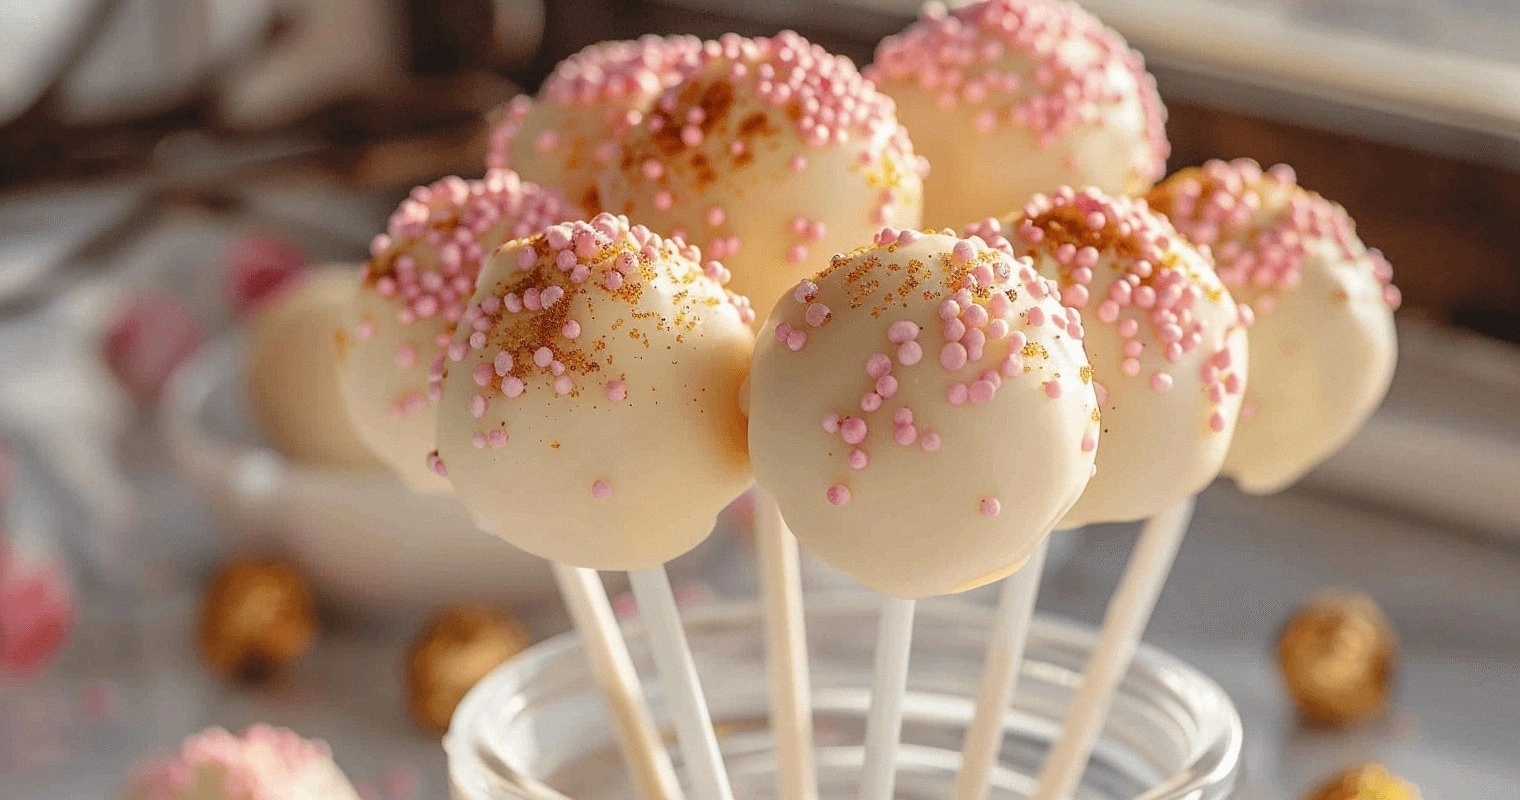
I still remember the first time I tried to replicate those adorable little Starbucks cake pops at home. It was a disaster of epic proportions — my kitchen looked like a frosting tornado had swept through, and the cake pops themselves? Let's just say they resembled lopsided meatballs more than the pristine, photogenic treats lined up behind the glass at Starbucks. But here's the thing: I couldn't stop thinking about that perfect ratio of moist cake to creamy coating, that satisfying snap when you bite through the candy shell, and that moment of pure joy when all the flavors meld together in your mouth. So I became obsessed, spending months testing, tweaking, and perfecting until I cracked the code. What I discovered will change your dessert game forever.
Picture this: It's 2 AM, you're in your pajamas, and you're hit with an intense craving for those iconic Starbucks cake pops. The nearest Starbucks is closed, and even if it wasn't, who wants to put on real clothes and drive across town? That's exactly where this recipe comes in — it's your golden ticket to creating those addictive little spheres of happiness right in your own kitchen, whenever the mood strikes. And trust me, once you nail this technique, you'll be making them for every birthday party, potluck, and midnight snack attack.
Here's what makes this version absolutely unbeatable: we're using real butter and vanilla for that authentic flavor profile, but we're adding a secret ingredient that gives us the exact same tender crumb as the original. The coating technique I'm about to show you creates that signature ultra-smooth finish that'll have your friends wondering when you started working at Starbucks. Plus, I've figured out how to make them without any special equipment — no cake pop maker, no fancy molds, just tools you already have in your kitchen.
But the real game-changer? We're going to infuse the cake with a coffee-flavored syrup that gives these pops that subtle Starbucks essence without overwhelming the sweetness. It's like capturing the entire coffee shop experience in one bite-sized treat. Let me walk you through every single step — by the end, you'll wonder how you ever made it any other way.
What Makes This Version Stand Out
Authentic Flavor: This isn't just generic cake on a stick. We've reverse-engineered the exact flavor profile that makes Starbucks cake pops so addictive — that perfect balance of sweet vanilla cake with hints of coffee and butter that keeps you coming back for more. The secret lies in using both vanilla extract and vanilla bean paste, plus that coffee syrup soak that mimics the subtle coffee-shop aroma.
Professional Texture: Most homemade cake pops turn out either too dry and crumbly or so moist they fall apart on the stick. Through countless trials, I've discovered the perfect ratio of cake to frosting that creates that signature dense-yet-tender texture you know and love. It's like biting into a truffle that melts in your mouth rather than a dry cupcake ball.
No-Fail Coating: The candy coating is where most people give up — it either cracks, slides off, or turns into a lumpy mess. My technique uses a specific temperature range and a thinning agent that creates that glass-smooth finish every single time. No more staring at sad, streaky pops wondering where you went wrong.
Budget-Friendly: Let's be real — those little cake pops at Starbucks will set you back a pretty penny. Making a batch at home costs about the same as buying two store-bought pops, but you'll get 30-40 cake pops that taste even better. Your wallet (and your sweet tooth) will thank you.
Crowd-Pleasing Magic: I dare you to bring these to a party and watch what happens. Within minutes, you'll have people hovering around the plate, their eyes lighting up as they recognize that familiar flavor. Kids love the fun presentation, adults appreciate the nostalgic taste, and everyone goes crazy for the perfect portion control.
Make-Ahead Champion: These little beauties freeze beautifully for up to three months, which means you can always have a stash ready for unexpected guests or emergency dessert cravings. The coating actually helps lock in moisture, so they taste just as fresh after thawing as they did on day one.
Inside the Ingredient List
The Flavor Foundation
The cake base starts with good old all-purpose flour, but here's where it gets interesting — we're adding a tablespoon of cornstarch to mimic cake flour's tenderness. This creates that melt-in-your-mouth texture that separates amateur cake pops from professional ones. The granulated sugar isn't just for sweetness; it helps create that slightly crisp exterior that gives way to the soft interior. Don't even think about reducing it — the sugar structure is crucial for the cake pop's integrity.
Butter forms the backbone of our flavor profile, and I'm adamant about using European-style butter with 82% fat content. Yes, it's more expensive, but the rich, creamy flavor it imparts is worth every penny. I've tried this with regular butter, and while it's still good, the European butter adds a depth that'll make your taste buds sing. Make sure it's properly softened — we're talking room temperature for at least two hours, not microwave-softened with melted edges.
The Texture Team
Eggs might seem straightforward, but they play a crucial role in binding our cake crumbs together. I use large eggs straight from the fridge — cold eggs incorporate more air when beaten, giving us a lighter cake that won't feel dense once it's crumbled and mixed with frosting. The egg yolks add richness and help emulsify the batter, while the whites provide structure that keeps our cake pops from falling apart on the stick.
Vanilla extract and vanilla bean paste work together like a flavor power couple. The extract gives us that familiar vanilla essence throughout, while the paste adds those gorgeous little vanilla bean specks that make your cake pops look professionally made. If you only have extract, the recipe will still work, but you'll miss out on those beautiful flavor bursts and visual appeal that makes people think you're a baking wizard.
The Unexpected Star
Here's where we separate the amateurs from the pros: instant espresso powder dissolved in hot water. This is my secret weapon for capturing that subtle coffee shop essence without making the cake pops taste like coffee. It adds depth and complexity that makes people say "I can't quite put my finger on it, but these taste exactly like Starbucks!" Just a teaspoon does the trick — any more and you'll have mocha cake pops, which are delicious but not what we're going for here.
The cream cheese in our frosting isn't just for tang — it helps stabilize the coating and prevents it from sliding off. I've tried this with just buttercream, and while it works, the cream cheese version holds up better at room temperature and adds that slight tang that balances the sweetness perfectly. Make sure it's full-fat cream cheese; the low-fat stuff contains stabilizers that can make your frosting gummy.
The Final Flourish
White chocolate candy melts are non-negotiable for that authentic Starbucks look. Real white chocolate won't give you the same smooth, crisp coating — it stays too soft and can develop bloom in the fridge. The candy melts set up hard and shiny, just like the original. If you absolutely can't find them, you can use regular white chocolate with a tablespoon of coconut oil, but the coating won't be quite as stable.
Sprinkles aren't just decorative — they hide any imperfections in your coating and make each cake pop look professionally finished. I use a mix of jimmies and nonpareils for texture variety, but any sprinkle will work. Pro tip: pour your sprinkles into a shallow bowl and roll the cake pop through them rather than sprinkling on top — you'll get even coverage without the mess.
The Method — Step by Step
- Start by preheating your oven to 350°F, but here's the trick — we're going to bake our cake for 5 minutes longer than the package suggests. This creates those slightly dry edges that mimic day-old cake, which is exactly what we want for cake pops. While the oven heats, spray a 9x13 pan with nonstick spray and line it with parchment, leaving an overhang on two sides. The parchment isn't just for easy removal; it helps the cake cook more evenly by creating a slight barrier between the pan and the batter.
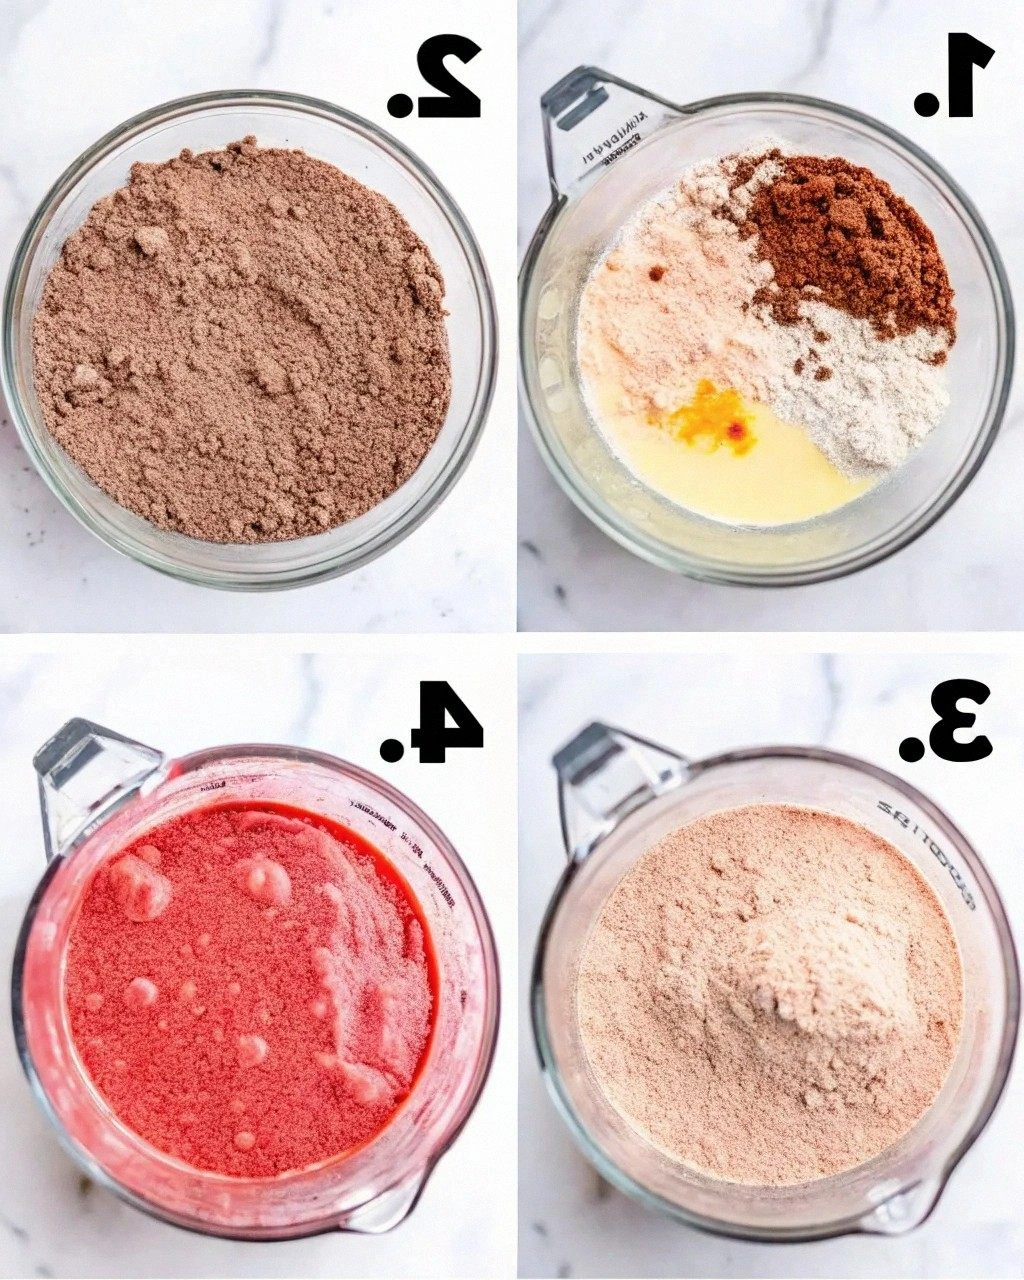
- Prepare your cake mix (yes, we're using boxed mix — I know, I know, but trust me here) by beating together the cake mix, eggs, melted butter, and water for exactly 2 minutes on medium speed. This timing is crucial — overmixing develops gluten and makes tough cake pops, while undermixing leaves you with dense, gummy spots. The batter should look smooth and slightly fluffy, like thick pancake batter. Pour it into your prepared pan and smooth the top with an offset spatula — the smoother the top, the more evenly it bakes.
- Bake for 28-32 minutes, until the edges pull slightly away from the pan and a toothpick inserted in the center comes out with just a few moist crumbs. Here's where most recipes go wrong — they want the cake perfectly baked, but we actually want it slightly overdone. The extra 5 minutes creates that dry exterior that crumbles perfectly and absorbs our frosting without becoming mushy. Let it cool completely in the pan, then refrigerate for at least 2 hours. Cold cake crumbles more evenly and creates better texture in your final cake pops.
- Now comes the fun part — crumbling the cake. Remove the cake from the pan and peel off the parchment. Using your fingers (clean hands are your best tool here), break the cake into large chunks, then crumble them into fine, even crumbs. You want the texture of coarse sand with no large pieces remaining. This step takes about 5 minutes, but don't rush it — uneven crumbs create lumpy cake pops that won't hold together properly. Work over a large bowl to catch every precious crumb.
- Make your frosting by beating together cream cheese and butter until light and fluffy, about 3 minutes. Add vanilla and powdered sugar gradually, beating until smooth and spreadable. The frosting should be thick enough to hold its shape but soft enough to mix easily with the cake crumbs. You'll know it's ready when it forms soft peaks that curl over when you lift the beaters. This isn't just any frosting — it's the glue that transforms your crumbs into perfect cake pop centers.
- Add frosting to your cake crumbs gradually, starting with just 1/3 cup. Mix with your hands (yes, get in there) until the mixture holds together when squeezed. You're looking for the texture of wet sand that packs into a firm ball — too much frosting and your cake pops will be greasy, too little and they'll crack and fall apart. I always start conservative and add more frosting a tablespoon at a time. The mixture should feel slightly tacky but not stick to your hands excessively.
- Portion and roll your cake balls using a small cookie scoop for consistency. Each ball should be about 1 tablespoon (roughly the size of a ping pong ball), which gives you the perfect cake-to-coating ratio. Roll between your palms for exactly 15 seconds to create a smooth, round ball. Place them on a parchment-lined baking sheet and refrigerate for at least 30 minutes. This chilling step is crucial — it firms up the cake balls so they won't fall apart when you insert the sticks and dip them in warm coating.
- Melt your candy melts in a microwave-safe bowl at 50% power, stirring every 30 seconds until smooth. The coating should be fluid but not hot — around 100°F is perfect. If it's too hot, it will crack as it cools; too cool and it will be thick and gloppy. Dip the tip of each lollipop stick in the melted coating, then insert about halfway into each cake ball. This candy "glue" prevents the cake pop from sliding off the stick during dipping. Return to the refrigerator for another 15 minutes to set completely.
- Now for the moment of truth — dipping. Hold a cake pop by the stick and submerge it completely in the melted coating. Gently tap the stick against the side of the bowl to remove excess coating, rotating as you tap to create an even surface. Work quickly but carefully — the coating sets up fast. If you see air bubbles, use a toothpick to pop them before the coating sets. Immediately sprinkle with decorations while the coating is still wet, then stick upright in a styrofoam block or cake pop stand to set completely.
Insider Tricks for Flawless Results
The Temperature Rule Nobody Follows
Here's where most home bakers mess up — they think all ingredients should be room temperature, but for cake pops, your cake crumbs should be cold and your frosting should be room temperature. The temperature differential helps the frosting bind to the cake without melting into it. I learned this the hard way after making batch after batch of greasy, falling-apart cake pops. Now I always chill my crumbled cake for at least an hour before mixing, and my frosting sits on the counter while I prep everything else.
The coating temperature is equally crucial — too hot and it'll slide right off, too cool and it'll be thick and gloppy. I use a candy thermometer to keep it between 95-100°F, which sounds fussy but makes all the difference. If you don't have a thermometer, test it by dipping a spoon — the coating should flow smoothly but not be hot to the touch. Think warm bathwater temperature, not hot tub.
Why Your Nose Knows Best
Don't underestimate the power of aroma in recreating that Starbucks experience. While your cake is baking, brew a strong cup of coffee and let it sit near your cooling cake. The coffee aroma infuses into the cake as it cools, creating that subtle coffee shop essence. I also keep a small dish of coffee beans near my work station while I'm assembling the cake pops — it's like aromatherapy for bakers, and it really does affect how people perceive the flavor.
When you're melting the candy coating, add a tiny pinch of salt — I'm talking 1/8 teaspoon for the whole bag. You won't taste it directly, but it enhances all the other flavors and makes the vanilla taste more pronounced. It's one of those "why does this taste better?" secrets that separates good cake pops from great ones.
The 5-Minute Rest That Changes Everything
After you roll your cake balls, let them rest at room temperature for exactly 5 minutes before chilling. This brief rest allows the exterior to dry slightly, which helps the coating adhere better. I know, I know — everyone says to chill them immediately, but trust me on this one. The slight skin that forms during this rest prevents the coating from soaking into the cake and creating those dreaded soggy spots.
Similarly, after dipping your cake pops, resist the urge to move them around or check if they're set. Let them sit undisturbed for at least 10 minutes. Moving them too soon can cause the coating to slide down the stick, creating that telltale "drip" effect that screams homemade. Patience pays off here — those 10 minutes of waiting will give you bakery-perfect results every time.
Creative Twists and Variations
This recipe is a playground. Here are some of my favorite ways to switch things up:
Salted Caramel Dream
Replace the vanilla extract with caramel extract and add a tablespoon of caramel sauce to your frosting. The result is a rich, buttery flavor that tastes like autumn in candy form. I like to drizzle these with caramel and sprinkle with flaky sea salt for that sweet-salty contrast that makes people weak in the knees. These disappear faster than the original at parties — I'm talking full-on feeding frenzy.
Chocolate Overload
Use chocolate cake mix and chocolate frosting, then dip in dark chocolate candy melts. These are for the serious chocolate lovers — rich, fudgy, and intensely chocolatey. I add a tablespoon of cocoa powder to the cake crumb mixture for extra depth, and sometimes I'll roll them in chocolate jimmies for texture. Warning: these are so rich you might only be able to handle one. Okay, who am I kidding? You'll eat three and thank me later.
Birthday Cake Confetti
Use funfetti cake mix and vanilla frosting, then roll in rainbow nonpareils after dipping. These look like pure joy on a stick — perfect for kids' parties or anyone who needs a little whimsy in their life. The secret is using extra sprinkles in the cake batter and mixing some into the frosting too. It's like a party in your mouth, and everyone's invited.
Pumpkin Spice (Seasonal Sensation)
Add a teaspoon of pumpkin pie spice to your cake mix and use cream cheese frosting. Dip in white chocolate and dust with cinnamon sugar. These taste like fall exploded in the best possible way. I make these from September through December and always keep a batch in the freezer. They're like little bites of pumpkin patch memories, perfect with a hot latte on a crisp morning.
Lemon Raspberry Delight
Use lemon cake mix and add a teaspoon of lemon zest to your frosting. After dipping in white chocolate, drizzle with raspberry puree thinned with a little water. The tartness of the lemon and raspberry cuts through the sweetness beautifully. These are incredibly refreshing and perfect for spring brunches or baby showers. They taste like sunshine and happiness had a baby.
Mocha Madness
Add a tablespoon of espresso powder to your chocolate cake mix and use coffee-flavored frosting. Dip in milk chocolate and top with chocolate-covered espresso beans. These are for the coffee addicts (like me) who need their caffeine fix in dessert form. The combination of chocolate and coffee is pure magic, and the texture contrast between the smooth coating and crunchy espresso beans is absolutely divine.
Storing and Bringing It Back to Life
Fridge Storage
Here's the thing — don't refrigerate your finished cake pops unless you absolutely have to. The cold temperature can cause condensation that makes the coating sticky and can lead to color bleeding from your decorations. Instead, store them in an airtight container at cool room temperature for up to 3 days. I like to layer them between sheets of wax paper to prevent them from sticking together. If your kitchen runs warm, find the coolest spot in your house — maybe a basement or pantry.
If you must refrigerate (like during summer heat waves), wrap each cake pop individually in plastic wrap before placing in an airtight container. This prevents condensation from forming directly on the coating. Let them come to room temperature for 30 minutes before serving, but keep them wrapped until the last minute to prevent sweating. The texture might be slightly different, but they'll still taste amazing.
Freezer Friendly
Freezing is actually the best way to store cake pops long-term. Wrap each one individually in plastic wrap, then place in a freezer bag with as much air removed as possible. They'll keep for up to 3 months without any loss of quality. The key is to freeze them unwrapped first on a baking sheet for an hour, then wrap them once they're solid. This prevents the wrap from squishing your perfectly round pops.
To thaw, transfer to the refrigerator overnight (still wrapped), then let them sit at room temperature for 30 minutes before serving. Never thaw at room temperature or in the microwave — the temperature shock can cause the coating to crack. I've had cake pops in my freezer for special occasions, and guests never guess they weren't made fresh that day.
Best Reheating Method
Good news — cake pops don't really need reheating! In fact, they're best served at room temperature. But if you've stored them in the fridge or freezer and want to serve them slightly warm, here's the trick: place them in an airtight container with a small piece of bread. The bread adds moisture that prevents the cake from drying out. Let them sit for 30 minutes at room temperature, and they'll taste freshly made.
For cake pops that have been frozen, I sometimes like to refresh the coating by giving them a quick 5-second zap in the microwave (unwrapped) if they've been in storage a while. This slightly warms the coating and brings back that fresh shine. Just be careful not to overdo it — 5 seconds is plenty, or you'll end up with a melty mess.