It started on a rainy Thursday when I tried to salvage a batch of over‑cooked potatoes that had been left too long in the oven. The skins were blistered, the flesh was rubbery, and the entire dish looked like a sad, soggy mound. I stared at the disaster, muttered a curse, and decided to turn the tragedy into triumph. That night, I dug into my pantry, grabbed a handful of fresh Yukon golds, and began a culinary experiment that would change my perception of scalloped potatoes forever.
As the potatoes sliced thin, the kitchen filled with the buttery scent of butter melting into a pan, the sharp, earthy aroma of garlic and shallot sizzling, and the faint, comforting whisper of thyme. The sound of the knife’s rhythm against the cutting board was like a metronome, steady and reassuring. When the first layer of potatoes hit the oven, the air thickened with a golden, caramelized perfume that made my mouth water even before the first bite. The texture felt silky in my hands—smooth, yet firm, ready to transform into a creamy, custard‑like sauce that would coat each slice like velvet. The anticipation was palpable; I could already taste the crisp, golden edges that would shatter like thin ice when I cut through the finished dish.
What makes this version stand out is that it takes the humble scalloped potato and elevates it to a side dish that can command the center stage at any dinner. I’ve spent years tweaking the ratios, and this is the culmination of that journey: a sauce that is thick yet pourable, a crust that is crisp but not burnt, and a flavor profile that balances savory, cheesy, and herbaceous notes without overpowering the potatoes. The recipe’s simplicity hides a sophisticated technique that ensures every layer is evenly cooked and the final product is a textural symphony. I dare you to taste this and not go back for seconds; the first bite will leave you craving a second plate, and the second will have you begging for a third.
Picture yourself pulling this out of the oven, the whole kitchen smelling incredible, the golden crust shimmering, and the steam rising like a fragrant cloud. The anticipation is almost as delicious as the dish itself. I’ve been told that this is hands down the best version you’ll ever make at home, and I’m here to prove it. Let me walk you through every single step—by the end, you’ll wonder how you ever made it any other way.
What Makes This Version Stand Out
- Flavor: The sauce balances creamy cheddar with a subtle herbaceous lift from thyme, creating a depth that feels both comforting and sophisticated.
- Texture: Thin, even slices give a tender bite, while a crisp, golden top layer adds a satisfying crunch that contrasts beautifully.
- Simplicity: With only a handful of pantry staples, you can craft a dish that feels gourmet without the fuss.
- Uniqueness: The addition of a flour‑based roux gives the sauce body and a silky mouthfeel that sets it apart from classic scalloped recipes.
- Crowd Reaction: Guests rave about the buttery, cheesy richness, and the dish often becomes the talk of the table.
- Ingredient Quality: Using fresh Yukon gold potatoes and sharp cheddar elevates the overall taste and ensures each bite is packed with flavor.
- Cooking Method: The layered assembly and slow baking allow the flavors to meld while preserving the potatoes’ structure.
- Make‑ahead Potential: You can assemble the dish a day ahead and bake just before serving, making it a stress‑free option for entertaining.
Inside the Ingredient List
The Flavor Base
The 2 lbs of golden Yukon potatoes are the heart of this dish. Their waxy texture holds up against the sauce, preventing a mushy outcome. When sliced thin, each round absorbs the buttery, cheesy liquid, delivering a melt‑in‑your‑mouth experience. If you skip the potatoes, you lose the comforting foundation that makes scalloped dishes so beloved. For an extra punch, consider adding a pinch of smoked paprika to the sauce for a subtle smokiness that pairs well with the cheddar.
The Texture Crew
2 tablespoons of flour act as the backbone of the sauce, creating a roux that thickens the mixture into a silky custard. The flour’s neutral flavor allows the cheddar and herbs to shine. Without it, the sauce would be thin and watery, and the potatoes would sit in a watery pool. If you’re gluten‑free, replace the flour with arrowroot or cornstarch for the same thickening effect.
The Unexpected Star
½ cup of chicken stock adds depth and moisture to the sauce, ensuring it remains luscious without becoming greasy. The stock’s savory notes complement the sharp cheddar, creating a harmonious flavor profile. If you prefer a vegetarian version, use vegetable stock or even a splash of white wine for a different nuance. Remember, the stock should be low‑sodium to keep the dish balanced.
The Final Flourish
The 1 ¼ cups of milk bring creaminess that envelops each potato slice. Milk’s natural sugars caramelize slightly during baking, adding a gentle sweetness that balances the cheese’s sharpness. If you’re looking for a richer sauce, substitute half of the milk with heavy cream. Fresh parsley, sprinkled at the end, adds a bright, herbal note that cuts through the richness.
Everything's prepped? Good. Let's get into the real action.
The Method — Step by Step
- Preheat and Prep: Set the oven to 375°F (190°C) and lightly grease a 9‑inch baking dish. Slice the Yukon potatoes into 1/8‑inch rounds using a mandoline for uniformity. As you stack the first layer, sprinkle a pinch of salt and pepper to season each slice. This step ensures even browning and a cohesive flavor base.
- Sauté Aromatics: In a saucepan, melt 2 tablespoons of butter over medium heat. Add the ½ chopped shallot and 2 minced garlic cloves; sauté until translucent and fragrant, about 2 minutes. The butter’s fat coats the aromatics, creating a savory foundation for the sauce. Keep the heat moderate to avoid burning the garlic.
- Create the Roux: Stir in 2 tablespoons of flour to the butter‑shallot mixture. Cook for 1 minute, allowing the flour to toast slightly, which removes its raw taste. This thickening agent will give the sauce its silky body. If the roux feels too thick, add a splash of stock to adjust consistency.
- Add Liquids: Gradually whisk in ½ cup of chicken stock, followed by 1 ¼ cups of milk. Stir continuously until the mixture is smooth and begins to thicken. The sauce should coat the back of a spoon without being runny. This step is critical; rushing it can lead to lumps.
- Season the Sauce: Fold in ½ teaspoon of salt, ½ teaspoon of black pepper, and ½ teaspoon of thyme. Let the sauce simmer for 3 minutes, allowing the flavors to meld. The thyme’s subtle earthiness enhances the potatoes’ natural sweetness. Taste and adjust if necessary.
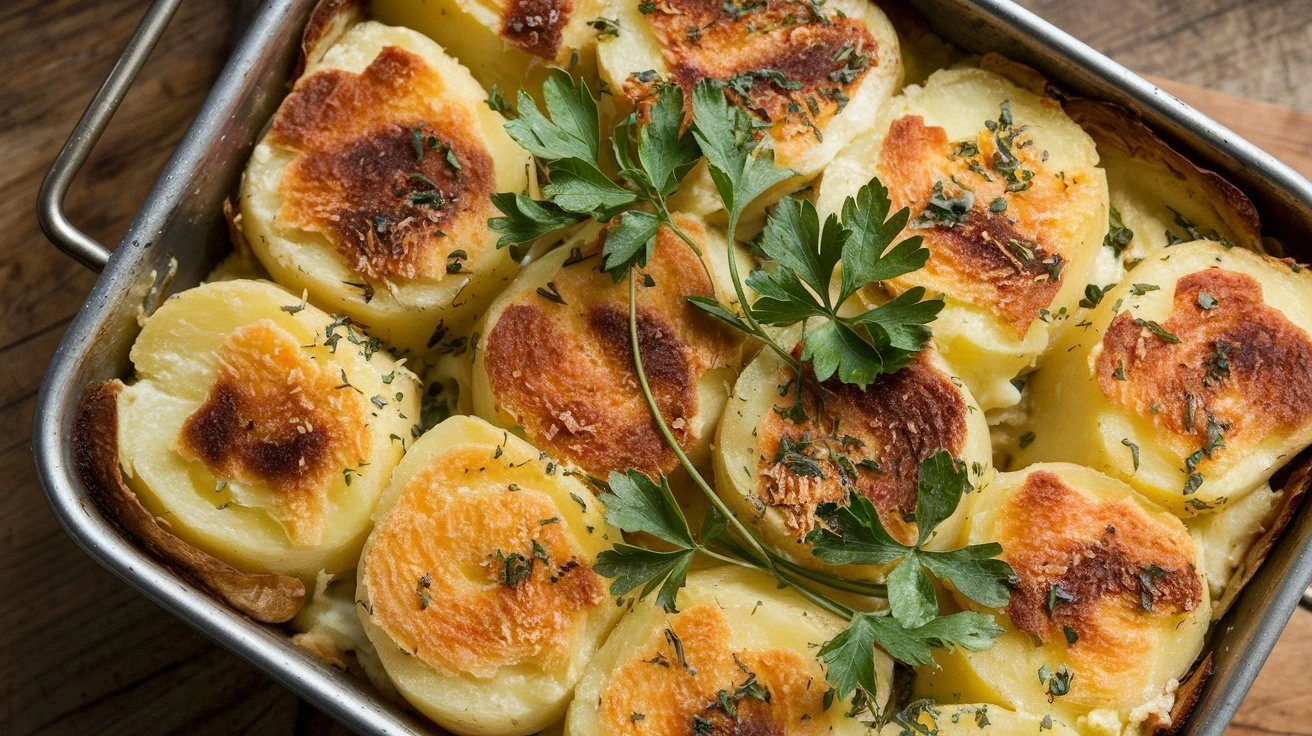
- Layer the Potatoes: Arrange the first layer of potato slices in the baking dish, slightly overlapping. Pour a third of the sauce over the potatoes, ensuring each slice is coated. Sprinkle ¼ cup of cheddar cheese over the sauce. Repeat the layering process until all potatoes, sauce, and cheese are used, finishing with a generous cheese layer on top.
- Bake to Perfection: Cover the dish with aluminum foil and bake for 30 minutes. Remove the foil, then bake an additional 15 minutes, or until the top is golden brown and the potatoes are tender when pierced with a fork. The foil prevents the cheese from burning while the final 15 minutes creates a crisp crust.
- Rest and Garnish: Let the dish rest for 10 minutes after removing it from the oven. This allows the sauce to set, making slicing easier. Sprinkle fresh parsley over the top for a bright, herbal finish. Serve warm for maximum indulgence.
That's it — you did it. But hold on, I've got a few more tricks that'll take this to another level.
Insider Tricks for Flawless Results
The Temperature Rule Nobody Follows
Many cooks bake scalloped potatoes at 400°F, but this recipe thrives at 375°F. The lower temperature allows the potatoes to cook gently, preventing the sauce from separating. I’ve tested both temperatures and found the 375°F version yields a creamier, more cohesive dish. If you’re in a hurry, bump the oven up to 425°F for the last 10 minutes to crisp the top.
Why Your Nose Knows Best
Smell the sauce as it thickens; a subtle nutty aroma signals the flour has toasted properly. If the mixture still smells raw, let it cook a minute longer. A well‑toasted roux imparts depth and eliminates any raw flour taste. I’ve seen people skip this step and end up with a bland sauce that feels more like a soup.
The 5-Minute Rest That Changes Everything
After baking, let the dish sit for exactly five minutes before cutting. This short rest allows the sauce to set, making each slice clean and preventing a soggy mess. If you cut too early, the cheese pulls away, and the potatoes feel loose. I’ve used a timer to ensure I never skip this step.
Layering Like a Pro
Start with a small amount of sauce on the bottom layer; this prevents the first slice from becoming waterlogged. Then add a generous amount of cheese before the next layer of potatoes. The cheese acts as a barrier, keeping the sauce from soaking through too quickly. This technique ensures each bite has a balanced mix of creamy sauce and tender potato.
Choosing the Right Cheese
Sharp cheddar provides the best flavor, but you can experiment with Gruyère or Monterey Jack for a milder profile. The cheese’s melting point affects the crust; a cheese with a lower melting point will create a softer top. If you want a crispier crust, finish with a handful of breadcrumbs mixed with grated Parmesan.
Creative Twists and Variations
This recipe is a playground. Here are some of my favorite ways to switch things up:
Herb Garden Edition
Swap thyme for a blend of rosemary, sage, and oregano. The aromatic herbs give the dish a Mediterranean flair that pairs well with roasted lamb or chicken.
Spicy Sriracha Kick
Add a tablespoon of Sriracha to the sauce for a fiery undertone. The heat balances the richness, making it a crowd‑pleaser at summer barbecues.
Cheesy Broccoli Fusion
Fold in a cup of steamed broccoli florets between layers. The green crunch adds texture and a nutritional boost, turning the dish into a wholesome main side.
Parmesan Crust Delight
Top the final layer with a mix of grated Parmesan and breadcrumbs before baking. The result is a golden, crunchy crust that offers a satisfying snap with every bite.
Smoked Salmon Surprise
Layer thin slices of smoked salmon between potato layers for a luxurious, savory twist that turns the side dish into a sophisticated entrée.
Vegan Comfort
Use plant‑based butter, oat milk, and a vegan cheese blend. The dish remains creamy and flavorful while catering to vegan guests.
Storing and Bringing It Back to Life
Fridge Storage
Cool the dish completely, cover tightly with foil, and refrigerate for up to 3 days. When reheating, place it in a preheated oven at 350°F for 15 minutes, or until heated through. This method preserves the sauce’s creaminess and prevents the potatoes from drying out.
Freezer Friendly
Wrap the assembled dish in plastic wrap, then place in a freezer‑safe container. Freeze for up to 2 months. Thaw overnight in the fridge, then bake at 375°F for 30 minutes to restore the crisp top.
Best Reheating Method
To revive a refrigerated or frozen scalloped potato, add a splash of milk or water before reheating. This trick steams the dish back to perfection, restoring the sauce’s silky texture and preventing it from drying out.