Last weekend I was on a mission to prove that a vegetable can out‑shine chicken in a classic takeout dish. I tossed a battered cauliflower into the oil, watched it turn a glorious golden, and then drenched it in a sauce that slapped my taste buds like a high‑five from an old friend. The kitchen was a symphony of sizzling, the air smelled like a street‑market stall in Chinatown, and my roommates were already circling the counter like sharks. I’ll be honest — I ate half the batch before anyone else got a chance to try it, and the look on their faces when they finally tasted the rest was pure, unfiltered joy. If you’ve ever struggled with soggy, bland cauliflower that never quite captures that iconic sweet‑spicy zing, you’re not alone — and I’ve got the fix.
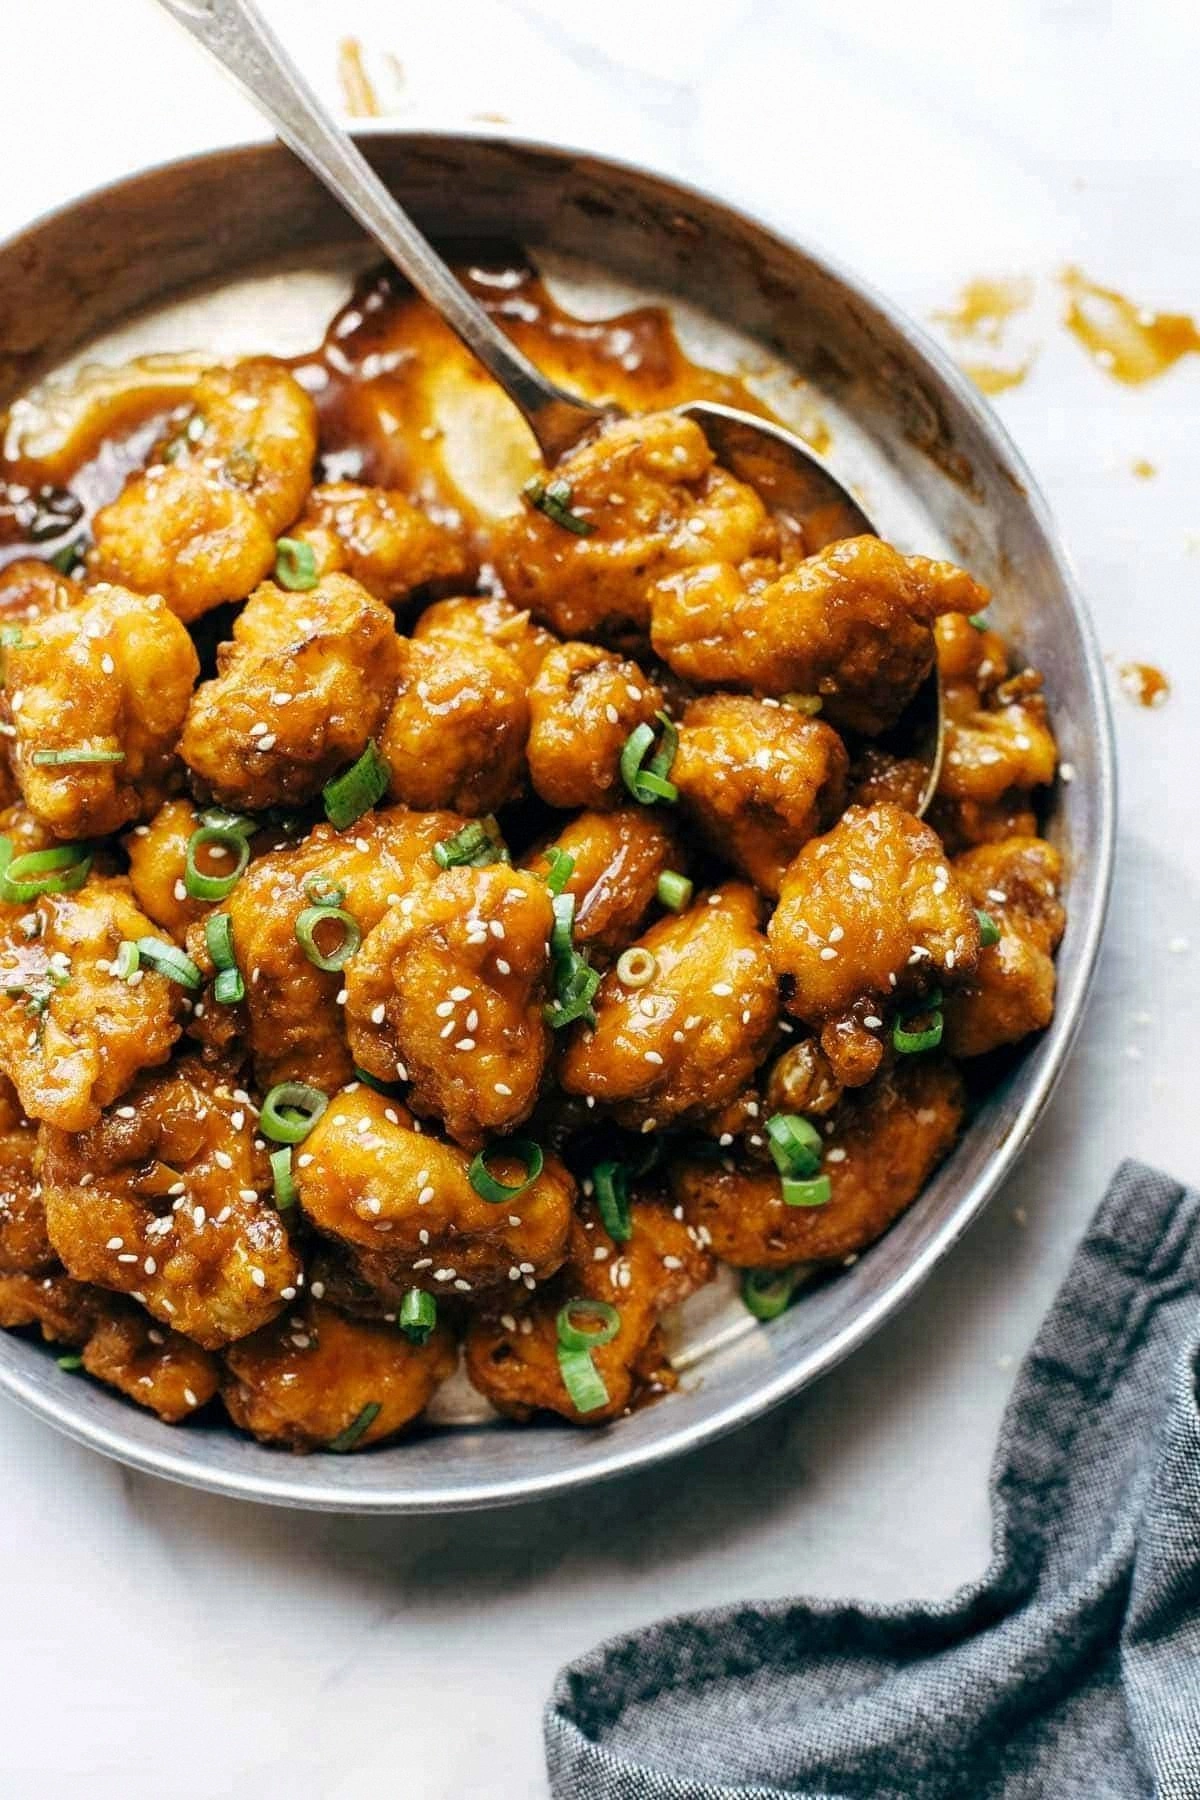
Picture this: a plate of cauliflower florets that are crisp on the outside, feather‑light on the inside, and cloaked in a glossy glaze that clings like velvet. The first bite delivers a crunch that shatters like thin ice, followed by an explosion of umami, tang, and just the right amount of heat that makes you gasp, then grin, then reach for another forkful. Most recipes get this completely wrong — either they over‑coat with sauce, turning everything soggy, or they under‑season, leaving you chewing on bland, fried veg. My version flips the script by using a double‑coat technique that locks in moisture while still letting the sauce glide over a perfectly crisp exterior.
What really sets this dish apart is a secret ingredient I almost left out: a splash of rice vinegar in the batter. This tiny acid bite cuts through the flour’s heaviness, giving the coating a subtle lift that makes the final sauce feel like it’s dancing on the palate instead of drowning it. And the sauce? It’s a balanced trio of soy, hoisin, and a whisper of brown sugar, all thickened with a cornstarch slurry that gives it that restaurant‑level sheen without any gummy aftertaste. I dare you to taste this and not go back for seconds; the flavor loop is practically engineered to keep you coming back.
Okay, ready for the game‑changer? I’m going to walk you through every single step — from picking the perfect cauliflower to mastering the final glaze. By the end, you’ll wonder how you ever made it any other way, and you’ll have a go‑to recipe that will make you the hero of any gathering, be it a casual movie night or a dinner party that needs that wow factor. Let me walk you through every single step — by the end, you'll wonder how you ever made it any other way.
What Makes This Version Stand Out
- Flavor Fusion: The sauce blends sweet, salty, and tangy notes, creating a complex profile that mimics the classic takeout taste while staying fresh.
- Crunch Factor: A double‑coat batter with a pinch of baking powder yields a light, airy crisp that stays crunchy even after saucing.
- Simplicity: All ingredients are pantry‑friendly; no exotic spices or hard‑to‑find sauces are required.
- Ingredient Quality: Using fresh cauliflower and high‑quality soy sauce makes a noticeable difference in texture and depth.
- Crowd Reaction: Guests invariably ask for the recipe, and the dish disappears faster than you can say “General Tso.”
- Make‑Ahead Potential: You can fry the cauliflower ahead of time and re‑glaze just before serving, keeping everything hot and crispy.
- Versatile Base: The cauliflower can be swapped for broccoli or even tofu, making it adaptable for different dietary needs.
- Visual Appeal: The glossy, ruby‑red sauce against the golden florets looks as good as it tastes, perfect for Instagram.
Inside the Ingredient List
The Flavor Base
Soy Sauce (¼ cup): This is the backbone of the glaze, delivering that unmistakable salty umami that defines General Tso’s. If you skimp on it, the sauce will taste flat and miss the authentic edge. Opt for a naturally brewed soy sauce for deeper flavor; low‑sodium versions can be used, but you’ll need to add a pinch more salt to compensate.
Rice Vinegar (2 tbsp): The vinegar brightens the sauce, cutting through the sweetness and giving a subtle tang that lifts the entire dish. Skipping it results in a cloying glaze that sits heavy on the palate. If you don’t have rice vinegar, a splash of apple cider vinegar works in a pinch, though the flavor will be slightly fruitier.
Hoisin Sauce (2 tbsp): Hoisin adds a mellow, sweet‑spicy depth that mimics the secret “takeout” notes you love. It also contributes a glossy finish. For a gluten‑free version, substitute with a tamari‑based hoisin or make a quick homemade blend using black bean paste, honey, and five‑spice powder.
The Texture Crew
All‑Purpose Flour (1 cup): Flour forms the first layer of the batter, providing structure. Using cake flour can make the coating too delicate, while bread flour may weigh it down.
Cornstarch (½ cup): Cornstarch is the secret to that feather‑light crunch; it creates a delicate lattice that fries up airy. If you only have potato starch, it works similarly, though the texture will be a tad denser.
Baking Powder (1 tsp): This leavens the batter, giving it a puffed‑up quality that stays crisp after the sauce is added. Forgetting it is a common mistake that leads to a heavy, doughy coating.
The Unexpected Star
Rice Vinegar in the Batter (1 tsp): Adding a dash of vinegar to the wet batter creates a micro‑fermentation that softens the flour’s gluten, resulting in a crisper fry. It’s a technique borrowed from tempura that many home cooks overlook. If you omit it, the coating will still be good, but not as airy.
Sesame Oil (1 tbsp, optional): A drizzle at the end of the glaze adds a nutty aroma that elevates the dish from good to unforgettable. Too much, however, can overwhelm the delicate balance, so a little goes a long way.
The Final Flourish
Garlic (2 cloves, minced): Fresh garlic provides a pungent backbone that sings when combined with ginger. Powdered garlic can be used, but it won’t deliver the same bright bite.
Ginger (2 tsp, grated): Ginger adds a warm, slightly peppery heat that cuts through the richness. If you’re not a fan of fresh ginger, ginger paste works, but fresh is always best for aroma.
Chili Garlic Sauce (1 tsp) or Red Pepper Flakes: This is where the “heat” lives. Adjust to taste; a shy dash for mild, a generous spoonful for fire‑breather status.
Green Onions (2, sliced) & Sesame Seeds (1 tsp): These garnish elements add fresh crunch and visual appeal, finishing the dish with a pop of color and texture.
Everything's prepped? Good. Let's get into the real action…
The Method — Step by Step
Start by cutting a large head of cauliflower into bite‑size florets, aiming for roughly four cups. Toss the florets with a pinch of salt and let them sit for five minutes; this draws out excess moisture, which is crucial for a crisp fry. Pat them dry with a clean kitchen towel — you want them as dry as a desert floor. This is the moment where the cauliflower begins its transformation from humble veg to star of the plate.
In a large bowl, whisk together 1 cup flour, ½ cup cornstarch, 1 tsp baking powder, and ½ tsp salt. Add 1 tsp rice vinegar and ¾ cup cold water, stirring until you achieve a smooth, pancake‑like batter. The batter should coat the back of a spoon without dripping off; if it’s too thick, add a splash more water, but keep it thin enough to cling lightly.
Kitchen Hack: Chill the batter for 10 minutes before using; the cold temperature helps create a tighter crust when fried.Heat a deep, heavy‑bottomed pan or wok with enough oil to submerge the florets (about 2 inches). Heat the oil to 350°F (175°C); you’ll know it’s ready when a tiny drop of batter sizzles and pops immediately. Carefully dip each cauliflower floret into the batter, allowing excess to drip back into the bowl, then gently lower it into the hot oil. Fry in batches to avoid crowding, which would drop the oil temperature and lead to soggy pieces.
Fry the coated cauliflower for 3‑4 minutes, turning once, until the pieces are a deep golden‑brown and float to the surface. The edges should start pulling away from the batter, a sign of perfect crispness. Use a slotted spoon to transfer the fried florets onto a wire rack set over a baking sheet; this lets excess oil drip away and keeps the coating airy.
While the cauliflower fries, whisk together the sauce: ¼ cup soy sauce, 2 tbsp rice vinegar, 2 tbsp hoisin sauce, 2 tbsp brown sugar, 1 tbsp cornstarch mixed with 2 tbsp water (slurry), 2 tsp grated ginger, 2 minced garlic cloves, and 1 tsp chili garlic sauce. Bring this mixture to a gentle boil in a saucepan over medium heat, stirring constantly. Once it thickens and becomes glossy, stir in 1 tbsp sesame oil if using, then remove from heat.
Watch Out: If the sauce starts to stick to the pan, lower the heat and add a splash more water; over‑heating can cause the cornstarch to seize and become grainy.Return the fried cauliflower to the pan (or a large skillet) over low heat. Pour the glossy sauce over the florets, tossing gently with tongs to coat each piece evenly. The sauce should cling like a silk veil, not pool at the bottom. Let the cauliflower simmer for 1‑2 minutes; this allows the glaze to set and the batter to absorb just enough moisture without losing its crunch.
Finally, sprinkle sliced green onions and sesame seeds over the top for a fresh pop of color and a subtle nutty finish. Give everything a quick toss to distribute the garnish. Taste and adjust salt or heat if needed — remember, the sauce should sing, not shout.
Kitchen Hack: If you’re serving a crowd, keep the sauce warm and drizzle over the cauliflower just before plating to maintain maximum crunch.Transfer the glazed cauliflower to a serving platter. Let it sit for a minute so the sauce thickens a touch more — this final rest is where the flavors meld into that addictive, finger‑licking perfection. Serve immediately with steamed rice or as a bold appetizer with a side of pickled veggies.
Insider Tricks for Flawless Results
The Temperature Rule Nobody Follows
Most home cooks let the oil temperature fluctuate wildly, which leads to uneven browning. Keep a deep‑fat thermometer handy and maintain a steady 350°F (175°C) throughout the fry. If the temperature drops, the batter soaks up oil, becoming soggy; if it spikes, the coating burns before the cauliflower cooks through. My secret? Add a few frozen peas to the oil after the first batch; they act as a temperature buffer, keeping the oil steady.
Why Your Nose Knows Best
Don’t rely solely on a timer when frying; trust your sense of smell. When the batter begins to emit a nutty, toasted aroma, that’s the signal the crust is reaching perfection. If you smell a faint, burnt scent, pull the pan off the heat immediately. This sensory cue saved me countless batches of over‑cooked cauliflower in the past.
The 5‑Minute Rest That Changes Everything
After coating and before the first fry, let the battered florets rest on a wire rack for five minutes. This short pause allows the batter to set, forming a skin that becomes ultra‑crispy once it hits the oil. Skipping this step is a common rookie mistake that results in a soggy, doughy exterior.
Don’t Overcrowd the Pan
It’s tempting to dump the entire bowl of cauliflower into the oil at once, especially when you’re hungry. Overcrowding drops the oil temperature dramatically, leading to greasy, limp pieces. Fry in small batches, and while the other batches rest on the rack, keep the oil hot for the next round.
Finish With a Finish
Just before serving, drizzle a tiny splash of fresh lime juice over the glazed cauliflower. The acidity brightens the sauce, making every bite feel fresh and vibrant. I once tried skipping this step, and the dish felt a bit heavy; now it’s a permanent garnish in my arsenal.
Creative Twists and Variations
This recipe is a playground. Here are some of my favorite ways to switch things up:
Spicy Szechuan Kick
Swap the chili garlic sauce for 1½ tsp of Szechuan peppercorn oil and add a dash of crushed red pepper flakes. The result is a tongue‑tingling, numbing heat that takes the dish to a whole new level of excitement.
Sweet‑And‑Savory Pineapple
Stir in ¼ cup of finely diced pineapple into the sauce while it simmers. The fruit adds a burst of tropical sweetness that balances the heat, perfect for a summer BBQ.
Garlic‑Infused Panko Crunch
After the first fry, toss the cauliflower in a mixture of panko breadcrumbs, garlic powder, and a drizzle of melted butter before the second fry. This adds an extra layer of crunch and a buttery garlic aroma that’s irresistible.
Vegan “Chicken” Swap
Replace cauliflower with firm tofu cubes, pressing them to remove excess moisture before battering. The tofu absorbs the sauce beautifully, offering a protein‑packed alternative for vegans.
Herb‑Lemon Finale
Finish the dish with a sprinkle of chopped fresh cilantro and a squeeze of lemon juice. The herbaceous lift brightens the glaze, making it feel lighter and more refreshing.
Storing and Bringing It Back to Life
Fridge Storage
Place any leftovers in an airtight container lined with a paper towel to absorb excess moisture. Store in the refrigerator for up to 3 days. When reheating, spread the cauliflower on a baking sheet and bake at 375°F (190°C) for 8‑10 minutes to revive the crunch.
Freezer Friendly
Freeze the fried (but unsauced) cauliflower on a parchment‑lined tray until solid, then transfer to a zip‑top bag. They’ll keep for up to 2 months. To serve, fry directly from frozen for an extra‑crispy texture, then toss in the sauce.
Best Reheating Method
The key to reviving this dish is steam‑plus‑crisp. Before reheating, drizzle a tiny splash of water over the florets, then cover with foil and bake for 5 minutes; the steam softens any stale edges. Remove the foil, increase the oven temperature for another 3 minutes, and you’ve got back that original crunch.