I was scrolling through my phone at 2 a.m., craving something sweet yet comforting, when my kitchen turned into a disaster zone. A bag of flour had exploded across the counter, and a splash of milk had stained the floor like an accidental abstract painting. I stared at the chaos, thinking, “I could use a quick fix that turns this mess into something edible.” That moment sparked the birth of this pancake recipe, and I’m still buzzing about how simple tweaks can turn ordinary batter into a cloud‑like breakfast masterpiece.
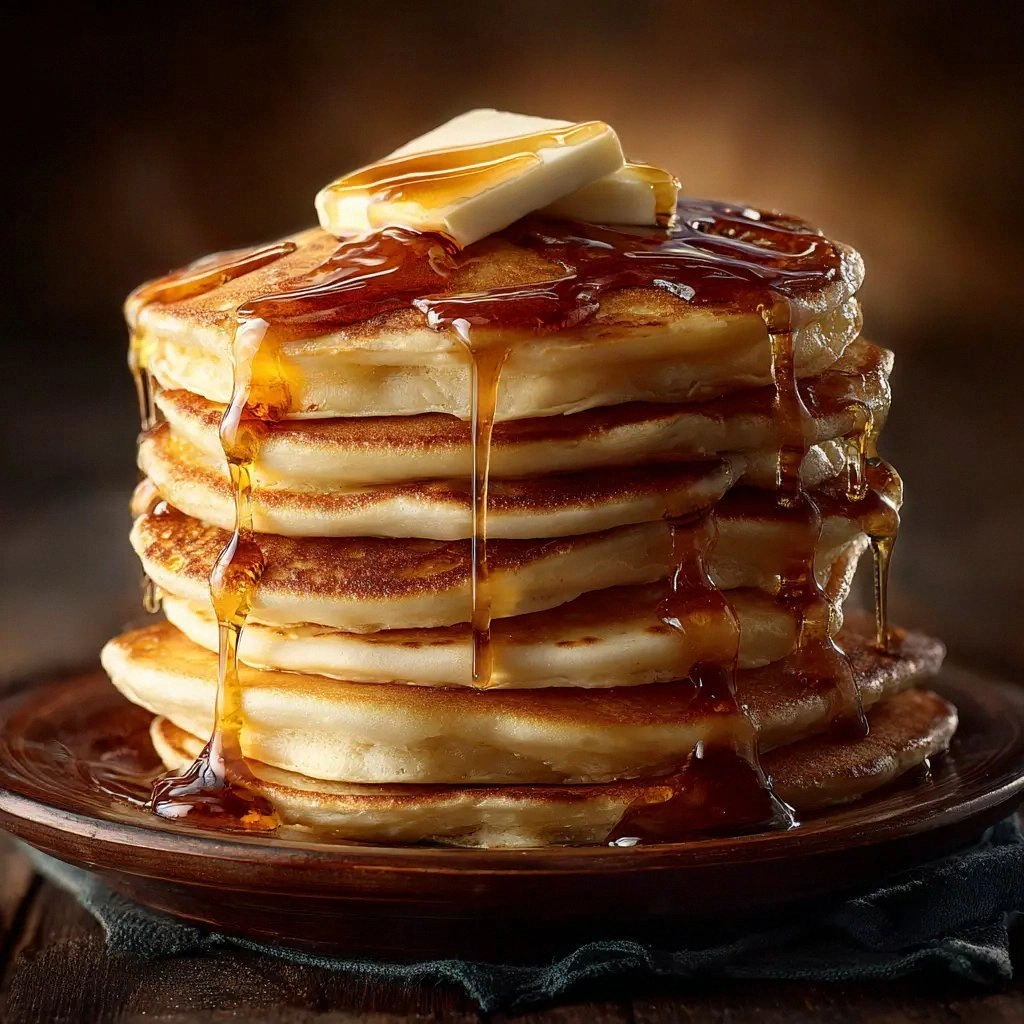
Picture the aroma: a gentle, buttery scent that rises from the skillet and lingers in the air, teasing your senses even before you take a bite. The sound of the first sizzle is a satisfying crackle, like a tiny applause that signals the pancake is starting its rise. When you lift the first golden circle, its surface is glossy, and the inside is pillowy, almost like a soft pillow you can eat. The flavor is a delicate balance—sweet from real sugar, a hint of vanilla, and a whisper of lemon zest that keeps the taste bright and fresh. Every bite feels like a warm hug, and the texture is so airy that it almost melts in your mouth.
What makes this version stand out is not just the fluffiness, but the confidence in each step that ensures consistency. I’ve spent countless weekends experimenting with ratios, resting times, and heat settings to find the sweet spot where pancakes rise just right. The result is a recipe that feels like a secret handshake between you and your stove, a reliable routine that turns any morning into a celebration. If you’ve ever struggled with flat or overly dense pancakes, this is the fix you’ve been waiting for. I dare you to taste this and not go back for seconds—trust me, you’ll be hooked.
And now, ready to dive into the heart of the matter? Let me walk you through every single step—by the end, you’ll wonder how you ever made it any other way. This isn’t just a recipe; it’s a culinary adventure that starts with a splash of confidence and ends with a plate of blissful, fluffy pancakes.
What Makes This Version Stand Out
- Fluff Factor: The batter rests for ten minutes, allowing gluten to relax and air to incorporate fully, resulting in a light, cloud‑like texture that melts in your mouth.
- Flavor Depth: A dash of vanilla and a pinch of lemon zest elevate the sweetness, giving the pancakes a bright, aromatic profile that feels fresh and indulgent.
- Texture Control: The ratio of liquid to dry ingredients is fine‑tuned to create a batter that’s thick enough to hold its shape but thin enough to spread evenly, giving every pancake a perfectly even crumb.
- Time Efficiency: Prep takes only fifteen minutes, and the cooking time is a mere thirty, making it a perfect weekend indulgence that won’t keep you in the kitchen all day.
- Make‑Ahead Friendly: You can prepare the batter ahead of time, refrigerate it for up to 24 hours, and simply reheat the pancakes to enjoy a fresh breakfast even on busy mornings.
- Ingredient Quality: Using whole milk and unsalted butter ensures a richer flavor profile and eliminates the need for salt adjustments, allowing the natural sweetness to shine.
Alright, let's break down exactly what goes into this masterpiece...
Inside the Ingredient List
The Flavor Base
The foundation of any great pancake is a harmonious blend of dry and wet ingredients. The 1.5 cups of all-purpose flour provide structure, while the 2 tablespoons of granulated sugar inject subtle sweetness that balances the savory notes of the batter. The 2 teaspoons of baking powder act as the leavening agent, creating tiny pockets of air that give the pancakes their signature lift. If you skip the baking powder, your pancakes will be flat and dense, losing that coveted airy quality.
The Texture Crew
The 1.25 cups of whole milk is more than a liquid; it’s a flavor carrier that enriches the batter with a creamy, slightly nutty undertone. Whole milk also contributes to the tender crumb, thanks to its fat content, which coats the flour proteins and reduces gluten formation. If you use skim milk, the pancakes will be thinner and less moist, so stick with whole for maximum fluffiness. The 1 large egg adds structure and richness, binding the batter together and providing a silky mouthfeel.
The Unexpected Star
The 3 tablespoons of unsalted butter, melted and cooled slightly, add a decadent buttery flavor that lingers on the palate. Butter also creates a slightly crisp edge when the pancakes cook, giving a pleasant contrast to the soft interior. If you’re in a pinch, a tablespoon of oil can replace butter, but you’ll lose that distinct buttery aroma. The 1/2 teaspoon of salt is essential; it enhances every flavor in the batter and balances the sweetness, preventing the pancakes from tasting flat.
The Final Flourish
The 1/2 teaspoon of salt is often overlooked, but it’s the secret to unlocking the full flavor potential of the batter. A pinch of salt also helps to break down proteins in the flour, creating a softer texture. If you prefer a sweeter pancake, you can reduce the salt slightly, but be prepared for a less complex taste. The combination of all these ingredients creates a batter that is both forgiving and consistently delicious.
Everything's prepped? Good. Let's get into the real action...
The Method — Step by Step
- In a large mixing bowl, whisk together the flour, sugar, baking powder, and salt until fully blended. This dry mix should feel light and airy, like a fine dusting of powdered sugar. The more thorough the whisking, the fewer lumps you’ll encounter in the batter. Once the dry ingredients are ready, set them aside and move on to the wet mix.
- In a separate bowl, beat the egg until the whites are slightly frothy. Pour in the whole milk and melted butter, then whisk until the mixture is smooth and glossy. The butter should be just cool enough to avoid cooking the egg, maintaining a silky texture. If you notice any separation, give it a quick stir to recombine.
- Gently pour the wet mixture into the dry mixture, stirring with a rubber spatula just until combined. The batter will look slightly lumpy; that’s normal. Over‑mixing will develop gluten, leading to dense pancakes. Keep stirring until the lumps are mostly gone, but the batter should still be a bit thick. This is the moment where patience pays off.
- Heat a non‑stick skillet or griddle over medium heat and lightly grease it with a small amount of butter or oil. Test the heat by flicking a few drops of water onto the surface; if they dance and evaporate quickly, the pan is ready. A properly heated pan ensures even cooking and prevents sticking. Remember, a hot pan is the secret to a golden exterior.
- Using a ladle, pour about 1/4 cup of batter onto the skillet for each pancake. Spread the batter gently with the back of the ladle to form a uniform circle. As the batter cooks, you’ll notice bubbles forming on the surface; this is the cue that the pancake is ready to flip. The edges should lift slightly from the pan, indicating a crisp exterior.
- Flip the pancake when the bubbles burst and the underside is golden brown. Use a spatula to gently lift and flip; the pancake should release easily. Flip only once—over‑flipping can cause the pancake to collapse and lose its fluffiness. Cook the second side for about 30 seconds, until it’s golden and cooked through.
- Transfer the cooked pancakes to a plate and cover loosely with foil to retain heat. Repeat the process with the remaining batter, adding a touch of butter to the pan as needed. The final stack should look like a cloud of golden delight, each pancake slightly domed and airy.
- Serve immediately with your favorite toppings—fresh berries, a drizzle of maple syrup, or a dusting of powdered sugar. The pancakes are best enjoyed hot, when the butter melts into a silky coating. If you need to hold them for a few minutes, place them in a warm oven or stack them on a plate with a towel.
That's it — you did it. But hold on, I've got a few more tricks that'll take this to another level. From mastering the perfect flip to creating a pancake tower that’s both Instagram‑worthy and delicious, the next section will give you the edge you need.
Insider Tricks for Flawless Results
The Temperature Rule Nobody Follows
Many cooks assume that a low heat will prevent burning, but a medium‑high temperature is actually the sweet spot for pancakes. It allows the batter to set quickly, creating a golden crust while keeping the interior moist. If you’re new to cooking, start with medium heat and adjust based on how the pancakes look and feel.
Why Your Nose Knows Best
The aroma that rises from the skillet is a reliable indicator of doneness. When the butter begins to brown slightly and a sweet, yeasty scent emerges, it’s time to flip. Trusting your nose can prevent over‑cooking and ensures each pancake has that perfect balance of crisp and tender.
The 5‑Minute Rest That Changes Everything
After you finish cooking, let the stack of pancakes rest on a wire rack for five minutes. This allows steam to redistribute, preventing the bottom from becoming soggy. It also gives the pancakes a moment to settle, so they keep their shape when you plate them.
Add a Splash of Lemon Juice
A teaspoon of fresh lemon juice in the batter brightens the flavor and cuts through the richness of the butter. It also helps to keep the batter from settling too quickly, maintaining that airy texture. Lemon zest is optional but highly recommended for a subtle citrus lift.
Use a Non‑Stick Skillet
A high‑quality non‑stick skillet ensures the pancakes release effortlessly, preserving their shape. If you’re using a stainless steel pan, be sure to pre‑heat it properly and use a generous amount of butter to avoid sticking.
Creative Twists and Variations
Blueberry Burst
Fold fresh blueberries into the batter after the rest period. The berries burst with juice as the pancakes cook, creating pockets of sweet, fruity flavor. Serve with a dollop of Greek yogurt for a tangy contrast.
Chocolate Chip Delight
Add a handful of dark chocolate chips to the batter just before cooking. The chips melt slightly, giving each bite a rich, chocolatey surprise. Pair with a drizzle of caramel sauce for an indulgent treat.
Savory Herb Pancake
Replace the vanilla with chopped fresh herbs like chives or thyme. This savory version pairs beautifully with smoked salmon or a poached egg. The herb aroma adds a sophisticated twist to the classic.
Maple‑Infused Batter
Swap half of the whole milk for pure maple syrup. The batter becomes sweeter and carries a subtle maple flavor that enhances the pancakes. Finish with a splash of maple on top for an extra touch of decadence.
Coconut Coconut
Use coconut milk instead of whole milk for a tropical twist. The pancakes take on a light coconut aroma, and the texture becomes slightly denser but still fluffy. Top with toasted coconut flakes for added crunch.
Spiced Pumpkin Pancake
Add a spoonful of pumpkin puree and a pinch of cinnamon to the batter. This variation is perfect for fall, offering a warm, comforting flavor profile. Serve with a swirl of whipped cream for a festive touch.
Storing and Bringing It Back to Life
Fridge Storage
Store leftover pancakes in an airtight container in the refrigerator for up to three days. When you’re ready to serve, reheat them in a skillet over low heat, adding a splash of milk to keep them moist. A quick toast in the oven at 350 °F for five minutes also works well.
Freezer Friendly
Lay pancakes flat on a baking sheet and freeze until solid, then transfer them to a freezer bag. They stay good for up to two months. Reheat by placing them in a microwave for 30 seconds or in a skillet with a little butter for a crisp finish.
Best Reheating Method
The secret to reviving frozen pancakes is a gentle heat and a splash of water. Add a teaspoon of water to a skillet, cover, and heat until the steam lifts the pancakes. This technique prevents the pancakes from drying out and keeps the fluffiness intact.