I was standing in my kitchen on a crisp October evening, the kind of night where the wind whistles through the trees and the faint scent of caramel apples drifts from the neighbor’s porch. I had just attempted a “quick” Halloween dessert—store‑bought candy corn dipped in chocolate—and the result was a sticky mess that clung to my spoon like a stubborn cobweb. I stared at the half‑melted candy corn, sighed, and thought, I dare you to taste this and not go back for seconds. That moment sparked a firestorm of curiosity: what if I could turn those sugary kernels into a silky, velvety pudding that captures the spirit of the season without the mess?
Fast forward three frantic evenings of trial, error, and a few too many bites of the batter (I’ll be honest — I ate half the batch before anyone else got to try it). The kitchen was a battlefield of whisked milk, simmering corn starch, and the unmistakable orange glow of candy corn melting into a custard‑like pool. The air was thick with the sweet perfume of vanilla and butter, and the sound of the spoon scraping the bottom of the pot was like a drumroll announcing a grand finale. When the first spoonful hit my tongue, it was pure autumnal bliss: the pudding was as smooth as a polished pumpkin, with a subtle crunch that reminded me of the first bite of a fresh candy corn.
Most recipes get this completely wrong. They either over‑cook the starch and end up with a gummy mess, or they skip the crucial step of tempering the candy corn, resulting in a bland, grainy texture. Here’s what actually works: a low, steady heat that coax the starch to thicken without clumping, and a gentle melt of the candy corn that infuses the pudding with that iconic tri‑color swirl without turning it into a sugary swamp. The secret ingredient? A splash of heavy cream that adds richness and a glossy finish that makes each cup look like a miniature work of art.
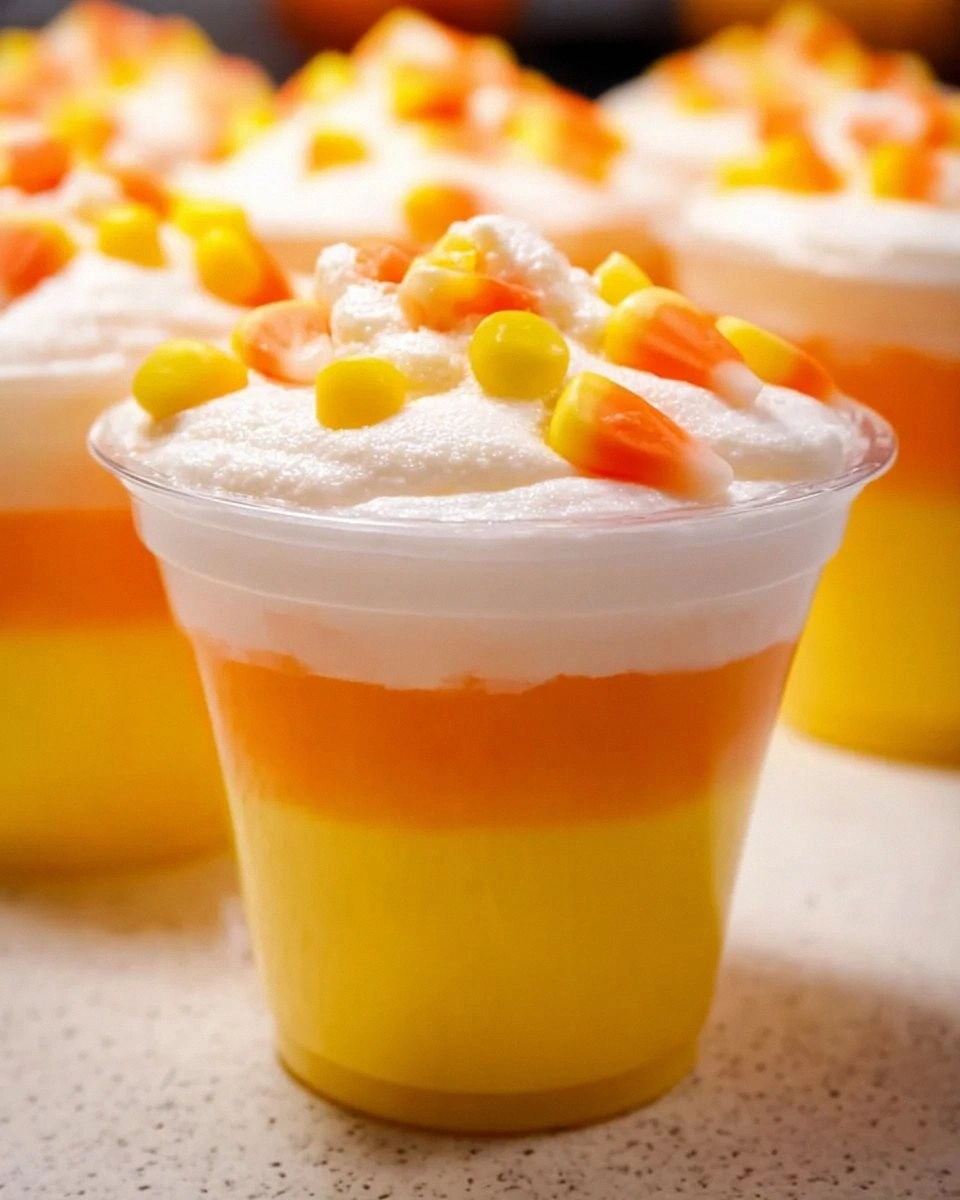
Picture yourself pulling these pudding cups out of the fridge, the whole kitchen smelling incredible, the tops shimmering with a dusting of crushed candy corn that catches the light like tiny fireworks. The moment you dig in, the cool creaminess meets the warm, buttery undertones, and you realize you’ve just created a seasonal masterpiece that will have guests begging for the recipe. Okay, ready for the game‑changer? Let me walk you through every single step — by the end, you’ll wonder how you ever made it any other way.
What Makes This Version Stand Out
- Flavor Fusion: The pudding marries the nostalgic sweetness of candy corn with the depth of vanilla‑infused cream, creating a taste that feels both familiar and elevated.
- Texture Triumph: A silky base punctuated by the gentle crunch of candy corn pieces gives you a mouthfeel that’s both creamy and surprising.
- Simplicity Meets Sophistication: Only eight pantry staples are needed, yet the final product feels like something you’d find at a high‑end bakery.
- Unique Swirl: By tempering the candy corn, you get a natural orange‑yellow‑white swirl that looks as good as it tastes.
- Crowd Reaction: This dessert consistently earns “wow” gasps and instant photo‑ops; it’s the kind of dish that makes people say, “I dare you to taste this and not go back for seconds.”
- Ingredient Quality: Using real butter and heavy cream, not shortcuts, ensures a richness that cheap substitutes can’t mimic.
- Cooking Method: A gentle stovetop simmer avoids the dreaded grainy texture that many pudding recipes fall victim to.
- Make‑Ahead Magic: The pudding holds its shape for up to three days in the fridge, making it perfect for holiday parties.
Inside the Ingredient List
The Flavor Base
First up is the dairy trio: whole milk, heavy cream, and unsalted butter. The milk provides the liquid foundation, while the cream adds a luxurious mouthfeel that ordinary milk can’t achieve. Butter contributes a subtle richness that rounds out the sweetness, preventing the pudding from tasting overly sugary. If you skip the butter, you’ll notice a thin, watery texture that feels more like a sauce than a pudding. Swap tip: For a dairy‑free version, use coconut milk and a splash of almond butter, but expect a hint of coconut aroma.
The Texture Crew
Cornstarch is the unsung hero that thickens the pudding without adding any flavor of its own. It creates that glossy, spoon‑coating finish that makes the dessert look restaurant‑ready. Sugar, of course, sweetens the mix, but I recommend using superfine caster sugar so it dissolves instantly, eliminating any gritty feel. If you’re watching your sugar intake, you can reduce it by a quarter and let the natural sweetness of the candy corn shine through. Buying tip: Look for a brand of cornstarch that’s labeled “pure” – no additives, no anti‑caking agents.
The Unexpected Star
Candy corn, the iconic Halloween treat, is the star of the show. When melted gently, it releases a buttery caramel note that elevates the pudding from “sweet” to “spectacular.” The bright orange, yellow, and white sections create a natural marbled effect that’s visually stunning. If you substitute with regular marshmallows, you’ll lose the signature color palette and the subtle caramel undertone. Fun swap: Try using white chocolate chips for a creamier version, but remember you’ll lose the nostalgic candy corn crunch.
The Final Flourish
A splash of pure vanilla extract is the final aromatic flourish that ties everything together. It adds a warm, floral note that cuts through the sweetness, making each bite feel balanced. A pinch of sea salt, though seemingly tiny, amplifies the flavors and prevents the pudding from tasting one‑dimensional. If you’re allergic to vanilla, a dash of almond extract can provide a similar depth, but use half the amount to avoid overpowering the candy corn.
Everything's prepped? Good. Let's get into the real action...
The Method — Step by Step
Gather all your ingredients on the counter, measuring each one precisely. I like to line up the bowls like a tiny orchestra—milk in the first, cream in the second, butter in the third—so nothing gets lost in the chaos. Watch this: when you melt the butter, keep the heat on low; you’ll hear a gentle sizzle that signals it’s just beginning to melt, not burn. Once melted, set it aside while you move on to the next step.
In a medium saucepan, whisk together the whole milk, heavy cream, and sugar over medium‑low heat. The mixture should start to steam, releasing a sweet, comforting aroma that fills the kitchen like a warm hug. Keep whisking until the sugar fully dissolves—no grainy spots allowed. This is the moment of truth: if you notice any sugar crystals, keep whisking; they’ll dissolve within 30 seconds.
In a separate small bowl, combine the cornstarch with a splash of cold milk to create a slurry. This prevents lumps when you add it to the hot liquid. Kitchen Hack: Use a fork instead of a whisk for the slurry; the tines break up the starch more evenly.
Gradually pour the cornstarch slurry into the simmering milk mixture, whisking constantly. You’ll notice the mixture begin to thicken within a minute, turning a creamy ivory color. Keep the heat gentle; too high and you’ll get a skin forming on top, which is a sign of over‑cooking.
Now, the candy corn enters the stage. Reduce the heat to low and add the candy corn, one handful at a time, stirring until each piece melts completely. This step requires patience—if you rush, the candy corn will seize and become grainy. The scent at this point is intoxicating: a buttery caramel perfume with a faint hint of vanilla.
Once the candy corn is fully incorporated, stir in the melted butter, vanilla extract, and a pinch of sea salt. The pudding should now have a glossy sheen and a deep, golden hue that mirrors a sunrise over a pumpkin patch. Watch Out: If you notice the edges pulling away from the pan, you’ve reached perfect thickness—don’t over‑cook.
Remove the saucepan from the heat and immediately pour the hot pudding into individual serving cups. I like to use clear glass ramekins so the beautiful swirl is visible from every angle. For an extra touch, sprinkle a light dusting of crushed candy corn on top while the pudding is still warm; it will adhere like a sweet snow.
Allow the cups to cool to room temperature, then cover each with plastic wrap, pressing the wrap directly onto the surface to prevent a skin from forming. Transfer the cups to the refrigerator and chill for at least two hours. The pudding will set further, and the flavors will meld into a harmonious whole.
When you’re ready to serve, garnish with a tiny drizzle of melted white chocolate and a single whole candy corn for that picture‑perfect finish. Serve chilled, and watch your guests’ faces light up as they take that first spoonful. This next part? Pure magic.
Insider Tricks for Flawless Results
The Temperature Rule Nobody Follows
Never, ever cook the pudding at a rolling boil. A gentle simmer keeps the starch from gelatinizing too quickly, which would give you a gummy texture. I keep my stove set to the lowest possible flame and use a heavy‑bottomed saucepan to distribute heat evenly. A quick tip: place a silicone spatula on the side of the pot; if it stays warm but not hot, you’re in the sweet spot.
Why Your Nose Knows Best
Your sense of smell is a better indicator of doneness than a timer. When the pudding releases that buttery‑caramel aroma and the candy corn scent becomes prominent, you’re almost there. If you’re still unsure, dip a spoon into the center; the pudding should coat the back of the spoon and leave a clean line when you run your finger through it.
The 5‑Minute Rest That Changes Everything
After you pour the hot pudding into the cups, let them sit uncovered for five minutes before sealing with plastic wrap. This short rest allows steam to escape, preventing a skin from forming. I used to rush this step and ended up with a thin film that ruined the silky mouthfeel. Trust me, those five minutes are worth the extra anticipation.
Crush, Don’t Grind
When you crush candy corn for the garnish, use a zip‑top bag and a rolling pin instead of a food processor. The gentle crush preserves the irregular shapes that give the topping its playful texture. A friend once tried a high‑speed blender and ended up with a powdery dust that melted into the pudding—let's just say the presentation suffered.
The Secret Chill
For the smoothest texture, chill the pudding on a wire rack placed over a baking sheet. This allows air to circulate around each cup, preventing condensation from pooling at the bottom. The result is a firmer set that still melts in your mouth, rather than a soggy base.
Creative Twists and Variations
This recipe is a playground. Here are some of my favorite ways to switch things up:
Spiced Pumpkin Swirl
Add a tablespoon of pumpkin puree and a pinch of pumpkin pie spice to the milk‑cream mixture before heating. The result is a warm, autumn‑spiced version that pairs beautifully with the candy corn’s sweetness. Perfect for anyone who loves a little extra spice in their dessert.
Chocolate‑Covered Delight
Stir in ¼ cup of high‑quality cocoa powder after the pudding has thickened, then melt in some dark chocolate chips for a richer, chocolate‑candy corn hybrid. The bitterness of the chocolate balances the sugary candy corn, creating a sophisticated flavor profile.
Berry Burst
Fold in a handful of fresh raspberries or a swirl of raspberry coulis just before chilling. The tartness cuts through the sweetness and adds a pop of color that makes the cups look like miniature sunrise desserts.
Nutty Crunch
Top each cup with toasted pecans or caramelized almonds before serving. The nutty crunch adds texture contrast and a buttery note that echoes the pudding’s base.
Vegan Velvet
Replace dairy with coconut milk and coconut cream, use a plant‑based butter alternative, and swap honey for maple syrup. The flavor shifts slightly toward tropical, but the texture remains luxuriously smooth.
Coffee Kick
Dissolve a teaspoon of instant espresso powder in the milk before heating. The subtle coffee undertone adds depth and makes the pudding a perfect after‑dinner treat for caffeine lovers.
Storing and Bringing It Back to Life
Fridge Storage
Keep the pudding cups sealed with airtight lids or tightly wrapped plastic wrap. They stay fresh for up to three days, and the flavors actually meld and improve after a night in the cold. Before serving, give each cup a quick stir to re‑incorporate any settled cream.
Freezer Friendly
If you need to keep them longer, freeze the cups for up to two months. Place a piece of parchment paper between each cup to prevent sticking. When ready to eat, transfer to the fridge to thaw overnight, then give them a gentle whisk. Adding a tiny splash of milk or cream before reheating restores that silky texture.
Best Reheating Method
For a quick warm‑up, microwave a cup for 30‑40 seconds, stirring halfway through. For an even gentler approach, place the cup in a water bath (bain‑marie) over low heat until just warmed through. Remember, the pudding only needs to be warmed, not cooked again, or you’ll lose the delicate set.