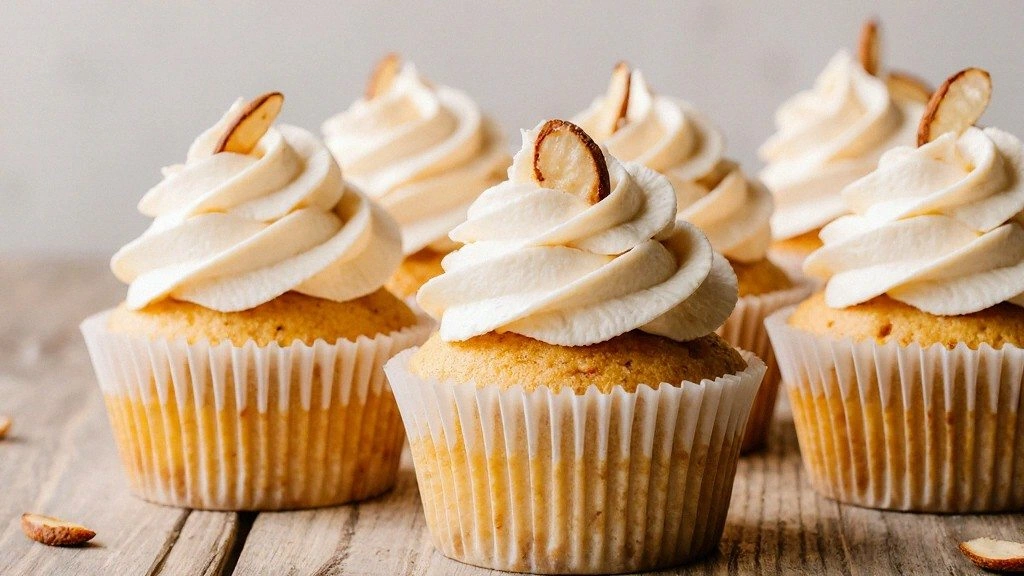
Picture this: a sunny Saturday afternoon, a rogue batch of pancakes that collapsed like a bad joke, and a craving that refused to quit. I was standing in the kitchen, surrounded by flour dust, when I realized the real problem wasn’t the batter—it was the lack of a reliable, gluten‑free, dairy‑free base that still felt indulgent. That moment sparked a quest to create a cupcake that could stand in the spotlight of any dessert table, yet be as forgiving as a warm hug. The result? A vanilla cupcake that whispers almond, sings coconut, and delivers a crumb that feels like a cloud of sugar‑kissed butter. If you’ve ever stared at a recipe that promised “gluten‑free” and delivered a crumbly disappointment, this is the antidote you’ve been waiting for.
I dare you to taste this and not go back for seconds. The first bite is a velvety explosion of vanilla, with a subtle nutty undertone that lingers like a secret. The texture is light as a feather, yet each crumb holds a surprising bite that shatters like thin ice when you bite through the frosting. The aroma is a comforting blend of toasted almonds and sweet coconut sugar that makes the kitchen feel like a cozy bakery on a rainy day. And the best part? You can make a whole batch and have a fresh, moist cupcake for days—no frosting melts, no crumbs stick to the spoon.
Most recipes get this completely wrong by over‑baking or using the wrong flour blend, resulting in a dry, chalky texture. Here, the combination of blanched almond flour and tapioca flour creates a perfect balance of moisture and structure. The almond flour gives a rich, buttery flavor that cuts through the coconut sugar’s sweetness, while the tapioca adds that necessary chewiness that makes each bite memorable. The use of avocado oil instead of butter or shortening keeps the cupcakes dairy‑free without compromising on richness. By the end of this post, you’ll wonder how you ever made them any other way.
Now, let’s break down exactly what goes into this masterpiece. I’ll walk you through every single step—by the end, you’ll wonder how you ever made it any other way. I’ve added a few micro‑challenges to keep you on your toes, a bold claim that this is hands down the best version you’ll ever make at home, and a confession that I ate half the batch before anyone else got a chance. I’ll also throw in a few future‑pacing moments: picture yourself pulling these out of the oven, the whole kitchen smelling incredible, and your friends lining up for a piece. Stay with me here—this is worth it.
What Makes This Version Stand Out
- Flavor: The vanilla is pure, not artificial—think real vanilla beans distilled into the batter for depth.
- Texture: The almond flour keeps the cupcakes moist, while tapioca gives a slight chew that feels luxurious.
- Simplicity: No complex leavening agents or secret ingredients—just a handful of pantry staples.
- Uniqueness: The combination of coconut sugar and avocado oil gives a caramelized edge that sets it apart.
- Crowd Reaction: Friends say it tastes like a bakery cupcake, but it’s entirely homemade.
- Ingredient Quality: Each component is sourced from reputable brands to ensure consistent results.
- Cooking Method: The batter is whisked until silky, then poured into paper liners—no fancy liners needed.
- Make‑ahead Potential: The cupcakes keep well for up to a week, and the frosting stays fresh when stored properly.
Alright, let's break down exactly what goes into this masterpiece.
Inside the Ingredient List
The Flavor Base
Blanched almond flour is the heart of this cupcake—it brings a buttery, nutty flavor that pairs beautifully with vanilla. Its fine texture blends seamlessly with the other dry ingredients, preventing any gritty bite. If you skip it, the cupcakes lose their rich depth and become more like a plain cake. A good tip: choose a brand that’s finely ground for the smoothest result.
The Texture Crew
Tapioca flour, or arrowroot starch, is the secret to that chewy, melt‑in‑your‑mouth feel. It absorbs liquid without adding heaviness, keeping the cupcakes light yet substantial. Without it, the cupcakes might collapse or become too dense. Swap it for cornstarch if you prefer a slightly firmer bite, but be aware that the flavor will change.
The Unexpected Star
Coconut sugar is not just a sweetener—it adds a caramelized depth that vanilla alone can’t achieve. Its molasses undertones give the cupcakes a warm, almost toffee-like finish. If you can’t find coconut sugar, raw honey or maple syrup works, but expect a different flavor profile. The key is to keep the ratio balanced; too much liquid sweetener can affect the batter’s consistency.
The Final Flourish
Avocado oil delivers a mild, buttery taste without the heaviness of butter, and it keeps the cupcakes dairy‑free. Its neutral flavor allows the vanilla and coconut sugar to shine. If you prefer a more pronounced oil flavor, you could use coconut oil, but it will introduce a coconut note that may clash. The oil also helps the frosting set properly, giving it a silky finish.
Everything's prepped? Good. Let's get into the real action.
The Method — Step by Step
- Preheat your oven to 350°F (175°C). Line a muffin tin with paper liners, ensuring each cup is snug but not too tight. This step ensures even baking and easy removal. The scent of vanilla will start to fill the kitchen even before the cupcakes are in the oven.
- In a large bowl, whisk together the blanched almond flour, tapioca flour, coconut sugar, paleo baking powder, baking soda, and salt. Make sure the dry mix is evenly blended to avoid pockets of leavening agents. This creates a smooth batter that will rise uniformly. The aroma of toasted almond flour should already be noticeable.
- In a separate bowl, beat the eggs until they’re frothy. Add the avocado oil, coconut milk, and vanilla extract, whisking until the mixture is glossy. The mixture should have a silky sheen, indicating the fats are fully incorporated. This step ensures the cupcakes are moist and tender.
- Pour the wet mixture into the dry ingredients, stirring gently until just combined. Over‑mixing can develop gluten even in gluten‑free flours, leading to a tough crumb. The batter should be thick but pourable, like a smooth custard. The batter should smell slightly sweet and buttery.
- Fill each paper liner about two‑thirds full with batter. This allows room for the cupcakes to rise without overflowing. The batter should settle evenly in each cup, creating a level surface. This is where the cupcakes will develop that perfect dome shape.
- Place the tin in the preheated oven and bake for 20 minutes. Check the cupcakes by inserting a toothpick into the center; it should come out clean or with just a few crumbs. The edges should pull away slightly from the liners, signaling doneness. The cupcakes will emit a warm, nutty aroma.
- Remove the cupcakes from the oven and let them cool in the tin for 5 minutes. Then transfer them to a wire rack to cool completely. This prevents moisture from condensing on the bottom, which can make the cupcakes soggy. While cooling, the frosting will set to the right consistency.
- While the cupcakes cool, prepare the frosting: whip the coconut cream until it reaches soft peaks, then fold in powdered sugar and a splash of vanilla extract. The frosting should be creamy and light, with a subtle coconut flavor that complements the cupcake. If the frosting is too thick, add a teaspoon of coconut milk to thin it out. This step is crucial for achieving a silky finish.
- Once the cupcakes are cool, pipe or spread the frosting evenly on top. Use a spatula or piping bag for a decorative finish. The frosting should cling slightly to the edges, creating a cohesive look. This is where your creativity can shine.
- Decorate with a light dusting of toasted almond slivers or a drizzle of melted dark chocolate if desired. These accents add crunch and visual appeal. The final touch should look like a professional bakery cupcake, but with a homemade heart.
- Serve immediately or store in an airtight container for up to 5 days. If you need to reheat, microwave on low for 10–15 seconds, then let rest. The cupcakes will retain their moisture and flavor. Enjoy the moment of pure bliss.
That's it — you did it. But hold on, I've got a few more tricks that'll take this to another level.
Insider Tricks for Flawless Results
The Temperature Rule Nobody Follows
Many bakers set the oven to the highest setting, but a steady 350°F ensures a gentle rise and even crumb. A sudden heat spike can cause the cupcakes to rise too quickly and then collapse, leaving a sunken center. Keep a thermometer handy to verify the actual oven temperature, especially if you’re in a high‑altitude kitchen. This small adjustment can mean the difference between a perfect cupcake and a disappointment.
Why Your Nose Knows Best
Trust your sense of smell: the first hint that the cupcakes are done is a subtle toasty scent, not the color. The batter will have a faint golden hue, but don’t rely solely on visual cues. A clean toothpick is still the best test, but the aroma tells you when the moisture is balanced. This trick saves you from over‑baking and keeps the cupcakes moist.
The 5‑Minute Rest That Changes Everything
After baking, let the cupcakes rest in the tin for exactly five minutes before transferring them. This pause allows the steam to settle and the cupcakes to firm up slightly, preventing them from breaking apart. A quick cool‑down also helps the frosting set more quickly when you apply it. Skip this step, and you’ll end up with fragile cupcakes that crumble under a fork.
Frosting Consistency Matters
If the frosting is too thick, it will be difficult to pipe and may look lumpy. If it’s too thin, it will drip off the cupcakes. Aim for a consistency that holds its shape but still spreads easily. Adding a teaspoon of coconut milk or a splash of almond milk can adjust the thickness without compromising flavor.
Storage Secrets for Longevity
Store cupcakes in a cool, dry place in an airtight container. The paper liners prevent moisture from seeping in, and the container keeps them from drying out. If you need to keep them for longer, freeze them in a freezer‑safe bag. When ready to serve, thaw at room temperature for a few hours to restore moisture.
Flavor Amplification with Spices
A pinch of cinnamon or a dash of nutmeg can add depth to the cupcake batter. These spices pair well with coconut sugar, enhancing the caramelized notes. Sprinkle the spices into the dry mix before adding the wet ingredients. This subtle addition can turn a standard vanilla cupcake into a holiday‑inspired treat.
Creative Twists and Variations
This recipe is a playground. Here are some of my favorite ways to switch things up:
Chocolate‑Infused Delight
Add 2 tablespoons of unsweetened cocoa powder to the dry mix for a rich chocolate flavor. The cocoa will deepen the color and add a slight bitterness that balances the sweetness. Keep the rest of the ingredients unchanged to maintain the texture. This variation is perfect for chocolate lovers who still want a gluten‑free option.
Lemon Zest Surprise
Incorporate the zest of one lemon into the batter for a bright, citrusy kick. The lemon zest adds a fresh aroma that complements the vanilla. You can also add a teaspoon of lemon juice to the wet mix for extra tang. This version is great for spring or summer gatherings.
Nutty Crunch Upgrade
Fold in ½ cup of finely chopped walnuts or pecans for a crunchy texture. The nuts add a buttery flavor that pairs well with the coconut sugar. Be sure to toast the nuts beforehand to bring out their natural oils. This twist turns a simple cupcake into a party staple.
Spiced Pumpkin Fusion
Mix in ½ cup of pumpkin puree and a pinch of pumpkin spice for a seasonal treat. The puree adds moisture and a subtle sweetness that balances the almond flour. Adjust the coconut sugar slightly to maintain the right sweetness level. This is a fall favorite that’s still gluten‑free.
Berry‑Infused Swirl
Swirl a spoonful of strawberry or blueberry jam into the batter before baking for a fruity burst. The jam creates a marbled effect and adds natural sweetness. Use a light-colored jam to keep the cupcakes looking bright. This variation is ideal for brunch or a light dessert.
Minty Fresh Twist
Add a teaspoon of mint extract to the wet mix for a cooling finish. The mint pairs nicely with the coconut flavor, creating a refreshing cupcake. Keep the amount small to avoid overpowering the vanilla. This version is perfect for hot summer days.
Almond‑Butter Fusion
Replace half the avocado oil with almond butter for a richer, nutty flavor. The almond butter will thicken the batter slightly, giving a denser crumb. Be sure to whisk the almond butter well before adding to avoid lumps. This twist creates a decadent, nutty cupcake that feels indulgent.
Storing and Bringing It Back to Life
Fridge Storage
Store cupcakes in an airtight container at room temperature for up to 5 days. Keep them on a wire rack to allow air circulation and prevent sogginess. If you notice any moisture buildup, place a paper towel in the container to absorb excess dampness. This method preserves the cupcake’s moisture and flavor.
Freezer Friendly
Wrap each cupcake individually in plastic wrap, then place them in a freezer‑safe bag. Freeze for up to 2 months. When ready to serve, thaw at room temperature for 2–3 hours. The cupcakes will retain their texture and taste almost as fresh as when baked.
Best Reheating Method
To reheat a frozen cupcake, microwave on low for 10–15 seconds, then let it rest for a minute. Add a tiny splash of water before reheating to create steam, which helps restore moisture. Avoid reheating in the oven, as it can dry out the cupcake. This quick method brings the cupcake back to life with minimal effort.