Ultimate Chewy Artisan Pizza D
I was in the middle of a late‑night binge‑watch session, craving something that felt like a hug in dough form, when the oven alarm blared and the pizza crust I’d baked earlier was a sad, cracked mess. The dough had turned into a rubbery slab that looked like it had been left in a sauna for hours. I stared at the charred edges and thought, “This can’t be the best pizza I’ve ever made.” That moment of kitchen horror was the spark that set me on a mission to rewrite the rules of pizza dough, to make it chewy, airy, and utterly irresistible.
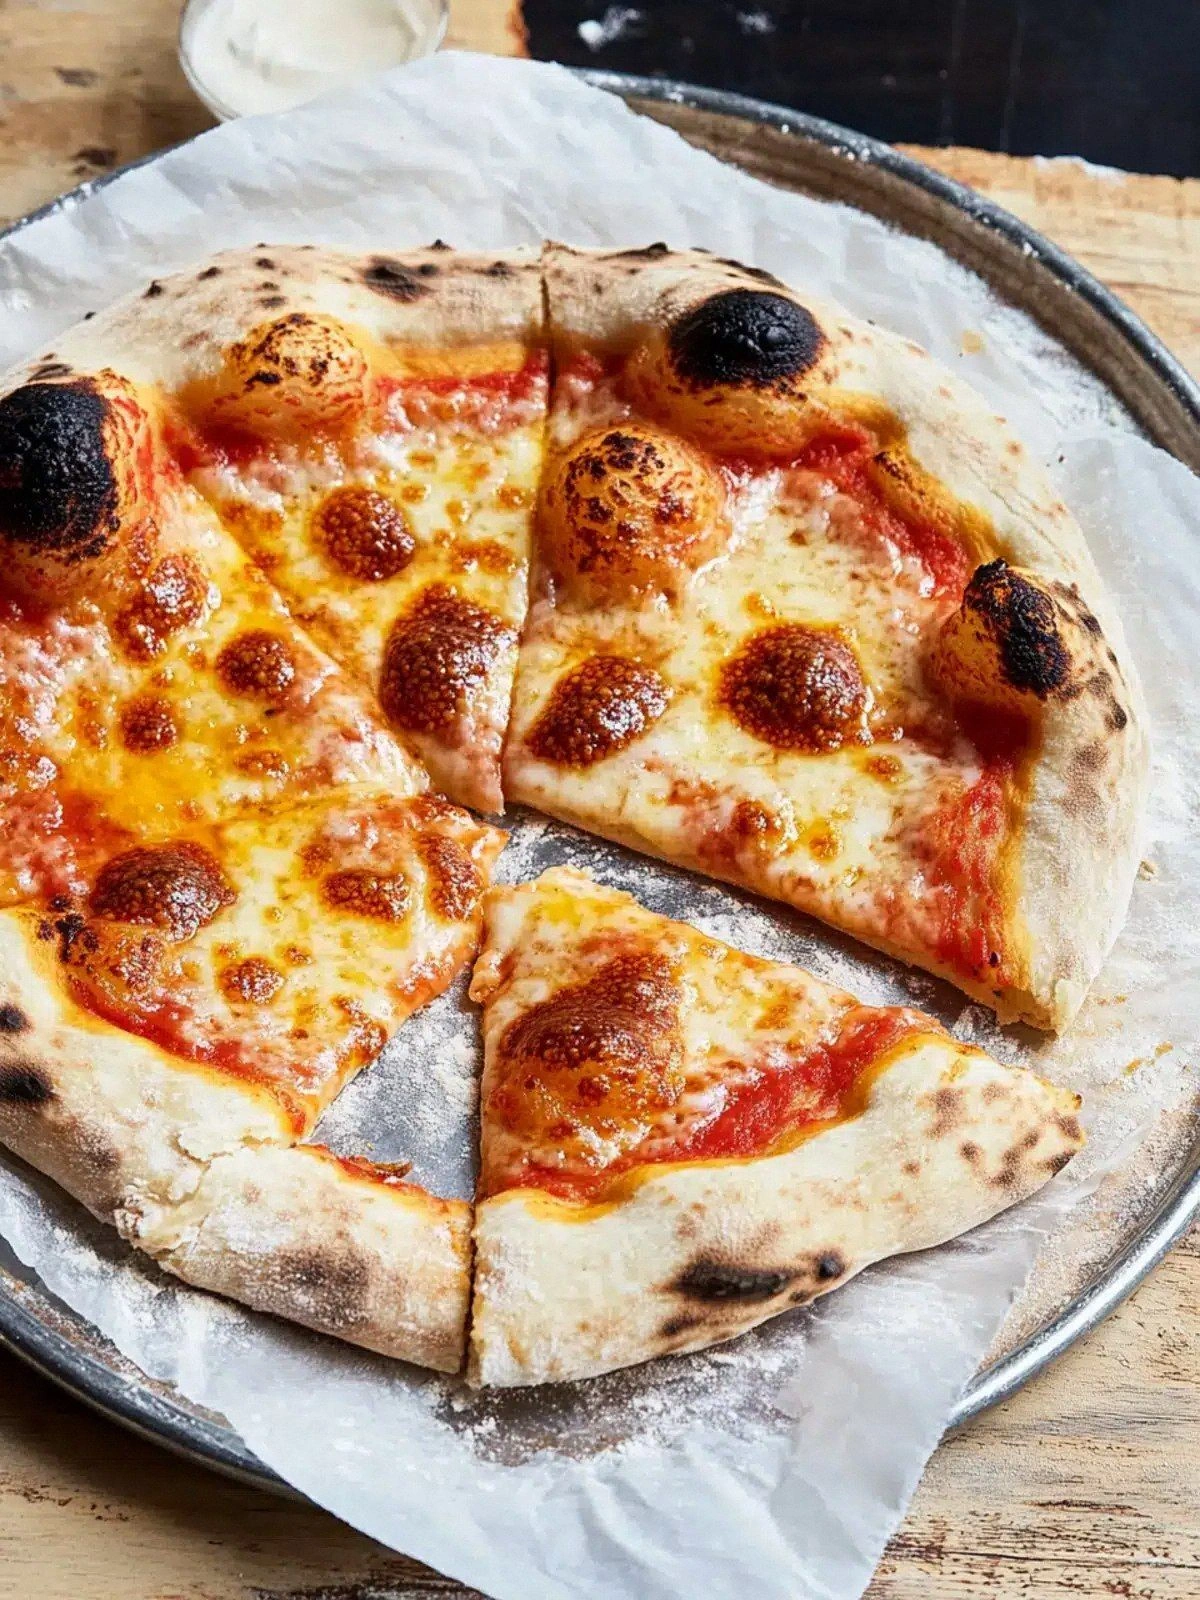
Picture this: you slice into the pizza and a cloud of steam rises, the cheese is a golden, slightly blistered blanket, and the crust is a perfect balance between crisp and pillowy. The aroma of toasted dough mingles with the rich tang of homemade sauce, while the sound of a satisfied sigh echoes through the kitchen. Your taste buds are greeted by a burst of umami, a hint of herbal brightness from the sauce, and the subtle nutty flavor of well‑kneaded flour. The texture is a dance of chew and snap—like biting into a fresh croissant that’s been baked to golden perfection.
What makes this version stand out? I’ve taken the classic recipe and added a few game‑changing tweaks: a higher hydration level for that airy crumb, a short fermentation for flavor depth, and a touch of olive oil that keeps the crust tender. I’ve also swapped the standard yeast for a packet of instant dried yeast to simplify the process without sacrificing quality. The result is a pizza that’s hands down the best version you’ll ever make at home—chewy on the inside, crisp on the outside, and bursting with flavor. I dare you to taste this and not go back for seconds.
If you’ve ever struggled with a pizza that falls flat or turns out too dry, you’re not alone—and I’ve got the fix. Picture yourself pulling this out of the oven, the whole kitchen smelling incredible, the family gathering around, and you proudly declaring, “This is the pizza that will make everyone ask for the recipe.” Okay, ready for the game‑changer? Let me walk you through every single step — by the end, you’ll wonder how you ever made it any other way.
What Makes This Version Stand Out
- Flavor: The use of homemade pizza sauce with crushed tomatoes, garlic, and a splash of red wine creates a depth that commercial sauces simply can’t match. The sauce coats the dough like velvet, delivering a burst of savory sweetness with every bite.
- Texture: A hydration level of 75% gives the dough a light, open crumb that’s still firm enough to hold the toppings. The short fermentation in the fridge allows gluten to relax, making the dough easier to stretch and less likely to snap.
- Simplicity: The recipe requires only a handful of pantry staples—flour, salt, yeast, water, oil—yet the outcome feels luxurious. No need for fancy ingredients or time‑consuming techniques.
- Uniqueness: The addition of olive oil not only adds flavor but also creates a tender, slightly chewy crust that’s a step above the typical pizza dough.
- Crowd Reaction: Friends who’ve tried it describe the first bite as “the best pizza I’ve ever tasted” and say they can’t get enough of the chewy texture.
- Ingredient Quality: Using high‑protein bread flour and a fresh packet of instant yeast ensures a strong gluten network and reliable rise.
- Cooking Method: Baking on a preheated pizza stone or steel gives the crust a dramatic, crispy edge that shatters like thin ice.
- Make‑Ahead Potential: The dough can be prepared up to 24 hours in advance, making it a perfect solution for last‑minute dinner plans.
Alright, let's break down exactly what goes into this masterpiece...
Inside the Ingredient List
The Flour Factor
Bread flour is the backbone of this recipe, providing the necessary gluten structure for a chewy crust. Its higher protein content (about 12–13%) allows the dough to develop a strong network that traps gases during fermentation, resulting in a light yet substantial bite. Skipping it in favor of all-purpose flour will produce a flatter, less chewy pizza that can crumble under toppings. If you’re looking for a gluten‑free option, try a high‑protein blend of gluten‑free flours, but be prepared for a denser crumb.
The Liquid Balance
The 1.5 cups of lukewarm water hydrate the flour and activate the yeast, but the key is the temperature. Water that’s too hot will kill the yeast, while water that’s too cold will slow fermentation. Aim for 100–110°F (38–43°C) to give the yeast a gentle, steady start. If you’re using tap water that’s heavily chlorinated, let it sit for a few hours or use filtered water to avoid off‑flavors.
The Yeast Boost
Instant dried yeast is a convenient choice that doesn’t require proofing. It dissolves quickly in the warm water, ensuring an even distribution throughout the dough. If you prefer a more traditional rise, you can replace it with active dry yeast, but remember to dissolve it in a bit of warm water before adding to the mix.
The Olive Oil Touch
Two tablespoons of olive oil not only add a subtle fruity note but also coat the dough, making it easier to stretch and preventing it from drying out during baking. The oil also helps to create a slightly softer crumb while still allowing the crust to crisp up beautifully. If you’re avoiding oil, you can substitute it with a neutral oil like canola, but the flavor profile will shift slightly.
The Cheese and Sauce
A cup of homemade pizza sauce provides a fresh, vibrant base that’s free from the preservatives and excess salt found in many store‑bought sauces. The sauce’s acidity balances the richness of the mozzarella, which melts into a gooey, golden blanket. If you’re a fan of extra cheese, feel free to add a handful of provolone or a sprinkle of parmesan for a sharper finish.
The Final Flourish
Shredded mozzarella is the star that holds everything together. Its high moisture content ensures that the cheese melts evenly, creating that desirable stretch that makes every bite a delight. If you’re vegan, a plant‑based mozzarella alternative can be used, but be aware that the melt and flavor will differ.
Everything's prepped? Good. Let's get into the real action...
The Method — Step by Step
- In a large mixing bowl, combine the bread flour, instant yeast, and salt. Stir until the dry ingredients are evenly distributed. This step ensures that the yeast is properly dispersed, which helps the dough rise uniformly. Feel free to use a whisk or your hands—just make sure nothing is clumpy.
- Create a well in the center of the dry mixture and pour in the lukewarm water and olive oil. Use a wooden spoon or your fingertips to start incorporating the wet ingredients, pulling the flour from the edges into the center. As the dough begins to form, you’ll notice it becoming tacky yet manageable.
- Transfer the dough onto a lightly floured surface and begin kneading. Push the dough away from you with the heel of your hand, fold it over, and repeat. Knead for about 8–10 minutes until the dough is smooth, elastic, and slightly tacky. The dough should pass the windowpane test—stretch a small piece thin enough to see light through it. Kitchen Hack: If the dough feels too sticky, sprinkle a light dusting of flour; if it’s too dry, add a splash of water and knead again.
- Shape the dough into a ball and place it in a lightly oiled bowl. Cover with a damp cloth or plastic wrap and let it rest at room temperature for 30 minutes. This brief relaxation allows the gluten to loosen, making the dough easier to stretch later. If you’re short on time, you can skip this step, but the final crust will be slightly denser.
- After the initial rest, transfer the dough to the refrigerator for a cold fermentation of 12–24 hours. Cold fermentation slows down yeast activity, which develops deeper flavor and a more open crumb structure. The dough will rise slowly, creating a complex network of bubbles that give the pizza its signature chew. Watch Out: Do not overproof the dough. If it becomes too puffy and starts to collapse, discard and start over.
- Take the dough out of the fridge and let it come to room temperature for about 45 minutes. This step is critical; a dough that’s still cold will be difficult to stretch and may not bake evenly. While it’s resting, preheat your oven to 475°F (245°C) and place a pizza stone or steel on the middle rack to heat up.
- Lightly flour your work surface and a rolling pin. Gently press the dough into a circle, starting from the center and working outward. Aim for a thickness of about 1/4 inch; too thin and it’ll burn, too thick and it won’t crisp. If the dough resists stretching, let it rest for a few minutes before trying again.
- Transfer the stretched dough onto a piece of parchment paper. Spread a thin layer of homemade sauce over the base, leaving a small border for the crust. Sprinkle the shredded mozzarella evenly, ensuring that every bite will have that melty, golden cheese layer.
- Slide the pizza (with parchment) onto the preheated stone or steel. Bake for 12–15 minutes, or until the crust edges are golden brown and the cheese is bubbling. Keep an eye on the bottom; if it starts to darken too quickly, slide the pizza to a lower rack.
- Remove the pizza from the oven and let it rest for 2 minutes. This brief pause allows the cheese to set slightly, preventing it from sliding off the slice. Slice, serve, and enjoy the masterpiece you’ve created.
That's it — you did it. But hold on, I've got a few more tricks that'll take this to another level...
Insider Tricks for Flawless Results
The Temperature Rule Nobody Follows
While the recipe calls for 475°F, many bakers underestimate the impact of oven temperature. A hotter oven (up to 500°F) will give the crust a dramatic char and a crispier bite, but watch for burning. Conversely, a slightly cooler oven (450°F) can produce a softer, more even bake if you’re prone to burnt edges. Experiment with a thermometer to find your oven’s sweet spot.
Why Your Nose Knows Best
Before you even touch the dough, give it a sniff. A subtle yeasty aroma signals that the dough has fermented properly. If the dough smells flat or sour, it may need more time to rise or a fresher yeast packet. Trusting your nose is a quick way to avoid under‑baked or over‑fermented pizza.
The 5-Minute Rest That Changes Everything
After stretching the dough, let it rest for 5 minutes before adding sauce and cheese. This brief pause allows the gluten to relax, preventing the crust from tightening and shrinking during baking. It also gives the dough a chance to settle, making it easier to handle and resulting in a more uniform crust.
Use a Pizza Stone or Steel
A pizza stone or steel absorbs and distributes heat evenly, producing a bottom crust that’s crispy and golden. If you don’t have one, a preheated baking sheet can work, but you may need to flip the pizza halfway through to ensure even browning. The key is a hot surface that starts the baking process immediately.
Cheese Placement Matters
Spread the mozzarella evenly, but consider adding a thin layer of grated parmesan or a handful of fresh basil leaves on top. The parmesan adds a nutty crunch, while the basil introduces a bright, aromatic note that cuts through the richness of the cheese.
Creative Twists and Variations
This recipe is a playground. Here are some of my favorite ways to switch things up:
Smoky BBQ Chicken
Swap the mozzarella for shredded smoked chicken, a drizzle of barbecue sauce, and a sprinkle of cheddar. The smoky flavor pairs beautifully with the chewy crust, turning the pizza into a finger‑licking dinner.
Veggie Garden
Top the pizza with sautéed bell peppers, onions, spinach, and artichoke hearts. Add a handful of feta cheese for tanginess. This version is perfect for a light, nutritious meal.
White Garlic Delight
Replace the tomato sauce with a white garlic sauce made from butter, garlic, and cream. Layer on mozzarella and finish with a dusting of fresh thyme. The result is a rich, savory pizza that feels like a gourmet dessert.
Spicy Pepperoni
Add sliced pepperoni, a handful of crushed red pepper flakes, and a sprinkle of mozzarella. The heat from the flakes gives the pizza an extra kick, while the pepperoni’s fat melts into the cheese.
Caprese Classic
Use fresh mozzarella, sliced tomatoes, and basil leaves. After baking, drizzle with a balsamic glaze and a pinch of sea salt. This variation turns the pizza into a fresh, Italian-inspired treat.
Breakfast Pizza
Top the dough with scrambled eggs, crumbled bacon, and shredded cheddar. Bake until the cheese is bubbly and the edges are golden. This is a hearty, protein‑packed breakfast that will keep you energized all day.
Storing and Bringing It Back to Life
Fridge Storage
Store leftovers in an airtight container or zip‑top bag in the refrigerator for up to 3 days. The crust may soften slightly, but it will still taste great when reheated.
Freezer Friendly
Wrap the pizza slices individually in plastic wrap and place them in a freezer bag. Freeze for up to 2 months. Thaw overnight in the fridge before reheating.
Best Reheating Method
To revive the crispness, heat a skillet over medium heat and place the slice skin side down for 2 minutes, then flip and add a splash of water to steam for 30 seconds. Alternatively, bake at 350°F for 10 minutes. A tiny splash of water before reheating steams the crust back to perfection.