I still remember the first time I tried to make a red velvet cake roll at home. It was a Sunday afternoon, the kind where the light hits your kitchen counter just right and you think you're invincible. I had visions of this gorgeous, ruby-swirled log emerging from my oven, ready to steal the show at book club that night. Instead, I ended up with a cracked, deflated disaster that looked like it had been sat on by an elephant. The cream cheese filling? Let's just say it resembled something closer to soup than frosting. I stood there, spatula in hand, wondering if I should just call it "deconstructed red velvet" and hope nobody noticed.
Fast forward through three more attempts, a mountain of dirty dishes, and what my husband now refers to as "The Great Red Velvet Meltdown of 2023," and I finally cracked the code. This Sweet Red Velvet Oreo Roll isn't just another pretty dessert — it's the result of every single mistake, every tear shed over cracked sponge, every batch of too-runny filling that slid right off the cake. I've figured out the exact temperature that makes the sponge pliable without being gummy, the precise moment to roll it, and yes — the secret ingredient that keeps that cream cheese filling stable even if you're serving it on the hottest day of summer.
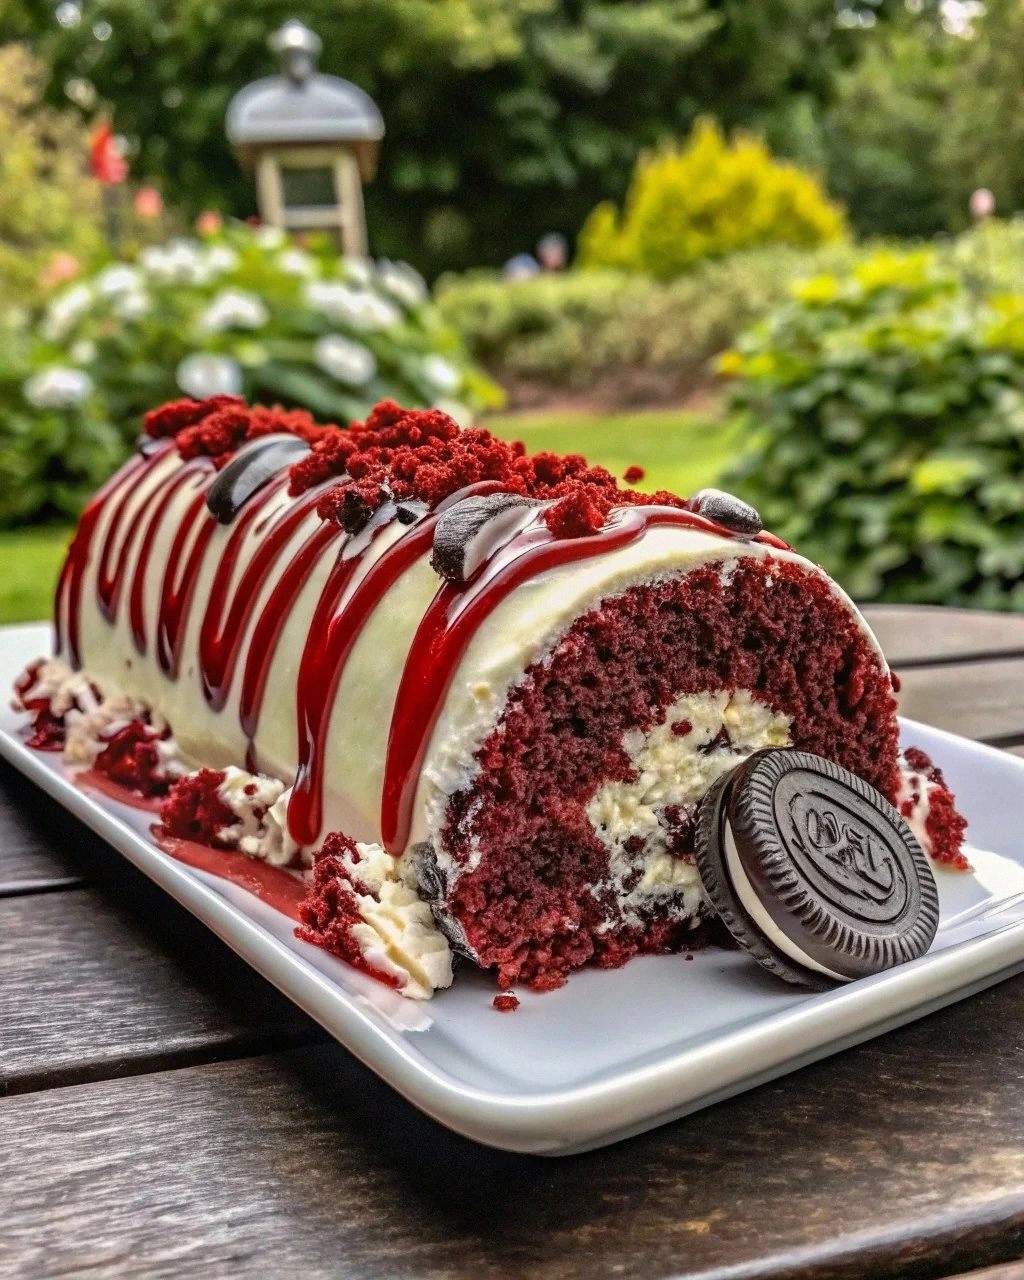
What makes this version absolutely bonkers is how we sneak crushed Oreos right into the sponge itself, creating these little pockets of chocolate cookie magic that burst through the red velvet like edible confetti. The cream cheese filling gets a double dose of vanilla — both extract and paste — because I'm done playing around with subtle flavors. This is the dessert that made my neighbor cancel her dinner plans just so she could come over for "one more slice" (her words, not mine). I dare you to taste this and not go back for seconds.
Picture yourself pulling this out of the oven, the whole kitchen smelling like Willy Wonka's factory got a sophisticated makeover. The deep red sponge crackles slightly as you roll it, revealing that perfect spiral of white filling studded with more Oreo bits because we're not about restraint here. Stay with me here — this is worth every single minute, and by the end, you'll wonder how you ever made it any other way.
What Makes This Version Stand Out
Flavor Bomb: We're not just dusting the top with cocoa powder and calling it a day. The sponge itself gets a double hit of chocolate — Dutch-processed cocoa for depth and melted dark chocolate for richness. The Oreos aren't just decoration; they're crushed and folded right into the batter, creating these surprise pockets of cookie crunch that make people stop mid-chew and go "wait, what is that amazing texture?"
Unbreakable Sponge: Most recipes tell you to roll the cake while it's warm, which is basically asking for a cracked disaster. I've discovered that cooling it for exactly 7 minutes — not 5, not 10 — creates this magical window where the sponge is still flexible but won't tear. Combined with the parchment paper rolling method, you'll get perfect spirals every single time.
Stable Filling Secret: Traditional cream cheese fillings weep and slide off the cake faster than my motivation on a Monday morning. By whipping the cream cheese with powdered sugar first, then folding in stabilized whipped cream, you get a filling that holds its shape for days. Yes, days — if this roll lasts that long in your house.
Oreo Overload Philosophy: We're using Oreos three ways here — crushed in the sponge, mixed into the filling, and yes, crumbled on top because we're not amateurs. The different textures keep every bite interesting, from the soft-soaked cookie bits in the cake to the crunchy toppings.
Make-Ahead Magic: This roll actually tastes better after a night in the fridge. The flavors meld, the filling sets properly, and you can slice it into perfect rounds without any filling squishing out the sides. It's the dessert equivalent of that friend who gets better looking the longer you know them.
Crowd Psychology: There's something about a cake roll that makes people think you're a baking wizard. Maybe it's the spiral, maybe it's the way you slice it tableside like you're performing surgery. Whatever it is, prepare for gasps, applause, and requests for your "secret" — which you absolutely don't have to share.
Inside the Ingredient List
The Flavor Base
The red velvet flavor starts with really good cocoa powder — not the stuff that's been sitting in your pantry since 2019. Dutch-processed cocoa gives us that deep, almost burgundy color that makes red velvet distinctive. Natural cocoa will turn your cake an unfortunate brownish-red that looks like it's having an identity crisis. The buttermilk isn't just for tang — its acidity reacts with the baking soda to give us lift and that signature tender crumb. Don't even think about substituting regular milk here; your sponge will be dense and sad, like a cake that's given up on its dreams.
That bottle of red food coloring sitting in your baking drawer? We're using gel color, not liquid, because nobody wants a cake that tastes like food coloring. Gel gives you that dramatic red without watering down your batter. If you're feeling fancy, beet powder works too, but your cake will have a more muted, sophisticated red — think vintage lipstick rather than fire engine. The vanilla extract matters more than you'd think — it rounds out the chocolate and makes the red velvet taste like red velvet instead of just red-colored chocolate cake.
The Texture Crew
Cake flour is non-negotiable for that cloud-like texture we're after. All-purpose flour will give you a roll that's more like a burrito — structurally sound but texturally disappointing. The cornstarch we add mimics cake flour's lower protein content, ensuring our sponge stays tender even when rolled. Eggs are separated and whipped separately because we're making a genoise-style sponge that relies on air for lift rather than chemical leaveners alone. Those stiff egg whites should hold peaks like a proud mountain range — if they're weeping or looking grainy, you've gone too far.
The granulated sugar gets divided — some goes into the yolks for richness, the rest into the egg whites for stability. This dual approach gives us both structure and moisture. Brown sugar would make the cake too heavy and compete with the Oreo flavors, so we stick with white for purity. The melted butter should be cooled to room temperature — hot butter will deflate your carefully whipped eggs faster than a pin in a balloon.
The Unexpected Star
Here's where things get interesting — we swap out some of the flour for very finely crushed Oreos. Not just any cookies, but Oreos specifically, because they contain just enough fat and sugar to replace some of our dry ingredients while adding that distinctive chocolate sandwich cookie flavor. The cream filling gets scraped out first (save it for coffee, trust me) and the chocolate cookies get blitzed in a food processor until they're powder-fine. Too coarse and you'll get weird texture pockets; too fine and you'll lose the cookie identity.
This Oreo flour addition is what makes our red velvet taste like red velvet decided to go to finishing school — more sophisticated, more complex, definitely more addictive. The cocoa in the cookies amplifies our chocolate notes, while the sugar content helps with caramelization and that gorgeous golden edge. It's like the difference between a regular red velvet and one that's been touched by dessert fairy dust.
The Final Flourish
The cream cheese filling walks a tightrope between stability and spreadability. Full-fat cream cheese is essential — those reduced-fat imposters contain more water, which means soggy cake and weeping filling. The butter gets beaten in while cold, creating tiny pockets that will firm up when chilled and give you clean slices. Powdered sugar isn't just for sweetness — its cornstarch content helps stabilize the filling against temperature changes.
Heavy cream gets whipped to soft peaks before folding in, giving us lightness without compromising structure. Adding the Oreo crumbs to the filling provides textural contrast and ensures every bite has that cookies-and-cream experience. A touch of lemon juice brightens everything and cuts through the richness, making you reach for "just one more slice" until suddenly half the roll has mysteriously disappeared.
The Method — Step by Step
- Start by separating your eggs while they're cold — it's infinitely easier than trying to separate room temperature eggs without breaking the yolks. Place the whites in your stand mixer bowl and the yolks in a separate large bowl. Let everything come to room temperature for about 30 minutes; this isn't just food blogger nonsense — room temperature eggs whip up to greater volume and create a more stable foam. While you're waiting, line your sheet pan with parchment paper, leaving an overhang on the short sides like handles. Grease the parchment and dust it lightly with cocoa powder — this prevents sticking and adds an extra layer of chocolate flavor to the exterior of your roll.
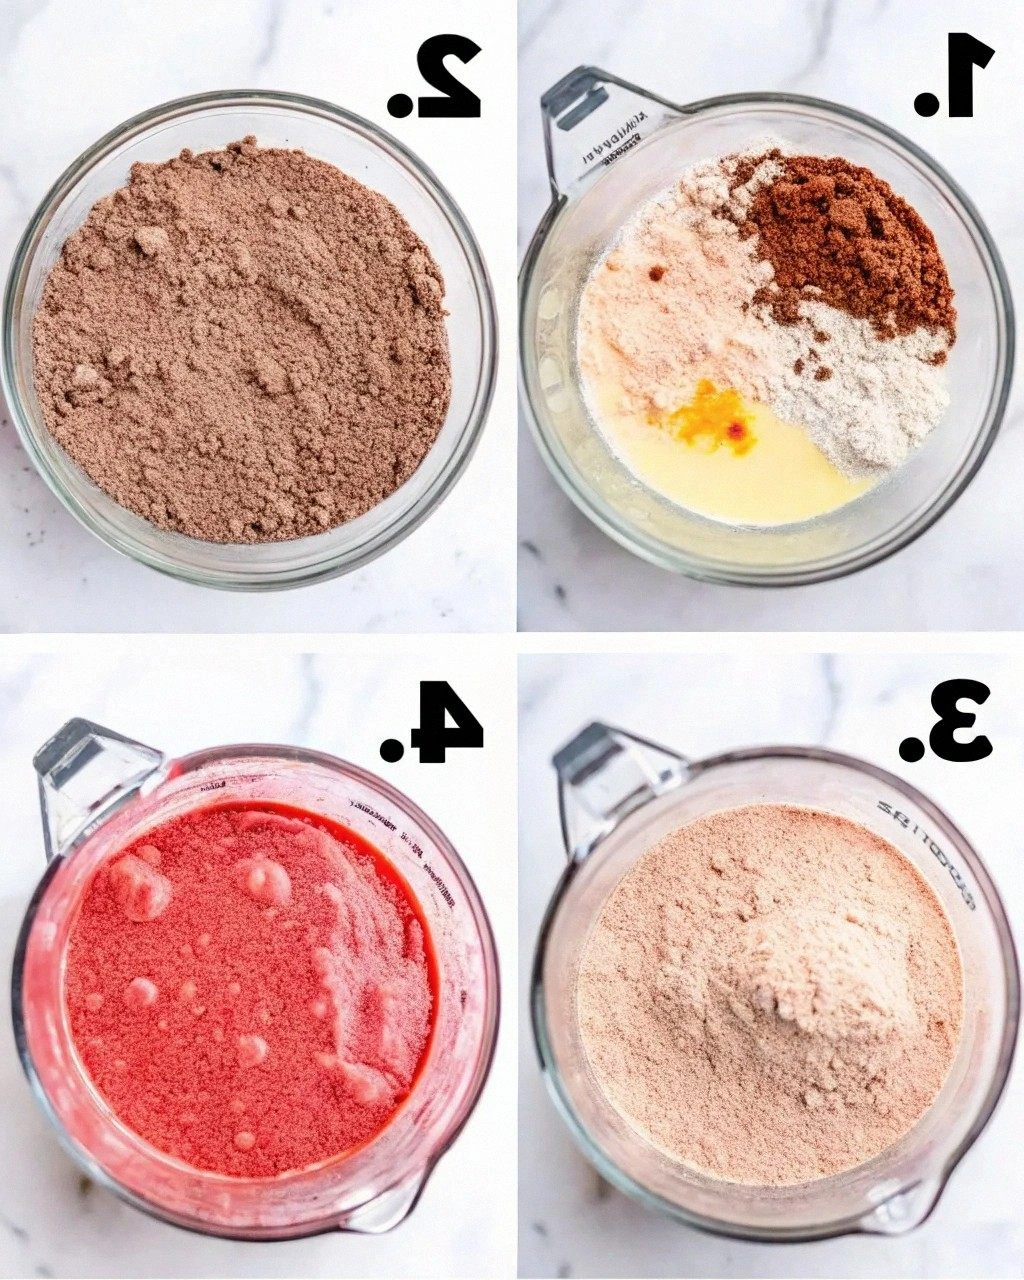
- Preheat your oven to 350°F and position the rack in the center. Too high and the top will burn before the center is done; too low and you'll get a pale, sad sponge. In your food processor, blitz 12 Oreos (cream removed) until they're the texture of fine sand. Don't rush this — chunky cookies will create weak spots in your sponge that could lead to cracking during rolling. Combine these cookie crumbs with your cake flour, cornstarch, cocoa powder, baking powder, and salt in a medium bowl. Whisk everything together until it's one homogeneous mixture; you don't want a bite of pure baking powder ruining someone's dessert experience.
- Now for the yolk mixture — beat them with 1/4 cup sugar until they're thick, pale, and form a ribbon when you lift the beaters. This should take about 3-4 minutes; don't shortcut this step because properly whipped yolks add structure to your sponge. Beat in the vanilla extract, red gel color, and melted butter until everything is glossy and combined. The mixture should be the color of rich mahogany and smell like vanilla ice cream had a baby with chocolate cake. Set this aside while you whip the egg whites — and here's the crucial part that separates success from disaster.
- Whip those egg whites on medium speed until they start to look foamy like bubble bath, then add the cream of tartar. This acid helps stabilize the whites and prevents over-whipping. Once soft peaks form, gradually rain in the remaining sugar — don't dump it all in or you'll deflate your precious foam. Continue whipping until you reach stiff peaks that hold their shape but still look glossy and smooth. Over-whipped whites look dry and curdled, like bad cottage cheese, and will be impossible to fold into your batter without crushing all the air you just incorporated.
- Here's where technique matters: gently fold one-third of the whipped whites into the yolk mixture to lighten it up. Use a large rubber spatula and cut down through the center, then sweep up the sides and turn the bowl. Don't stir — that's how you lose air faster than a punctured balloon. Once incorporated, add the remaining whites in two more batches, folding just until you can't see streaks of white. Sift the flour mixture over the top in three additions, folding gently after each addition. The batter should be light and pillowy, dropping off your spatula in thick ribbons.
- Pour the batter into your prepared pan and spread it gently with an offset spatula. Don't press down — let the batter flow naturally into the corners. Give the pan a gentle tap on the counter to release any large air bubbles, then bake for 12-15 minutes. The cake is done when it springs back lightly when touched and has started to pull away from the sides of the pan. While it's baking, lay out a clean kitchen towel and dust it generously with powdered sugar — this prevents sticking and adds sweetness to the exterior.
- The moment of truth: invert the hot cake onto the sugared towel and peel off the parchment paper. Starting from the short end, roll the cake up with the towel like a jelly roll. Yes, it's hot. Yes, you might burn your fingers a little. Suck it up — this step prevents cracking later. Let the rolled cake cool completely on a wire rack; the steam trapped inside keeps everything flexible. Once cool, unroll it gently. It should curve naturally without cracking — if it cracks, your oven temperature was probably off or you over-baked it.
- For the filling, beat the cream cheese and butter together until they're completely smooth and no lumps remain. This takes longer than you think — about 5 minutes on medium speed. Add the powdered sugar slowly to avoid a snowstorm in your kitchen, then beat in the vanilla and lemon juice. In a separate bowl, whip the cream to soft peaks, then fold it into the cream cheese mixture along with the crushed Oreos. The filling should be thick enough to hold peaks but still spreadable — if it's too stiff, thin it with a tablespoon of cream.
- Spread the filling evenly over the unrolled cake, leaving a 1-inch border on all sides. This border prevents the filling from squishing out when you roll it up again. Now roll it up tightly but gently, using the towel to help guide the roll. Don't press down too hard or you'll squeeze out all that beautiful filling. Wrap the roll in plastic wrap and refrigerate for at least 2 hours or overnight. This sets the filling and makes slicing clean and easy. When ready to serve, dust with more crushed Oreos and slice with a sharp knife dipped in hot water for perfect portions.
That's it — you did it. But hold on, I've got a few more tricks that'll take this to another level...
Insider Tricks for Flawless Results
The Temperature Rule Nobody Follows
Room temperature ingredients aren't just a suggestion — they're the difference between a sponge that rises like a dream and one that sits there like a sad pancake. Take your eggs, cream cheese, and butter out of the fridge at least an hour before you start. Cold cream cheese won't blend smoothly and will leave you with lumpy filling that looks like cottage cheese gone wrong. Cold eggs won't whip up to full volume, leaving you with a dense sponge that cracks when you so much as look at it. If you're in a rush (and who isn't?), submerge your eggs in warm water for 10 minutes and microwave your cream cheese in 10-second bursts until it's pliable but not melted.
Why Your Nose Knows Best
Don't rely on timers alone — your nose is your most reliable kitchen tool. When the cake is almost done, your kitchen will fill with this incredible aroma of chocolate, vanilla, and something mysteriously rich that's distinctly red velvet. The smell should be pronounced but not sharp or burnt. If you catch a whiff of something acrid or overly toasted, check your cake immediately — your oven might be running hot. I once ignored this rule and ended up with a sponge that looked perfect on top but was burnt underneath, like a dessert wearing a disguise. Trust your senses; they've been honed over thousands of years of human cooking evolution.
The 5-Minute Rest That Changes Everything
After you unroll the cooled cake but before you fill it, let it sit uncovered for exactly 5 minutes. This brief airing prevents the filling from making the sponge soggy and helps any residual moisture evaporate. Your cake will absorb the filling better and maintain that perfect contrast between tender cake and creamy filling. Skip this step and you risk a soggy spiral that collapses into itself like a dessert black hole. I learned this the hard way when I rushed through a batch for a dinner party and ended up serving what looked like red velvet roadkill — delicious, but definitely not Instagram-worthy.
The Overnight Transformation
This roll reaches peak deliciousness after 24 hours in the fridge — the flavors meld into something greater than the sum of their parts. The Oreos in the filling soften slightly, creating these pockets of cake-like texture throughout the cream cheese. The sponge absorbs just a hint of moisture from the filling, becoming even more tender. If you can resist eating it immediately (and good luck with that), wrap it tightly in plastic wrap and let it rest. The transformation is like watching a caterpillar become a butterfly, except instead of wings, you get the best dessert you've ever tasted. I've had friends text me days later asking if I put some kind of addictive substance in there — it's just time doing its magic.
The Clean Slice Secret
For those perfect bakery-style slices that show off your gorgeous spiral, use a long, sharp knife dipped in hot water. Wipe the blade clean between each cut — yes, every single slice. The hot knife melts through the cream cheese filling without dragging or smearing, while the clean blade prevents crumbs and filling from building up and ruining your presentation. Don't use a serrated knife — it'll saw through your beautiful roll and leave you with ragged edges that look like they were cut by a toddler. A friend tried using dental floss once (apparently it works for some cakes) and ended up with a squashed roll that looked like it had been run over. Stick with the hot knife method — it's foolproof and dramatic, like you're performing dessert surgery.
Creative Twists and Variations
This recipe is a playground. Here are some of my favorite ways to switch things up:
Golden Velvet Oreo Roll
Swap the red food coloring for yellow and use Golden Oreos instead of regular ones. The result tastes like birthday cake and sunshine had a baby. Add a teaspoon of butter extract to the filling for that nostalgic boxed cake flavor that somehow tastes better than the real thing. Kids go absolutely bonkers for this version, and adults get that guilty pleasure smile when they taste it. The golden color is perfect for spring brunches or baby showers where red might clash with your theme.
Mint Chocolate Madness
Add a teaspoon of peppermint extract to the sponge and use Mint Oreos for the filling. The red sponge with green flecks looks like Christmas exploded in the best possible way. Top with crushed candy canes for extra crunch and festivity. This version is dangerously refreshing — the mint cuts through the richness, making it weirdly addictive. I've served this at holiday parties where people who claimed they were "too full for dessert" somehow found room for three slices.
Salted Caramel Swirl
Drizzle homemade salted caramel over the filling before rolling up the cake. The caramel seeps into the sponge slightly, creating these incredible pockets of gooey sweetness that contrast with the tangy cream cheese. Use a light hand — too much caramel and your roll won't hold its shape. The salt enhances all the other flavors and keeps this from being cloyingly sweet. It's like taking a trip to the fair but in dessert form.
Triple Chocolate Threat
Add mini chocolate chips to the filling and drizzle the finished roll with chocolate ganache. Use chocolate-filled Oreos for extra chocolate impact. This is for the chocoholics who think regular red velvet is too subtle. The different chocolate textures — cake, chips, ganache, cookie — create this amazing complexity that keeps you coming back for more. Warning: this version has been known to cause chocolate-induced happiness comas.
Berry Red Velvet
Fold fresh raspberry puree into half the filling for a beautiful two-tone effect when you slice it. The tart berries cut through the sweetness and add a sophisticated note that makes this appropriate for adult dinner parties. Swirl the raspberry filling gently so you get pretty pink ribbons throughout. Top with fresh berries for a dessert that looks like it belongs in a French patisserie but tastes like home.
Pumpkin Spice Fall Edition
Add pumpkin pie spice to the sponge and use pumpkin puree in place of some of the buttermilk. This autumn version tastes like fall in every bite and pairs beautifully with the Oreo flavors. The pumpkin keeps the sponge incredibly moist, almost like a pumpkin roll but with red velvet flair. It's become my go-to for Thanksgiving when people are tired of pumpkin pie but still want those cozy flavors.
Storing and Bringing It Back to Life
Fridge Storage
Wrap the roll tightly in plastic wrap, then slide it into an airtight container. It'll keep for up to 5 days in the fridge, though I've never seen one last that long. The key is making sure no air can get to it — air is the enemy of freshness and will dry out your sponge faster than you can say "leftovers." If you've already sliced into it, press plastic wrap directly against the cut surface before wrapping the whole thing. Store it in the back of the fridge where the temperature is most stable, not in the door where temperature fluctuations can cause the filling to weep.
Freezer Friendly
This roll freezes beautifully for up to 2 months. Wrap individual slices in plastic wrap, then aluminum foil, and store them in a freezer bag. This way you can pull out exactly what you need without thawing the whole roll. Let slices thaw in the fridge overnight or at room temperature for 30 minutes. The texture after freezing is actually slightly denser and fudgier — some people prefer it this way. Don't microwave to thaw — it'll turn the filling into a melty mess and make the sponge rubbery.
Best Reheating Method
Honestly, this is best served cold or at room temperature. But if you must warm it slightly, let it sit at room temperature for 15-20 minutes before serving. If your kitchen is particularly cold, you can microwave individual slices for 5-7 seconds — no more or you'll have Oreo lava. Add a tiny splash of water to the plate before microwaving — it creates steam that helps refresh the sponge. Whatever you do, don't reheat the whole roll — the filling will break down and become runny, and you'll end up with a mess that no amount of powdered sugar can disguise.