When I first tried to make a pot pie that could double as a party appetizer, I ended up with a soggy, flavorless mess that made my friends laugh and my kitchen smell like a burnt casserole. The disaster started when I tossed in too much broth, thinking the extra liquid would make the filling silky. Instead, the mixture turned into a watery soup that clung to the crust like a bad habit. I was halfway through when I realized I’d forgotten the key ingredient that gives the dish its signature bite—jalapeño poppers. That moment of panic turned into a revelation, and I vowed to create a version that would make even the most skeptical palate swoon.
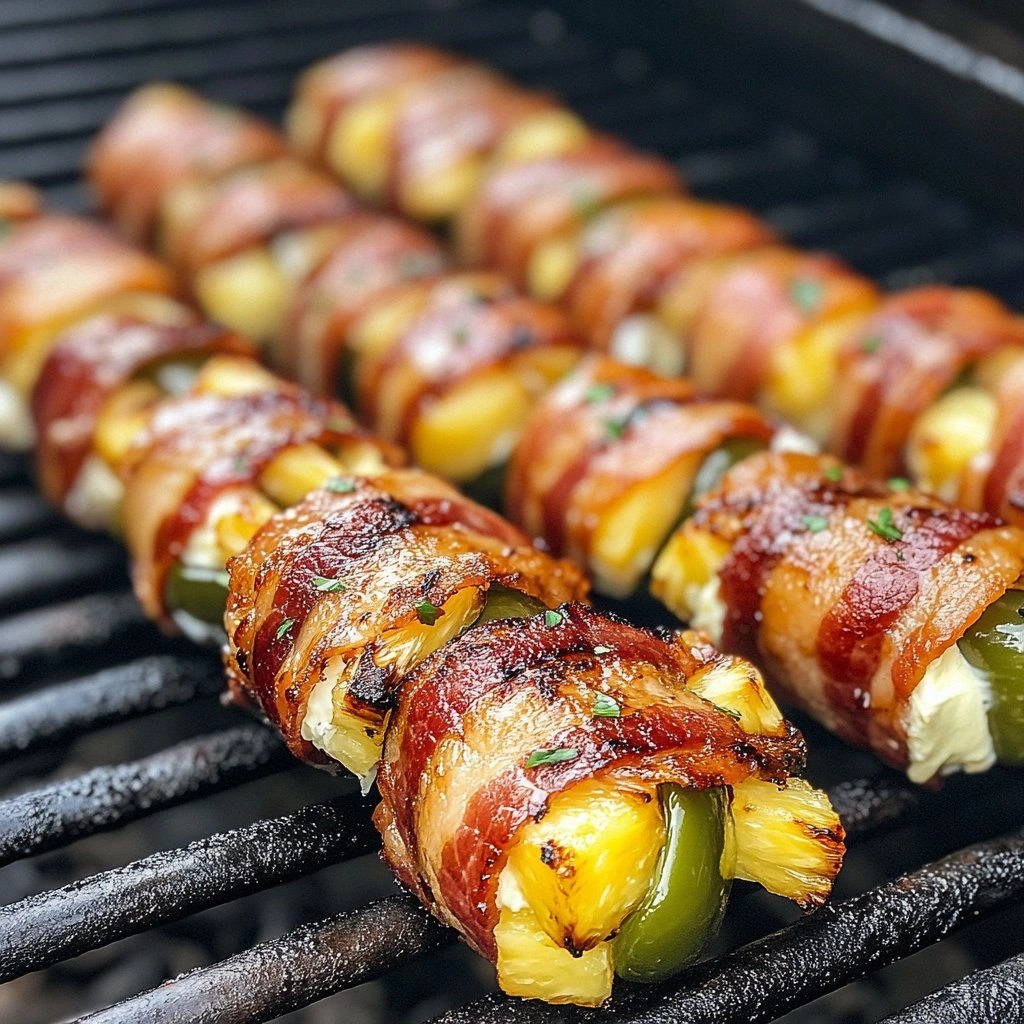
Picture this: a golden crust crackling as it meets the oven, a fragrant steam that rises like a promise, and the first bite that delivers a creamy, cheesy explosion with a subtle kick of heat. The aroma of smoked paprika and fresh thyme lingers in the air, mingling with the buttery scent of caramelized onions. The texture is a perfect balance—crispy on the outside, molten on the inside, with every bite offering a burst of tangy cream cheese and jalapeño heat. The sound of the crust popping as it bakes is almost musical, a satisfying crack that signals the dish is nearing perfection. It’s the kind of dish that turns a regular dinner into an unforgettable culinary event.
What makes this version stand out is not just the combination of flavors, but the way each element is elevated through technique and quality. I’m talking about the crunch of the crust, the melt of the cheeses, the fresh bite of jalapeños, and the savory depth of the broth. Every bite is a symphony of textures and tastes that keeps you coming back for seconds, or thirds if you’re bold enough. The recipe is simple enough to follow for novices, yet sophisticated enough to impress seasoned cooks. I dare you to taste this and not go back for seconds.
Let me walk you through every single step—by the end, you’ll wonder how you ever made it any other way. I’ll share the secrets that turn an ordinary pot pie into a crowd-pleasing masterpiece, and I’ll keep the instructions clear, playful, and downright delicious. You’ll learn how to balance heat and creaminess, how to get that crust just right, and how to layer flavors like a culinary artist. Ready? Let’s dive into the details that will make this dish your new go-to.
What Makes This Version Stand Out
- Flavor: The marriage of creamy cheddar, tangy cream cheese, and fiery jalapeños creates a taste profile that’s both comforting and adventurous. Each bite delivers a creamy base with a subtle, lingering heat that doesn’t overpower the palate. This balance is achieved by carefully selecting the right jalapeños and tempering them with mild cheeses. The result is a dish that feels indulgent without being cloying.
- Texture: A flaky, buttery crust that crackles when you bite into it, juxtaposed against a silky, molten filling. The breadcrumbs add a light crunch that’s just enough to break up the richness. The contrast between the crisp exterior and the gooey interior keeps the dish exciting from the first forkful to the last crumb.
- Simplicity: All the steps can be completed in less than an hour, and the ingredients are pantry staples that most people already have on hand. The recipe requires minimal prep time, making it perfect for weeknight dinners or last-minute gatherings. It’s a recipe that feels effortless but delivers gourmet results.
- Uniqueness: While many pot pies rely on chicken or beef, this version uses a spicy popper-inspired filling that’s rarely seen in the realm of comfort food. The combination of jalapeños and cream cheese is a twist that sets this dish apart from standard casseroles. It’s a fresh take that feels modern yet familiar.
- Crowd Reaction: Friends and family always ask for a second plate. The dish’s vibrant color and enticing aroma make it a conversation starter. It’s the kind of meal that encourages people to linger and enjoy the experience together.
- Ingredient Quality: Using fresh, high‑quality ingredients—like ripe jalapeños and real cheddar—ensures the flavor is bright and authentic. The recipe also encourages using homemade broth if possible, which adds depth and a personal touch. The difference between store‑bought and fresh components is unmistakable.
- Cooking Method: The technique of pre‑baking the crust before filling it with the sauce allows the pastry to stay crisp while the filling stays perfectly moist. The layering method ensures each bite is balanced, and the final bake melds flavors together without overcooking the chicken.
- Make‑Ahead Potential: The pot pie can be assembled ahead of time and refrigerated or frozen, making it ideal for meal prep. When reheated, it retains its flavor and texture, and the crust remains pleasantly flaky. This makes it a versatile dish for both spontaneous and planned meals.
Alright, let’s break down exactly what goes into this masterpiece…
Inside the Ingredient List
The Flavor Base
The foundation of any great pot pie is a rich, savory base. In this recipe, we start with a sauté of onions and garlic that release their sweetness and aroma. The onions are finely chopped so they soften quickly, forming a silky bed for the rest of the ingredients. Garlic adds a punch that lingers, and if you skip it, the dish will feel flat and uninspired. For a deeper flavor, use a mix of white and yellow onions; they caramelize differently and give subtle nuance.
Next comes the chicken—boneless, skinless breasts cut into bite‑sized cubes. The chicken is the heart of the dish, absorbing all the surrounding flavors. If you’re short on time, use pre‑cooked rotisserie chicken; it will still work beautifully but will reduce the overall cooking time. The key is to sear the chicken until it’s golden, which locks in juices and adds a slight crust that contrasts with the creamy filling.
The Texture Crew
Texture is everything in a pot pie. The breadcrumbs, especially panko, give that satisfying crunch when baked on top. They also help absorb excess moisture, preventing the crust from becoming soggy. If you prefer a lighter texture, use a blend of panko and regular breadcrumbs, or even crushed crackers for a different mouthfeel. Remember to toast them lightly in butter before sprinkling them on top; this enhances their flavor and crispness.
Cheese is the star of the texture crew. Cheddar provides a sharp, melty base, while cream cheese adds silkiness and a slight tang. The Parmesan on the crust adds a nutty finish that crisps beautifully. If you’re vegan, substitute dairy cheeses with plant‑based alternatives, but be aware that the melting point and flavor profile may differ slightly. The combination of cheeses ensures every bite is a harmony of melt and crunch.
The Unexpected Star
Jalapeños are the unexpected star that gives this dish its signature heat and freshness. Fresh jalapeños are best for their bright, green flavor, but pickled ones add a tangy depth that’s worth trying. If you’re a heat enthusiast, leave the seeds in; if you prefer a milder experience, remove them. The jalapeños not only add spice but also a pop of color that makes the dish visually striking.
Another unexpected star is the fresh thyme and rosemary. These herbs provide a fragrant, earthy backdrop that balances the richness of the cheeses and the heat of the jalapeños. They also add a subtle herbal note that lifts the overall flavor profile. If you’re missing fresh herbs, dried ones work, but use them sparingly as they are more potent.
The Final Flourish
Finally, the finishing touches bring everything together. A splash of heavy cream thickens the sauce, making it velvety and luscious. Lemon juice adds brightness, cutting through the richness and preventing the dish from feeling heavy. A pinch of salt and pepper brings all the flavors together, and a sprinkle of fresh cilantro at the end adds a burst of freshness that brightens the palate.
Everything’s prepped? Good. Let’s get into the real action…

The Method — Step by Step
-
Start by preheating your oven to 375°F (190°C) while you prepare the filling. This ensures the oven is hot enough to give the crust a golden finish. As the oven warms, set a large skillet over medium heat and add a splash of olive oil. Once the oil shimmers, add the diced onions and cook until translucent, about 3–4 minutes. The aroma should be sweet and inviting, signaling that your base is ready.
Now that the onions are softened, introduce the minced garlic and let it bloom for about 30 seconds. The garlic’s scent should become fragrant but not burnt. Then, add the cubed chicken to the skillet. Sear the chicken until each side turns a deep golden brown, which should take about 5 minutes. The seared chicken will hold its juices better and develop a richer flavor profile.
-
With the chicken browned, pour in the chicken broth and let it simmer for a minute to deglaze the pan. Scrape any browned bits from the bottom; they’re full of flavor. Add the diced jalapeños, ensuring you keep the seeds if you want that extra kick. Stir the mixture until the jalapeños begin to soften, which should take about 3 minutes. The broth will thicken slightly, forming a base for the creamy sauce.
Next, fold in the softened cream cheese, allowing it to melt into the broth. Stir continuously until the mixture is smooth and velvety. Then, add the shredded cheddar cheese, which will melt and thicken the sauce further. Keep the heat low to prevent the cheese from separating. The sauce should coat the back of a spoon and feel silky.
-
At this point, introduce the smoked paprika, garlic powder, onion powder, thyme, and rosemary. These spices bring depth and a smoky undertone that balances the heat. Stir well to combine, ensuring the spices are evenly distributed. The aroma should become complex, hinting at the final flavor profile of the dish.
Now, pour in the heavy cream and lemon juice. This combination thickens the sauce and adds a bright, citrusy note that cuts through the richness. Stir until the sauce is smooth and glossy. Taste and adjust salt and pepper to your preference. The sauce should be creamy, slightly tangy, and full of flavor.
-
While the sauce simmers, prepare the crust. In a medium bowl, combine flour, salt, and pepper. Add the cold butter pieces and use a pastry cutter or your fingertips to blend until the mixture resembles coarse crumbs. The butter should be cold to keep the crust flaky. If you prefer a pre‑made crust, you can use a store‑bought pie crust for convenience.
Roll the dough out on a floured surface until it’s about 1/8 inch thick. Cut the dough into circles that fit your baking dish, leaving a little extra to cover the top. Place the bottom crust in the dish, pressing it into the corners. This will serve as the base for the filling.
-
Spread the creamy filling over the crust, ensuring it’s evenly distributed. The filling should be thick enough to hold its shape but still slightly loose so it doesn’t sink into the crust. This is the moment of truth; the filling should look glossy and inviting. If it looks too runny, let it simmer a bit longer to thicken.
Next, sprinkle the breadcrumbs evenly over the top. The breadcrumbs will create a light crunch once baked. Add a pinch of grated Parmesan on top of the breadcrumbs for an extra layer of flavor and a golden finish. The breadcrumbs should be lightly toasted in butter before adding to the crust to enhance their flavor.
-
Cover the pot pie with the top crust, sealing the edges by crimping them together with a fork. This prevents the filling from leaking out during baking. If you’re using a pre‑made crust, simply place it on top and crimp the edges. The crust should be snug but not too tight; you want it to expand slightly as it bakes.
Make a few slits in the top crust to allow steam to escape. This will help prevent the crust from becoming soggy and will also give it a beautiful, even rise. The slits should be evenly spaced, creating a decorative pattern. The crust should look golden and crisp when it’s done.
-
Bake the pot pie in the preheated oven for 25–30 minutes, or until the crust is golden brown and the filling is bubbly. The filling should be bubbling around the edges, indicating that it’s fully cooked. Check the crust after 20 minutes; if it’s browning too fast, tent it with foil to prevent burning.
While the pie is baking, keep an eye on the steam escaping from the slits. If the steam is heavy, it’s a sign the filling is hot and ready. Once the pie is done, let it rest for 5 minutes before slicing. This allows the filling to set, preventing it from spilling out.
-
Remove the pie from the oven and let it cool for a few minutes. The crust should still be crisp, but the filling should be firm enough to hold its shape. Gently slide a knife around the edges to loosen the crust before serving. The aroma should be irresistible, filling the kitchen with a warm, savory scent.
Finally, garnish with chopped fresh cilantro for a burst of color and freshness. A squeeze of lemon over the top adds a bright finish that balances the richness of the dish. Serve hot, and watch as the first forkful melts in your mouth, revealing layers of cheese, jalapeño, and buttery crust. This is the moment you’ll want to capture on camera and share with friends.
Insider Tricks for Flawless Results
The Temperature Rule Nobody Follows
Many cooks think a high oven temperature will give a crisp crust, but it often burns the edges before the filling cooks through. The trick is to bake at a moderate 375°F (190°C) and keep an eye on the crust’s color. If you notice browning too quickly, tent the pie with foil. This subtle temperature control ensures the filling stays moist and the crust stays golden.
Why Your Nose Knows Best
The scent of a pot pie rising in the oven is a reliable indicator of doneness. When the steam is thick and the aroma is rich, the filling has reached its peak. A subtle citrusy note from the lemon juice will signal the sauce’s acidity is balanced. Trust your nose; it’s a seasoned chef’s secret weapon.
The 5-Minute Rest That Changes Everything
Letting the pie rest for 5 minutes after baking allows the filling to set and the flavors to meld. This short pause prevents the filling from sliding off the crust when you slice. It also gives the crust a moment to firm up, making each bite crisp. I swear by this step—skip it and you’ll get a messy mess.
Use Fresh Herbs for a Burst of Color
Fresh thyme and rosemary add a fragrant aroma that enhances the dish’s depth. If you can’t find fresh herbs, use dried ones but reduce the quantity by half; dried herbs are more concentrated. The fresh herbs also provide a visual pop of green that makes the dish more appetizing.
Don’t Skimp on the Butter
Butter is the secret to a flaky crust and a rich filling. Using too little can result in a dry crust; too much can make it greasy. Aim for a 1:1 ratio of flour to butter by weight for a perfect balance. If you’re using a pre‑made crust, look for one that lists butter as a primary ingredient.
Keep the Jalapeños Fresh
Fresh jalapeños provide a bright, crisp heat that canned or pickled peppers lack. They also offer a pop of color that makes the dish visually appealing. If you’re short on fresh jalapeños, use frozen, but thaw them first and pat dry to avoid excess moisture.
Creative Twists and Variations
This recipe is a playground. Here are some of my favorite ways to switch things up:
Smoky Chipotle Twist
Swap the fresh jalapeños for chipotle peppers in adobo sauce. The smoky, deep heat transforms the dish into a Mexican‑inspired delight. Use a tablespoon of adobo sauce to keep the heat balanced. This variation pairs well with a side of cilantro lime rice.
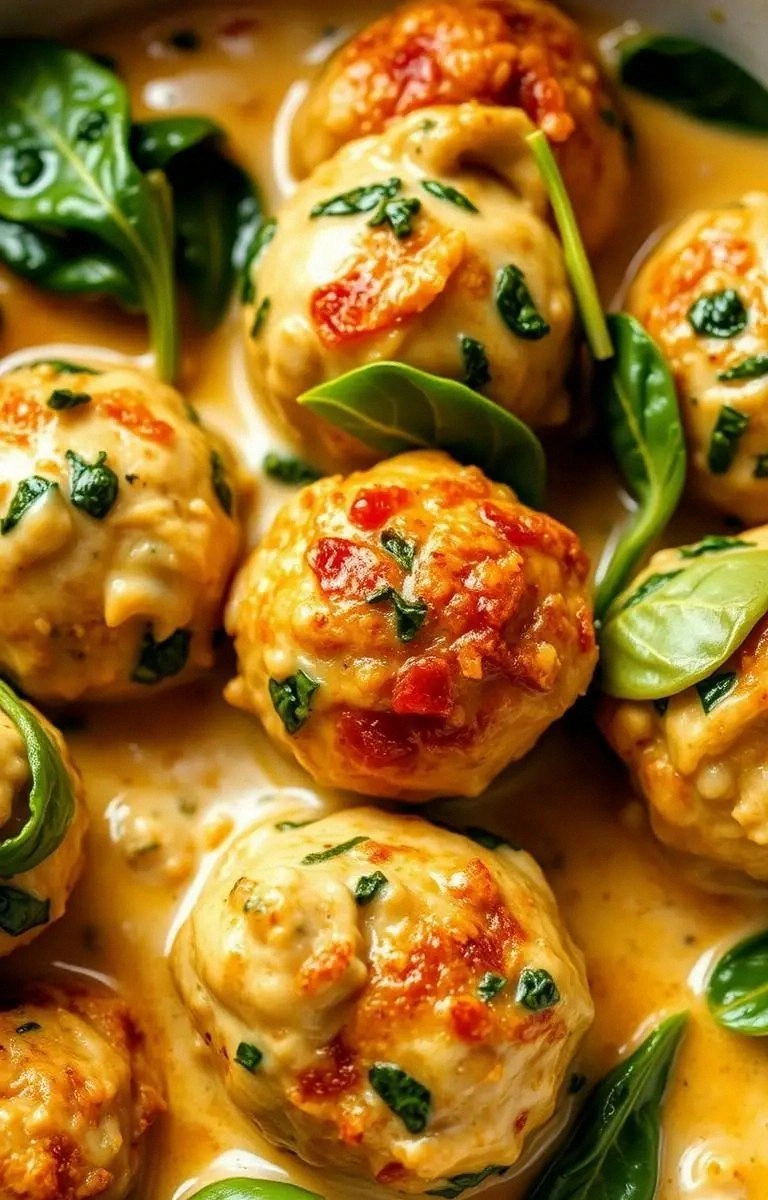
Spinach and Feta Delight
Replace half of the cheddar with crumbled feta and fold in a cup of wilted spinach. The feta adds tang, while the spinach brings earthiness and a pop of green. This version is lighter but still rich, making it a great summer option.
Buffalo Chicken Flavor
Introduce a splash of buffalo sauce to the filling for a spicy kick. Add a handful of blue cheese crumbles on top before baking. This version is perfect for game‑day gatherings and pairs beautifully with celery sticks.
Herb‑Infused Parmesan Crust
Mix chopped fresh parsley and basil into the breadcrumb topping. Add a tablespoon of grated Parmesan for an extra layer of umami. This crust adds a burst of herbaceous flavor and a golden finish.
Vegan Version
Use plant‑based cream cheese and cheddar alternatives, and replace butter with coconut oil. Substitute the chicken with sautéed tofu or tempeh for protein. The result is a creamy, satisfying dish that’s completely dairy‑free.
Breakfast Variation
Swap the chicken for diced ham and add a handful of shredded Swiss cheese. Fold in a pinch of nutmeg for a warm, comforting flavor. Serve the pot pie on a bed of sautéed spinach for a hearty breakfast.
Storing and Bringing It Back to Life
Fridge Storage
Store any leftovers in an airtight container in the refrigerator for up to 3 days. The crust may soften slightly, but it will still taste great when reheated. When ready to eat, reheat in the oven at 350°F (175°C) for 10 minutes to restore crispness.
Freezer Friendly
Wrap the pot pie tightly in aluminum foil and place it in a freezer bag. It will keep for up to 3 months. Thaw overnight in the refrigerator before reheating. This is perfect for meal prep or a quick dinner on a busy weeknight.
Best Reheating Method
Reheat in the oven at 350°F (175°C) for 15–20 minutes, or until the filling is hot and the crust is crisp. Add a splash of water to the bottom of the dish before reheating; this steams the filling and keeps it moist. A quick 2‑minute broil at the end will give the crust a fresh golden finish.
And that’s the full journey from pantry to plate. You’ve now mastered a dish that’s bold, comforting, and utterly unforgettable. I’ve poured my heart into this recipe, and I can’t wait to hear how it transforms your table. Stay with me here — this is worth it.