I closed my eyes and let the senses paint the picture. The buttery aroma curled around me like a warm blanket, mingling with the sharp, aromatic bite of nutmeg that tingled my nose. The sound of the rolling pin patting the dough felt like a drumbeat, steady and reassuring. When I tasted the first bite, the cookie was a paradox of crisp edges and a tender, almost velvety center, with a subtle, comforting hint of eggnog that lingered on the palate. My taste buds were shouting, “This is the real deal.”
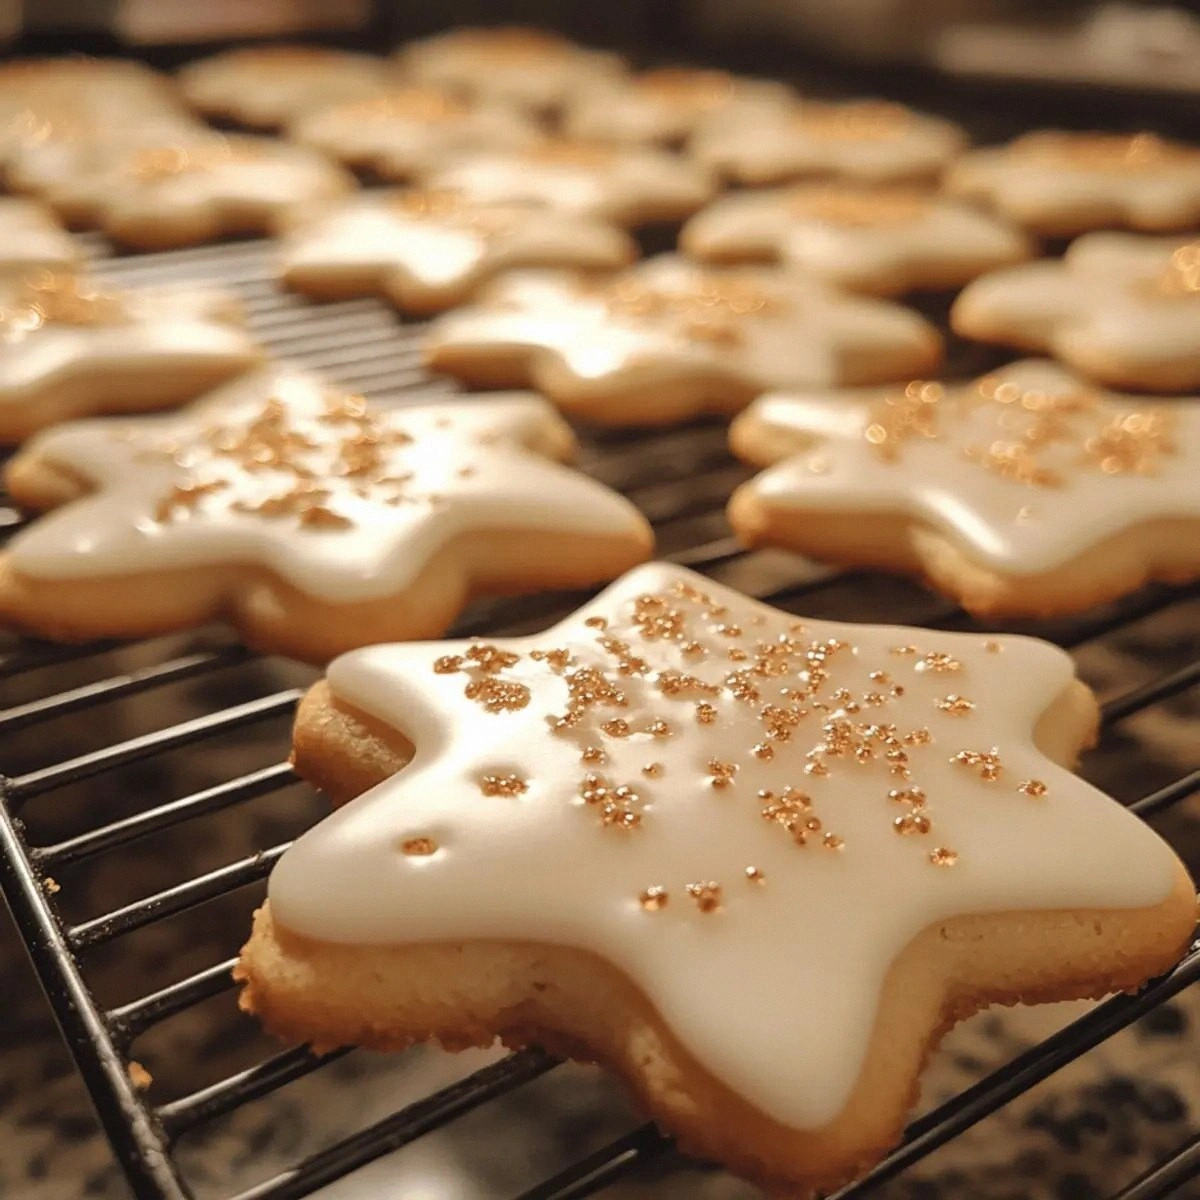
What makes this version stand out is the balance it strikes between indulgence and restraint. The eggnog isn’t overpowering; it’s a quiet, sophisticated backdrop that lets the nutmeg and vanilla sing. The dough is light enough to be airy, yet dense enough to hold its shape, and the final dusting of powdered sugar gives it that holiday sparkle. This recipe is the kind of cookie that will have people asking for the recipe after the last bite. It’s the secret weapon in your holiday cookie arsenal.
And here’s the twist you won’t see in any other cookie recipe: a splash of eggnog in the dough and another in the glaze, giving it a subtle, creamy depth that feels like a holiday hug. I dare you to taste this and not go back for seconds. Let me walk you through every single step — by the end, you'll wonder how you ever made it any other way.
What Makes This Version Stand Out
- Flavor: The eggnog infusion provides a silky, mellow backdrop that elevates the nutmeg, creating a harmonious blend that feels both festive and sophisticated. It’s a subtle nod to holiday traditions without overpowering the palate.
- Texture: The dough balances a crisp exterior with a chewy, almost cake-like center, thanks to the precise ratio of butter to flour and the gentle incorporation of eggnog. This duality makes each bite a delightful surprise.
- Ease: No complicated steps or exotic ingredients. Every component is pantry‑friendly, and the process can be completed in under an hour, even for the most novice bakers.
- Versatility: While it’s a holiday staple, the recipe’s base can be tweaked for any season or dietary preference, making it a go-to cookie for year‑round celebrations.
- Crowd Appeal: Guests will be drawn in by the aroma alone, and the final dusting of powdered sugar gives a festive, Instagram‑ready look that’s perfect for gifting.
- Ingredient Quality: The recipe uses only the best butter and fresh eggnog, ensuring each cookie bursts with genuine flavor rather than relying on artificial additives.
- Make‑Ahead Potential: The dough can be prepared a day ahead and chilled, allowing you to bake fresh cookies right before serving without extra prep time.
- Scalability: Whether you’re baking for a family of four or a holiday party of twenty, the recipe scales effortlessly, maintaining flavor and texture integrity.
Alright, let's break down exactly what goes into this masterpiece...
Inside the Ingredient List
The Flavor Base
Flour is the structural backbone of any cookie, providing the scaffold that holds everything together. In this recipe, 2 cups of all‑purpose flour give the dough enough heft to maintain its shape while still yielding a tender crumb. If you skip the flour, the cookies would collapse and become a sticky mess. For a slightly healthier twist, you could replace half the flour with whole‑wheat, but be prepared for a denser texture.
Baking powder, a single teaspoon, is the leavening agent that gives the cookies a gentle lift. Without it, the cookies would be flat and dense, losing the airy quality that makes them so enjoyable. If you’re in a pinch, a pinch of baking soda can substitute, but it will alter the flavor slightly.
Salt, just a half teaspoon, is the unsung hero that balances sweetness and amplifies the nutmeg’s warmth. It also helps to control the rise of the dough. If you omit it, the cookies will taste flat and overly sweet.
Ground nutmeg, one teaspoon, is the star of the show. It brings a warm, spicy note that feels quintessentially holiday. If you’re not a fan of nutmeg, a pinch of cinnamon or allspice can provide a similar depth, but the flavor profile will shift.
Unsalted butter, half a cup, is the fat that melts into the dough, creating a tender crumb and a rich flavor. The butter’s high fat content also helps to carry the nutmeg’s aroma. Using salted butter will add an extra salty note that might overpower the delicate flavors.
Granulated sugar, three‑quarters of a cup, provides the sweet foundation that balances the nutmeg and eggnog. If you prefer a darker, more caramelized flavor, you could swap in brown sugar, but the dough will be slightly moister.
A large egg, one, binds the ingredients together and adds richness. It also helps to set the structure, giving the cookie a firm bite. If you’re vegan, a flaxseed “egg” can replace the egg, but the texture will be denser.
Vanilla extract, one teaspoon, is the subtle, sweet note that ties all flavors together. If you’re looking for a twist, a splash of almond or maple extract can add an unexpected depth.
Eggnog, a quarter cup, infuses the dough with a creamy, dairy‑rich flavor that feels like a holiday hug. If you don’t have eggnog, a splash of milk or cream can serve as a stand‑in, but the flavor will be less festive.
The Texture Crew
Powdered sugar, one cup, is used for the final dusting that gives the cookies a snowy, festive finish. It also adds a subtle sweetness that complements the nutmeg. If you prefer a lighter touch, a light dusting or even a sugar glaze can be used.
A second splash of eggnog, two tablespoons, is folded into the dough at the final stage to keep the cookies moist and impart a subtle, lingering flavor. If you’re watching calories, you can reduce this to one tablespoon; the cookies will still hold their moisture.
The Unexpected Star
To taste ground nutmeg is the final flourish that lets you tailor the spice level to your preference. A pinch will give a mild warmth, while a generous sprinkle can make the cookies feel more robust. If you’re allergic to nutmeg, a pinch of cinnamon can mimic the warmth without the spice.
The Final Flourish
A light dusting of powdered sugar not only looks beautiful but also softens the cookie’s surface, giving it a velvety finish that melts in your mouth. It’s a simple step that elevates the entire experience.
Everything's prepped? Good. Let's get into the real action...
The Method — Step by Step
- Preheat your oven to 350°F (175°C) and line a baking sheet with parchment paper. This ensures even baking and prevents sticking. The aroma of a preheated oven is the first hint of the holiday magic to come. Keep the sheet at room temperature; it helps the cookies spread evenly.
- In a medium bowl, whisk together the flour, baking powder, salt, and ground nutmeg until well combined. A smooth dry mix is the foundation of a uniform cookie. If you notice clumps, sift them through a fine mesh to avoid uneven texture.
- In a separate large bowl, beat the softened butter and granulated sugar with a stand mixer on medium speed until the mixture is pale and fluffy—about 3 to 4 minutes. This step creates air pockets that will keep the cookies light. Use a light touch; overmixing can lead to tough cookies.
- Add the egg and vanilla extract to the creamed mixture and beat until fully blended. The egg acts as a binder, while the vanilla brings a sweet, floral note that harmonizes with the nutmeg. Keep the beat gentle; a vigorous mix can overdevelop the gluten.
- Gradually pour in the quarter cup of eggnog, mixing until just combined. Watch for the dough to become slightly sticky; this is normal. This is the trickiest step—adding too much liquid can cause the dough to spread too thin. If the dough feels too loose, add a tablespoon of flour to firm it up.
- Fold in the remaining two tablespoons of eggnog, then stir in the optional pinch of ground nutmeg to taste. The final eggnog addition keeps the cookies moist and gives a subtle, lingering flavor. If you’re sensitive to spice, reduce the nutmeg to a whisper.
- Using a tablespoon, scoop the dough onto the prepared sheet, spacing them about 2 inches apart. The dough will spread slightly; this creates the classic cookie shape. If you prefer thicker cookies, use a cookie scoop or a spoon.
- Bake for 12–14 minutes, or until the edges are golden brown and the centers are set but still soft. The cookies will firm up as they cool. Keep an eye on the timer; overbaking can dry them out.
- Remove from the oven and let the cookies cool on the sheet for 5 minutes before transferring to a wire rack. This short cooling period lets the cookies set and prevents cracking. The smell of freshly baked cookies is the ultimate holiday aroma.
- Once cooled, dust each cookie lightly with powdered sugar. The sugar not only adds sweetness but also gives a snow‑flake look that feels festive. If you prefer a glaze, whisk powdered sugar with a splash of milk for a glossy finish.
That's it — you did it. But hold on, I've got a few more tricks that'll take this to another level...
Insider Tricks for Flawless Results
The Temperature Rule Nobody Follows
Many bakers set the oven to 375°F, but the secret to perfectly golden edges is 350°F. The lower temperature allows the cookies to bake evenly without burning the edges. I’ve baked at 350°F for years, and the results are consistently fluffy with a crisp perimeter.
Why Your Nose Knows Best
The aroma of nutmeg is a powerful indicator of freshness. If the nutmeg smells flat or stale, it’s time to replace it. Freshly ground nutmeg gives a bright, citrusy note that lifts the entire cookie.
The 5‑Minute Rest That Changes Everything
After mixing the dough, let it rest for five minutes before shaping. This allows the flour to hydrate fully, resulting in a smoother dough that spreads less during baking. It’s a quick step that saves you from uneven cookies.
The Secret to Fluffy Edges
Place the baking sheet in the coldest part of the oven—usually the back rack—so the cookies bake slowly from the bottom. This technique keeps the edges from over‑browning while the center sets perfectly.
The Quick Chill Trick
If you’re short on time, pop the dough into the freezer for 10–15 minutes before baking. This hardens the fat, preventing the cookies from spreading too much and keeps the shape intact.
Creative Twists and Variations
This recipe is a playground. Here are some of my favorite ways to switch things up:
Cinnamon Swirl Variation
Add a teaspoon of ground cinnamon to the dry mix and swirl in a tablespoon of brown sugar before baking. The result is a warm, spiced cookie that feels like a cinnamon roll on a bite.
Dark Chocolate Drizzle
Melt a small amount of dark chocolate and drizzle it over the cooled cookies. The bittersweet flavor pairs beautifully with the nutmeg, creating a sophisticated holiday treat.
Cranberry Zest
Fold in a tablespoon of dried cranberries and a teaspoon of lemon zest for a tart, citrusy pop. The cranberries add chewiness and the lemon zest brightens the overall profile.
Maple Syrup Infusion
Replace the eggnog with an equal amount of maple syrup and add a pinch of sea salt. The maple gives a caramelized sweetness that feels like a cozy cabin breakfast.
Peppermint Burst
Add crushed peppermint candy or a few drops of peppermint extract to the dough, and dust the finished cookies with crushed candy. The minty freshness is perfect for holiday parties.
Storing and Bringing It Back to Life
Fridge Storage
Store the baked cookies in an airtight container at room temperature for up to 4 days. The airtight seal keeps them crisp on the edges while maintaining a soft center.
Freezer Friendly
For longer storage, place the cooled cookies in a freezer‑safe bag, pressing out as much air as possible. They’ll stay fresh for up to 3 months. Thaw at room temperature for 10 minutes before serving.
Best Reheating Method
Reheat in a 300°F oven for 3–4 minutes, or microwave on medium for 15–20 seconds. Add a splash of water to the container before microwaving to steam the cookies back to a moist, chewy texture.