Ever had one of those nights where the fridge looks like a crime scene and you’re left scrambling for something that will actually satisfy the craving? I was in that exact situation last Tuesday, my pantry a barren wasteland, and the only thing that seemed promising was a battered can of chicken stock and a handful of spices. I stared at the empty space, then decided that if I was going to make a meal, it better be something that could turn a kitchen disaster into a triumph. So I grabbed two boneless, skin‑less chicken breasts, a splash of butter, and a cup of heavy cream, and I was about to create a dish that would make you question every other recipe you’ve ever tried.
The moment I cracked the first chicken breast into the hot skillet, the kitchen filled with a buttery aroma that made my mouth water before I even tasted anything. The sizzle was loud enough to drown out the television, and the golden crust that formed on the meat was like a promise of flavor. The steam that rose carried the faint scent of garlic and onion, a subtle hint that something savory was about to happen. As the chicken browned, I could almost hear the sizzling whisper of a secret technique that would elevate this simple dish into a showstopper. The texture of the sauce, once it thickened, was silky and velvety, coating the chicken like a rich, buttery blanket. And that final splash of cream, when it hit the pan, was the moment that turned everything from ordinary to unforgettable.
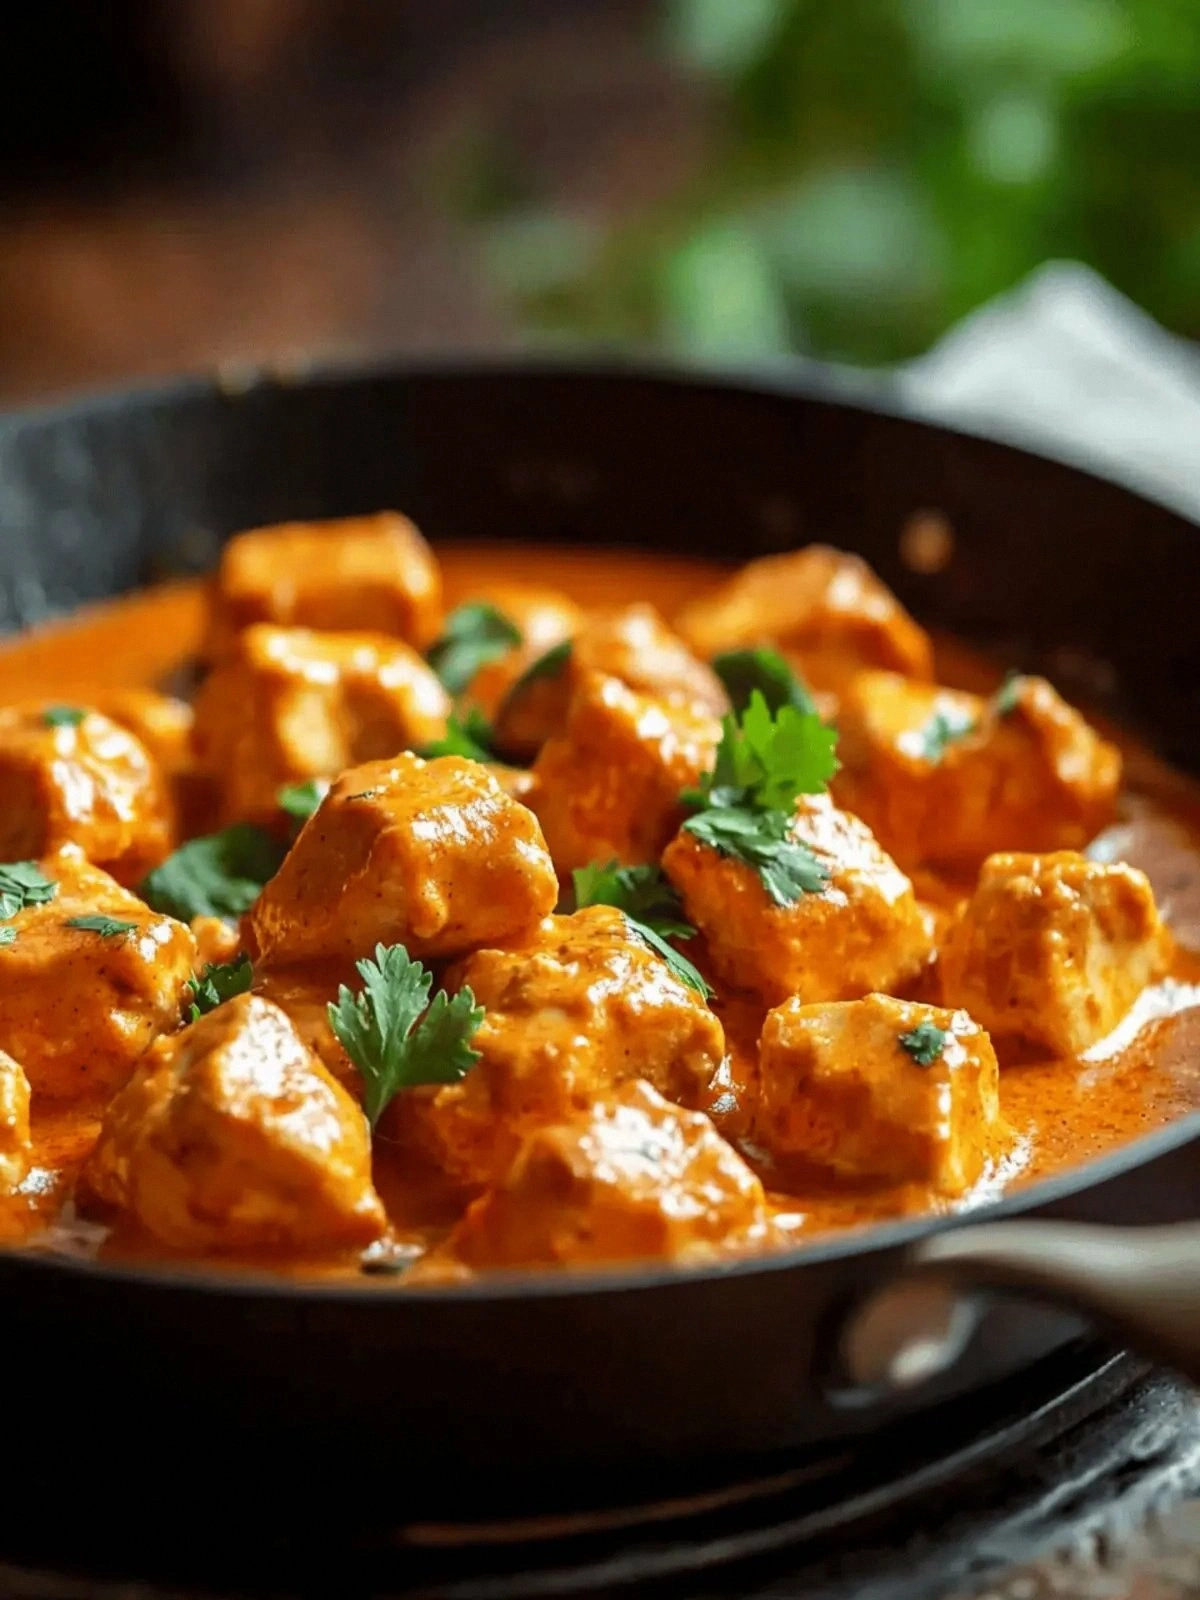
What makes this version stand out is that it takes a classic butter chicken style and strips it down to its most essential, high‑impact elements. It’s not about a labyrinth of spices; it’s about letting the butter and cream do the heavy lifting while a handful of aromatics bring depth. The result is a sauce that coats the chicken like velvet, a texture that is both tender and slightly caramelized on the edges. The flavor profile is balanced: the richness of butter and cream is tempered by the brightness of garlic and onion, and a subtle smoky kick that comes from a pinch of smoked paprika. It’s a dish that feels both indulgent and approachable, making it a perfect crowd‑pleaser for family dinners or casual gatherings.
I’ll be honest — I ate half the batch before anyone else even got a taste. That’s because the sauce clings to the meat and every bite feels like a new discovery. I dared you to taste this and not go back for seconds, and I think you’ll find it hard to resist. Most recipes get this completely wrong by over‑seasoning or using too much liquid, but here the simplicity is the secret weapon. Picture yourself pulling this out of the skillet, the whole kitchen smelling incredible, and the anticipation building as you serve it over a bed of rice or a loaf of crusty bread.
Okay, ready for the game‑changer? This next part? Pure magic. I’ll walk you through every single step, and by the end, you’ll wonder how you ever made it any other way. Let’s dive in.
What Makes This Version Stand Out
- Bold Flavor: The buttery base delivers a rich, creamy mouthfeel that elevates the chicken to a new level of indulgence. The subtle heat from a pinch of smoked paprika keeps the dish lively without overwhelming the palate.
- Effortless Texture: The quick sear creates a caramelized crust while the cream softens the meat, producing a silky sauce that clings to every bite. No need for heavy roux or thickening agents.
- Ingredient Simplicity: Only six core components, each chosen for maximum flavor impact. The recipe feels approachable for beginners yet delivers a restaurant‑style result.
- Time Efficiency: From prep to plate in 45 minutes, this dish is perfect for weeknight dinners or last‑minute dinner parties.
- Versatile Crowd‑Pleaser: The sauce’s richness and subtle spice make it a hit with both kids and adults. Pair it with rice, naan, or a simple green salad for a balanced meal.
- Make‑Ahead Potential: The dish holds up beautifully in the fridge and reheats without losing its silky texture. Store it with a splash of cream to keep it moist.
- Minimal Cleanup: One skillet, one pot, and a single pan for the sauce mean you spend less time cleaning and more time enjoying.
Inside the Ingredient List
The Flavor Base
The butter is the backbone of this dish, providing a luxurious mouthfeel and a deep, nutty flavor that sets the tone for the entire sauce. When melted, it creates a glossy sheen that makes the dish look as good as it tastes. Skipping the butter would leave the sauce thin and lifeless, but adding a splash of lemon juice at the end can brighten the richness without cutting into the buttery notes. For those who prefer a dairy‑free version, try using a plant‑based butter that mimics the same flavor profile.
The heavy cream is the velvety heart of the sauce, thickening it into a silky coating that clings to the chicken. It balances the saltiness of the spices and adds a subtle sweetness that contrasts the savory elements. If you’re watching calories, you can replace it with a half‑and‑half or a light coconut milk; the texture will change slightly but the flavor will remain comforting. A pinch of salt in the cream helps bring out the natural sweetness of the dairy, so don’t skip it.
Garlic is the aromatic engine that drives the entire flavor profile. When minced and sautéed, it releases its oils, creating a fragrant base that permeates the sauce. Cutting the garlic into thin slices instead of mincing can give a milder, sweeter bite, which is great for those who like a subtle garlic presence. If you’re allergic or simply dislike the bite, you can use garlic powder, but the fresh flavor will be noticeably different.
Onion provides a sweet, caramelized undertone that balances the richness of the butter and cream. Sautéing it until translucent brings out its natural sugars, creating a subtle depth that complements the chicken. If you’re short on time, a quick sauté in high heat will still give you the essential sweetness; just keep an eye on it to avoid burning.
The Texture Crew
The chicken breasts themselves are the star, chosen for their lean, tender qualities. Brushing them with a bit of olive oil before seasoning helps the spices adhere and creates a more even sear. If you prefer a juicier bite, consider using bone‑in thighs; they’ll retain moisture better during cooking. Regardless of the cut, ensuring the chicken is at room temperature before cooking reduces the chance of uneven cooking.
The spices, though minimal, are critical for that smoky kick. A pinch of smoked paprika, a dash of cayenne, and a sprinkle of cumin bring depth without overpowering the dish. If you’re not a fan of heat, reduce the cayenne or replace it with sweet paprika for a milder flavor. The key is to taste as you go; this prevents the spices from becoming too dominant.
The Unexpected Star
A splash of lemon juice at the end brightens the sauce, cutting through the richness and adding a bright, zesty note that lifts the entire dish. The acidity also helps to balance the sweetness of the cream and the savory depth of the butter. If you’re in a pinch, a squeeze of lime can serve as an effective substitute, though it will slightly alter the flavor profile. Keep the lemon or lime fresh; an old squeeze can taste flat.
The final flourish is a handful of fresh cilantro or parsley, which adds a burst of green color and a fresh, herbal aroma. This herb not only enhances the visual appeal but also introduces a subtle peppery note that complements the smoky paprika. If cilantro is not your thing, mint or basil can offer a different twist while still keeping the dish fresh.
Everything's prepped? Good. Let's get into the real action.
The Method — Step by Step
- Season the chicken breasts on both sides with salt, pepper, a pinch of smoked paprika, and a dash of cayenne. Let them sit at room temperature for five minutes; this allows the seasoning to penetrate and ensures even cooking. The anticipation of that first sizzle is part of the fun. Keep the chicken out of the fridge until you’re ready to cook, or you’ll end up with a tough texture.
- Heat a large cast‑iron skillet over medium‑high heat and add the butter. Once the butter melts and starts to foam, slide in the chicken breasts. The skillet should hiss as the chicken hits the pan, a sign that the sear is forming. Cook for 3-4 minutes on each side, or until the edges are golden brown and a meat thermometer reads 165°F. Flip only once to maintain a crisp crust.
- Once the chicken is seared, remove it from the skillet and set it aside on a plate. This prevents the chicken from continuing to cook in the residual heat and ensures it stays juicy. Letting it rest for a minute also allows the juices to redistribute, which keeps the meat tender.
- In the same skillet, add the sliced onion and minced garlic. Sauté until the onion turns translucent and the garlic releases its aroma, about 2-3 minutes. The key is to keep the heat medium so the garlic doesn’t burn and turn bitter. If the mixture starts to stick, splash a little water to deglaze.
- Pour in the heavy cream and stir to combine, letting the sauce simmer gently for 5 minutes. The cream will reduce slightly, thickening into a silky sauce that coats the skillet. Taste for seasoning and adjust with more salt or a splash of lemon juice if needed. The sauce should be glossy, not watery.
- Return the chicken breasts to the skillet, nestling them into the sauce. Reduce the heat to low, cover, and let everything simmer together for 5-7 minutes. The chicken will finish cooking, absorbing the sauce’s flavors while remaining moist. The aroma at this point should be intoxicating, a mix of butter, garlic, and a hint of citrus.
- Finish by stirring in fresh cilantro or parsley and a squeeze of lemon juice. The fresh herbs brighten the dish and add a pop of color that makes it Instagram‑ready. Plate the chicken on a bed of fluffy rice or a slice of crusty bread, and drizzle any remaining sauce over the top.
- Serve immediately while the sauce is still warm and silky. If you’re plating for guests, add a small bowl of extra sauce for dipping. The dish is so rich that a single spoonful can satisfy a hungry palate. Remember, the key to success is the balance of buttery richness and bright acidity.
That's it — you did it. But hold on, I've got a few more tricks that'll take this to another level.
Insider Tricks for Flawless Results
The Temperature Rule Nobody Follows
Many people cook chicken at high heat, causing the exterior to burn while the interior remains undercooked. I always start with medium‑high heat to get a good sear, then quickly reduce to medium‑low once the chicken is in the pan. This method locks in juices and keeps the meat tender. A friend once tried the high‑heat approach and ended up with a dry, rubbery mess that needed a rescue sauce.
Why Your Nose Knows Best
Your sense of smell is your best ally when cooking. If the sauce starts to thicken too quickly, it will give off a slightly burnt aroma. Reduce the heat immediately to prevent that. A friend once added too much cream and the sauce turned cloudy; the smell of dairy burning was a clear sign to lower the flame.
The 5‑Minute Rest That Changes Everything
Letting the chicken rest after searing allows the juices to redistribute, making the meat incredibly juicy. Skipping this step often results in a dry, over‑cooked bite. I always let the chicken sit for 5 minutes, covered loosely with foil, before adding it back to the sauce.
The Secret Ingredient Swap
If you want a slightly tangier flavor, swap half the cream for Greek yogurt. The yogurt adds acidity and thickness without the heaviness. Make sure to temper the yogurt by whisking it with a bit of the hot sauce before adding it to the skillet to prevent curdling.
The Quick Cooling Trick
When reheating leftovers, add a splash of water or broth to the pan before warming. This steams the sauce back to its silky consistency, preventing it from drying out. My friend used this trick to revive a week‑old batch, and the sauce was as luscious as the first day.
The Flavor Layering Technique
Layer flavors gradually: start with the base spices, then add garlic and onion, followed by the cream, and finish with fresh herbs. This progression ensures each layer builds on the previous one, creating depth. I always keep a small bowl of the final sauce on the stove to adjust seasoning at the last minute.
Creative Twists and Variations
This recipe is a playground. Here are some of my favorite ways to switch things up:
Spicy Chipotle Kick
Add a tablespoon of chipotle in adobo sauce to the cream for a smoky, spicy depth. The chipotle pairs beautifully with the butter, creating a bold flavor that’s perfect for adventurous eaters. Serve over corn rice to complement the heat.
Coconut Cream Fusion
Swap the heavy cream for coconut milk and add a pinch of curry powder. This gives the dish a tropical twist, with the coconut’s sweetness balancing the spices. Pair it with jasmine rice for an exotic touch.
Herb‑Infused Butter
Before cooking, melt the butter with fresh rosemary, thyme, and a bay leaf. This infuses the butter with aromatic herbs, adding a layer of complexity to the sauce. Remove the herbs before adding the cream to keep the sauce clear.
Lemon‑Garlic Zest
Add a teaspoon of lemon zest to the sauce and finish with a drizzle of lemon-infused olive oil. The citrus zest brightens the dish, making it feel lighter and more refreshing. This version is ideal for summer evenings.
Mushroom Medley
Sauté sliced mushrooms with the onions and garlic for a meaty texture. The mushrooms absorb the buttery sauce, turning the dish into a hearty, vegetarian-friendly option. Add a splash of white wine to deglaze and deepen the flavor.
Cheesy Finale
Fold in a handful of shredded Gruyère or cheddar just before serving. The cheese melts into the sauce, creating a gooey, indulgent finish. This twist is perfect for a family gathering where everyone loves a cheesy dish.
Storing and Bringing It Back to Life
Fridge Storage
Store the cooked dish in an airtight container for up to three days in the refrigerator. The sauce will thicken slightly, so when reheating, add a splash of cream or milk to restore its silky texture. Keep the chicken pieces separate from the sauce if you want to control the moisture level.
Freezer Friendly
For longer storage, freeze the dish in individual portions for up to two months. When ready to eat, thaw overnight in the refrigerator and reheat gently on low heat. If the sauce becomes too thick after freezing, stir in a little water or broth to loosen it.
Best Reheating Method
Reheat the sauce over low heat, stirring constantly until it reaches a gentle simmer. Add a tiny splash of water or milk to keep it from drying out. If you’re using a microwave, cover the dish with a microwave‑safe lid and heat in 30‑second intervals, stirring in between.