Picture this: I was standing in my kitchen, a half‑finished pizza dough in one hand and a bag of pre‑seasoned ground beef in the other, when a friend dared me to create a snack that could double as a meal. I laughed, because we all know how quickly a midnight craving can turn into a culinary crisis. That night, I pulled out my trusty skillet, tossed a handful of fresh vegetables, and let the aroma of sizzling beef fill the air. The sizzle was louder than a drum solo, and the smell of Italian seasoning hit the room like a warm hug. By the time the first pocket popped out of the pan, I already knew I had stumbled onto something special.
I had always been a fan of pizza, but the idea of turning it into a handheld, high‑protein pocket seemed almost too good to be true. I started experimenting with a simple dough, a rich tomato sauce, and a generous heap of cheese, but the texture kept falling flat. Then I added ground beef and a dash of red pepper flakes, and the flavor exploded into a savory, slightly spicy burst that made my taste buds do a happy dance. The pockets turned out crispy on the outside, soft and melty inside, and the whole thing smelled like a warm, comforting hug. I was so thrilled that I had to share this discovery with everyone I knew.
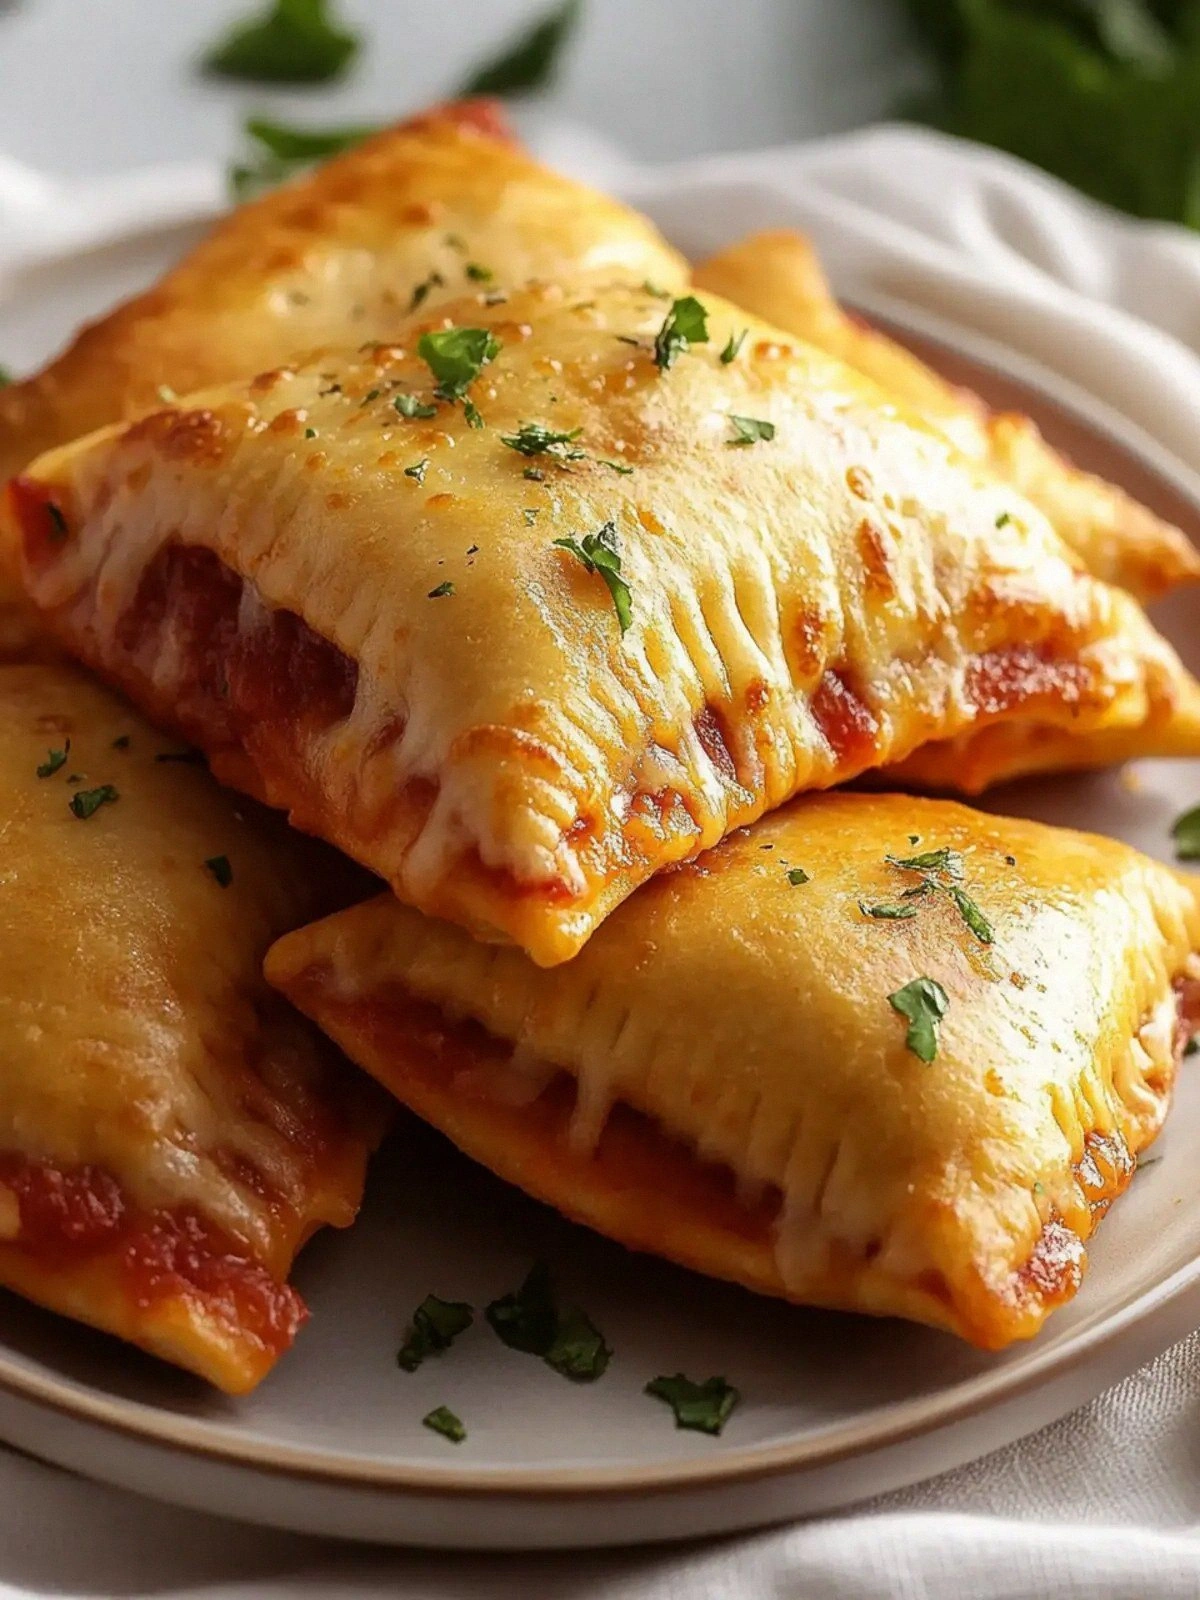
What sets these pockets apart isn’t just the protein punch; it’s the harmony of textures, the depth of flavor, and the sheer convenience of the recipe. I dared you to taste this and not go back for seconds, and trust me, you’ll find yourself reaching for the next pocket before you even finish the first. The secret sauce? A blend of traditional pizza sauce and a splash of crushed tomatoes that gives it a silky, velvety base. The crust is hand‑rolled to a thin, golden perfection that crisps up like a delicate, buttery wafer. The result is a pocket that feels like a gourmet bite in a bag, ready to satisfy any craving.
I’ll be honest — I ate half the batch before anyone else got to try it, and the kitchen smelled like victory. Most recipes get this completely wrong, either by over‑baking the dough or under‑seasoning the filling, but I found the sweet spot that balances heat, salt, and that unmistakable pizza aroma. Picture yourself pulling these out of the oven, the whole kitchen smelling incredible, and the pockets steaming with melted cheese and savory meat. The edges are crisp enough to bite into, yet the inside remains a soft, gooey, protein‑rich haven. If you've ever struggled with making a filling that stays together, you're not alone — and I've got the fix.
The next part of this journey is a bit like a science experiment, but with less beakers and more dough. I’ll walk you through every single step, from rolling the dough to sealing the pockets, so by the end, you’ll wonder how you ever made it any other way. The key is to keep the filling moist but not soupy, so it doesn’t leak during baking. I’ll share a trick to keep the crust from puffing up and a method to make the pockets pop up perfectly. Ready to dive in? Let’s get started.
Before we get into the meat of the recipe, let’s talk about the foundation that makes these pockets so robust and satisfying. The dough is the backbone, and I use a simple, high‑protein dough that holds up to the hearty filling without becoming soggy. The sauce provides that classic tomato kick, while the cheese blend delivers a creamy, melty texture that glues everything together. The vegetables add a subtle crunch and a burst of freshness that cuts through the richness. Together, they form a symphony of flavors that dance on your palate with every bite.
What Makes This Version Stand Out
- Taste: The flavor profile is a harmonious blend of savory meat, tangy tomato, and a hint of heat from red pepper flakes that keeps you coming back for more.
- Texture: The pockets boast a crisp exterior that gives way to a molten cheese interior, creating a satisfying contrast that satisfies every craving.
- Protein: With a full pound of lean ground beef and a generous cheese blend, each pocket is a protein powerhouse that fuels the body and the soul.
- Convenience: The recipe is quick to assemble, making it ideal for late‑night cravings or a speedy lunch that feels indulgent.
- Make‑Ahead Friendly: Once assembled, the pockets can be frozen and baked later, so you always have a ready‑to‑heat snack on hand.
- Kid‑Friendly: The mild heat and cheesy goodness make it a hit with children and adults alike, turning mealtime into a shared adventure.
Inside the Ingredient List
The Flavor Base
At the heart of every great pizza is its sauce, and in this recipe, the sauce is elevated with a splash of crushed tomatoes that adds depth and a subtle sweetness. The Italian seasoning brings aromatic herbs like oregano, basil, and thyme into play, creating a fragrant backdrop that complements the savory beef. The red pepper flakes add a gentle heat that awakens the palate without overpowering the other flavors. Together, they form a sauce that coats the dough like velvet, ensuring every bite is bursting with classic pizza warmth.
Choosing the right sauce can make or break the entire pocket. A low‑sugar, no‑added‑salt tomato sauce keeps the flavor bright and prevents the pockets from becoming overly salty. If you’re adventurous, a touch of balsamic glaze can add a tangy finish that lingers pleasantly on the tongue. The key is balance: enough sauce to moisten the filling but not so much that the dough becomes soggy.
One of the most overlooked aspects of pizza sauce is its thickness. A sauce that’s too thin will seep into the dough, causing a soggy pocket, while a sauce that’s too thick can leave the filling dry. Aim for a consistency that’s thick enough to cling to the beef and vegetables but still pourable. A simple test is to stir a spoonful; if it holds its shape, you’re good to go.
The Texture Crew
The cheese blend is the glue that holds everything together, providing a creamy, melty core that melts into the beef and vegetables. I use a mix of mozzarella, provolone, and a touch of cheddar to create a complex flavor profile that feels both familiar and exciting. The cheese’s meltiness also helps bind the filling, preventing it from spilling out during baking.
Ground beef is the powerhouse of protein in this recipe, delivering a hearty bite that satisfies hunger and keeps you energized. I prefer lean ground beef to keep the pockets from becoming greasy, but if you’re a meat lover, a higher fat content can add richness. Season the beef with Italian seasoning and red pepper flakes for a savory depth that echoes the sauce.
Vegetables, such as diced bell peppers, onions, and mushrooms, add crunch, color, and a subtle sweetness that balances the savory elements. They also bring vitamins, minerals, and fiber, making the pockets not only delicious but also nutritionally balanced. Sauté the veggies until they’re just tender; this preserves their bright color and prevents them from releasing too much moisture.
The Unexpected Star
While dough is often seen as a passive backdrop, it’s actually the star that delivers the crunch and holds the entire pocket together. I use a high‑protein dough that’s rolled thin enough to create a delicate crust that crisps up like a buttery wafer, yet robust enough to support the filling without tearing. The dough’s protein content ensures it retains structure even when baked with a moist filling.
Preparing the dough correctly is essential for achieving that coveted golden exterior. After rolling, I lightly dust the surface with flour to prevent sticking, then fold it once to create layers that will puff slightly during baking. This technique gives the pocket a light, airy interior while keeping the crust crisp.
Many pizza lovers underestimate the importance of a well‑topped dough. A thin crust allows the heat to penetrate quickly, ensuring the cheese melts evenly and the beef cooks thoroughly. It also creates a satisfying crunch that contrasts beautifully with the soft interior.
The Final Flourish
Once the filling is assembled, a final drizzle of sauce on top adds a glossy sheen and a burst of tomato flavor that enhances every bite. The top layer also helps seal the edges, preventing leaks during baking. I apply a thin layer of sauce with a spoon, then sprinkle a light dusting of cheese to finish.
Adding a touch of extra cheese on top before baking creates a golden, bubbly crust that looks as good as it tastes. The cheese melts into the pockets, forming a crispy edge that’s almost like a second layer of dough. This finishing touch elevates the pockets from simple snacks to gourmet treats.
When you take a bite, the first thing you’ll notice is the satisfying crunch of the crust, followed by the warm, savory filling that oozes with melted cheese and juicy beef. The vegetables add a subtle crunch that keeps the texture dynamic, while the sauce’s subtle sweetness balances the richness. Every bite is a mini celebration of pizza flavors.
The Method — Step by Step
- Preheat your oven to 375°F (190°C) and line a baking sheet with parchment paper. While the oven warms, divide the dough into eight equal portions and roll each into a circle about 1/4 inch thick. Keep the dough covered with a damp towel to prevent drying out. This step ensures each pocket has a uniform base that will bake evenly.
- In a skillet over medium heat, brown the ground beef until fully cooked, breaking it into crumbles as it cooks. Add Italian seasoning and red pepper flakes, stirring until the aromas mingle. Once the beef is browned, drain any excess grease to keep the pockets from becoming soggy. The beef should be moist but not liquid.
- Add the sautéed vegetables to the beef and stir for an additional two minutes, allowing the flavors to meld. Pour in the pizza sauce, stirring until the mixture is well combined and the sauce thickens slightly. This creates a rich, savory filling that clings to the dough.
- Spread a thin layer of sauce on the center of each dough circle, then spoon in a generous amount of the beef‑veggie mixture. Top with a sprinkle of cheese blend, ensuring it covers the filling evenly. Fold the dough over to form a half‑moon shape, and press the edges with a fork to seal. The sealed pockets should look like small, golden pillows.
- Beat one egg with a splash of water to create an egg wash, then brush the tops of the pockets lightly. This gives them a beautiful shine and a golden crust when baked. The egg wash also helps the cheese melt beautifully, creating a cohesive top layer.
- Arrange the sealed pockets on the prepared baking sheet, spacing them about 2 inches apart. This allows air to circulate and ensures even baking. Place the sheet in the preheated oven and bake for 20 minutes, then flip the pockets and bake for an additional 10 minutes. The total baking time should be about 30 minutes.
- Check the internal temperature of one pocket with a meat thermometer; it should read at least 165°F (74°C) to ensure the beef is fully cooked. The cheese should be bubbling and the crust golden brown. If the pockets need more time, bake for a few extra minutes, watching closely to avoid burning.
- Remove the pockets from the oven and let them rest for 5 minutes. This rest period allows the filling to set, making them easier to handle and preventing hot cheese from spilling out. The pockets should feel warm but not scalding.
- Serve hot, optionally with a side of marinara or a fresh green salad. The pockets are best enjoyed immediately, but if you need to hold them for a short time, keep them in an airtight container in a warm place. The flavor will remain vibrant, and the crust will stay crisp.
- If you’re making a large batch, consider freezing the assembled pockets before baking. Wrap them tightly in plastic wrap and store in a freezer bag. When ready to bake, place them directly from the freezer onto a baking sheet and add a few extra minutes to the baking time.
- For a quick reheating option, pop the pockets in a toaster oven or microwave for 30‑60 seconds, then transfer them to a skillet for a minute to crisp the crust. This method preserves the gooey interior while restoring the crunch.
- If you prefer a lower calorie version, replace the ground beef with ground turkey or chicken and use a reduced‑fat cheese blend. This swap cuts down on saturated fat while maintaining the protein content. The flavor profile remains robust, with a slightly lighter finish.
Insider Tricks for Flawless Results
The Temperature Rule Nobody Follows
Many people bake at a high temperature, hoping for a quick crust, but the best pockets come from a moderate 375°F (190°C). This temperature allows the dough to rise slowly, creating a tender interior while still crisping the edges. If you’re in a hurry, a lower temperature of 350°F (175°C) works well, but you’ll need to add a few extra minutes to the baking time.
Why Your Nose Knows Best
The aroma of a cooking kitchen is a powerful cue for readiness. As soon as the beef starts to sizzle with the seasoning, you’ll know it’s time to add the sauce. The scent of tomato and herbs signals that the filling is developing the right depth of flavor. Trust your nose; it’s a reliable guide.
The 5-Minute Rest That Changes Everything
Letting the pockets rest after baking is more than a courtesy; it’s a game‑changer. During this brief pause, the filling settles, the cheese sets, and the crust firms up. The result is a pocket that’s easier to slice and less likely to crumble. I always keep a timer handy so I don’t forget this crucial step.
Keep the Dough Moist
Covering the dough with a damp towel while it rests prevents it from drying out, especially if you’re making the pockets a few hours ahead. Moist dough yields a softer, more pliable crust that’s easier to seal. If you’re using a pre‑made dough, let it sit at room temperature for 15 minutes before rolling.
Use a Sharp Knife
A sharp knife cuts cleanly through the dough and cheese, preventing tearing and ensuring a neat appearance. A dull blade can cause the pockets to split or the filling to spill. Keep your knife sharp or use a pizza cutter for precision.
Make It Ahead of Time
Assemble the pockets and store them in the fridge for up to 24 hours before baking. This prep step saves time on busy nights and ensures you always have a quick, protein‑rich snack ready. Just remember to let the pockets sit at room temperature for 10 minutes before baking to prevent a soggy crust.
Creative Twists and Variations
Spicy Jalapeño Surprise
Swap out the red pepper flakes for diced jalapeños to give the pockets a fiery kick. Add a handful of fresh cilantro for a burst of herbal freshness. This variation is perfect for those who love a little heat and want a flavor profile that’s both bold and bright.
Greek Yogurt Dip
Serve the pockets with a side of Greek yogurt mixed with dill and garlic for a cooling contrast. The tangy yogurt balances the richness of the cheese and beef, creating a harmonious bite. This dip is also a protein boost, making the meal even more satisfying.
Chicken Alfredo Pocket
Replace the ground beef with diced chicken breast and use a creamy Alfredo sauce instead of pizza sauce. Top with a sprinkle of Parmesan and fresh parsley for a decadent twist. This version feels like a pasta dish in a pocket, offering a luxurious, comforting experience.
Veggie‑Loaded Delight
Omit the beef entirely and fill the pockets with sautéed spinach, artichoke hearts, and sun‑dried tomatoes. Use a mozzarella‑ricotta blend for a light, airy cheese. This vegetarian take is flavorful, nutritious, and perfect for a lighter meal.
BBQ Beef Pocket
Swap the pizza sauce for a smoky BBQ sauce and add a handful of corn kernels for sweetness. Use ground beef seasoned with smoked paprika for depth. The result is a pocket that feels like a backyard cookout in every bite.
Cheesy Pepperoni Blast
Add sliced pepperoni to the beef mixture and top the pockets with extra mozzarella for a classic pizza experience. The pepperoni adds a savory, slightly spicy flavor that pairs perfectly with the cheesy interior. This variation is a crowd‑pleaser for pizza lovers who want a familiar taste.
Storing and Bringing It Back to Life
Fridge Storage
Store assembled pockets in an airtight container in the refrigerator for up to 24 hours. Keep the dough sealed to prevent it from drying out. When ready to bake, let the pockets sit at room temperature for 10 minutes to ensure even cooking.
Freezer Friendly
Wrap each pocket individually in plastic wrap, then place them in a freezer bag. Freeze for up to 3 months. When baking, add 5 minutes to the baking time to account for the cold temperature.
Best Reheating Method
Reheat in a preheated oven at 375°F (190°C) for 10 minutes, or microwave on medium for 30 seconds, then finish in a skillet for a minute to crisp the crust. A splash of water before reheating steams the pockets back to a moist, gooey interior. This method preserves the texture and flavor better than a microwave alone.