I was standing in my kitchen at midnight, the timer on my old oven ticking like a metronome, when a dare from my roommate hit me like a splash of cold water: “Make the most unforgettable chocolate cupcake you’ve ever tasted, and don’t forget the name.” I laughed, I shrugged, and I grabbed the nearest mixing bowl, because honestly, who doesn’t love a good midnight snack? The kitchen smelled like a blend of burnt sugar and hopeful anticipation, the kind of aroma that makes you feel you’re about to discover a secret treasure hidden behind a pantry door. I could hear the faint hum of the refrigerator, the clink of a spoon against the bowl, and the distant bark of a dog that seemed to be cheering me on. When the first batch came out of the oven, the top was a glossy, crack‑topped dome that whispered promises of rich, fudgy interiors, and I knew I had stumbled onto something that would change the way you think about cupcakes forever.
Most cupcake recipes out there treat chocolate as a background singer, a supporting role that never really shines. Not this one. This version is a full‑on rock star, headlining the dessert stage with a bold, velvety crumb that melts in your mouth like butter on a hot pan. The secret? A splash of boiling water that awakens the cocoa, a double‑layered frosting that balances silky buttercream with a glossy ganache, and a dash of heavy cream that turns the frosting into a cloud you can actually bite. I dare you to taste this and not go back for seconds, because once you’ve experienced the contrast between the moist interior and the glossy top, you’ll be forever chasing that perfect bite.
Why does this version stand out? Most recipes get the texture completely wrong—either they’re dry like a desert or soggy like a wet sponge. I’ve spent countless evenings tweaking ratios, testing ovens, and even borrowing a professional mixer just to nail that sweet spot where the crumb is tender but not crumbly, and the frosting stays glossy without cracking. The result is a cupcake that sings with every bite, a chocolate note that lingers on the palate like a favorite song on repeat. Picture yourself pulling these out of the oven, the whole kitchen smelling incredible, the frosting still glossy, the steam rising like a curtain call after a perfect performance.
But I’m not just bragging. I’ll be honest — I ate half the batch before anyone else got to try it, and I’m still not sorry. The reason I’m sharing every single step is because I want you to experience that same “wow” moment without any of the trial‑and‑error disasters that I survived. There’s a technique involving boiling water that most home bakers skip, and a small trick with heavy cream that turns a regular buttercream into something that feels like it was made in a boutique patisserie. Okay, ready for the game‑changer? Let me walk you through every single step — by the end, you’ll wonder how you ever made it any other way.
What Makes This Version Stand Out
- Taste: The combination of unsweetened cocoa and a splash of boiling water creates a deep, almost espresso‑like chocolate flavor that’s balanced by a buttery vanilla frosting.
- Texture: The batter’s high‑moisture content gives a tender crumb that pulls away from the pan like a soft pillow, while the frosting stays glossy and smooth without any grainy edges.
- Simplicity: Despite the impressive results, the ingredient list is straightforward, and the steps use everyday kitchen tools—no fancy equipment required.
- Uniqueness: Adding boiling water to the cocoa awakens the flavor compounds, a trick most home bakers overlook, making the chocolate taste richer than store‑bought mixes.
- Crowd Reaction: These cupcakes have a habit of disappearing within minutes at parties, earning you the title of “the dessert hero” among friends.
- Ingredient Quality: Using real butter and high‑quality cocoa powder makes a world of difference; the frosting feels luxurious because the butter is never substituted.
- Cooking Method: The two‑stage baking (initial high heat then reduced temperature) creates a cracked top that’s both beautiful and functional, allowing the frosting to cling perfectly.
- Make‑Ahead Potential: The cupcakes freeze beautifully, and the frosting can be stored separately, so you can prep ahead for any surprise gathering.
Alright, let's break down exactly what goes into this masterpiece...
Inside the Ingredient List
The Flavor Base
All‑purpose flour is the backbone of any good cupcake, providing structure without weighing it down. I recommend sifting the flour with the cocoa powder; this not only eliminates lumps but also aerates the mixture, giving you a lighter crumb. If you skip the sift, you’ll end up with a dense texture that feels more like a brownie than a cupcake. For a gluten‑free twist, you can swap the flour for a 1‑to‑1 blend of almond flour and rice flour, but be prepared for a slightly nuttier flavor.
The Sweet Symphony
Granulated sugar is the sweetener that caramelizes slightly during baking, creating that subtle golden crust on the top. Powdered sugar, on the other hand, is reserved for the frosting where its fine texture ensures a smooth, glossy finish. If you’re watching your sugar intake, you can replace half of the granulated sugar with coconut sugar; the flavor will shift toward a caramel undertone, which some people love.
The Texture Crew
Vegetable oil and butter each play distinct roles: oil keeps the crumb moist, while butter adds flavor and richness. The heavy cream in the frosting adds body and a luxurious mouthfeel, preventing the buttercream from feeling dry. If you’re out of heavy cream, substitute with half‑and‑half, but the frosting will be a touch less decadent.
The Unexpected Star
Boiling water might sound like a weird addition to a cupcake batter, but it’s a game‑changer. When you pour the hot water over the cocoa, it blooms the cocoa, releasing aromatic compounds that give the chocolate depth you normally only get from high‑quality couverture. Skipping this step is the same as serving a movie without its soundtrack—something crucial is missing.
Everything's prepped? Good. Let's get into the real action...
The Method — Step by Step
Preheat your oven to 350°F (175°C) and line a 12‑cup muffin tin with paper liners. While the oven warms up, whisk together the flour, cocoa powder, baking powder, baking soda, and salt in a large bowl. This dry mixture is the canvas for our flavor masterpiece; make sure it’s evenly combined to avoid any pockets of salty surprise later.
Kitchen Hack: Sift the dry ingredients twice for an ultra‑light crumb that feels like a cloud.In a separate bowl, beat the butter, sugar, and a pinch of salt together until the mixture is pale and fluffy, about 3‑4 minutes on medium speed. This is the point where the sugar starts to dissolve into the butter, creating tiny air pockets that will later expand and give your cupcakes that coveted lift.
Add the egg to the butter‑sugar mixture, beating until fully incorporated. Then pour in the vanilla extract and the milk, alternating with the vegetable oil, beginning and ending with the dry ingredients. The batter should look glossy and slightly runny—that’s exactly what we want; a thick batter would yield a dense texture.
Now for the magic: gently stir in the boiling water that’s been infused with the remaining cocoa powder. You’ll see the batter turn a deep, almost black hue, and you’ll smell a rich chocolate perfume that fills the kitchen instantly. This step is pure alchemy—don’t rush it; let the water fully integrate before moving on.
Divide the batter evenly among the prepared liners, filling each about three‑quarters full. For perfect uniformity, use an ice‑cream scoop; this ensures each cupcake bakes at the same rate, preventing one from over‑browning while another stays undercooked.
Bake for 18‑20 minutes, then lower the oven temperature to 325°F (165°C) and continue baking for another 8‑10 minutes. The first high heat creates that coveted cracked top, while the lower temperature finishes the interior without drying it out. The cupcakes are done when a toothpick inserted into the center comes out with a few moist crumbs but no wet batter.
Watch Out: Opening the oven door too early can cause the tops to collapse; trust the timer.While the cupcakes cool in the pan for 5 minutes, melt the butter for the frosting in a saucepan over low heat. Once melted, whisk in the powdered sugar, cocoa powder, and heavy cream until the mixture is smooth and glossy. The heat helps dissolve the sugar, creating a silky ganache that will later be folded into the buttercream.
In a large mixing bowl, beat the remaining butter until light and airy, then add the second teaspoon of vanilla extract. Gradually add the chocolate ganache, beating on low speed until fully combined. Finally, increase the speed and whip for another 2‑3 minutes until the frosting is thick enough to hold its shape on a spoon.
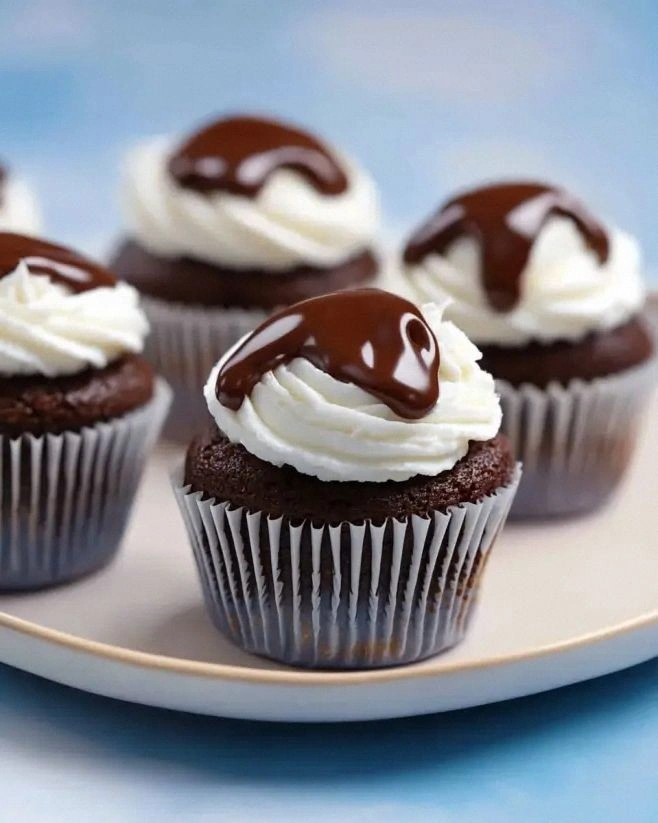
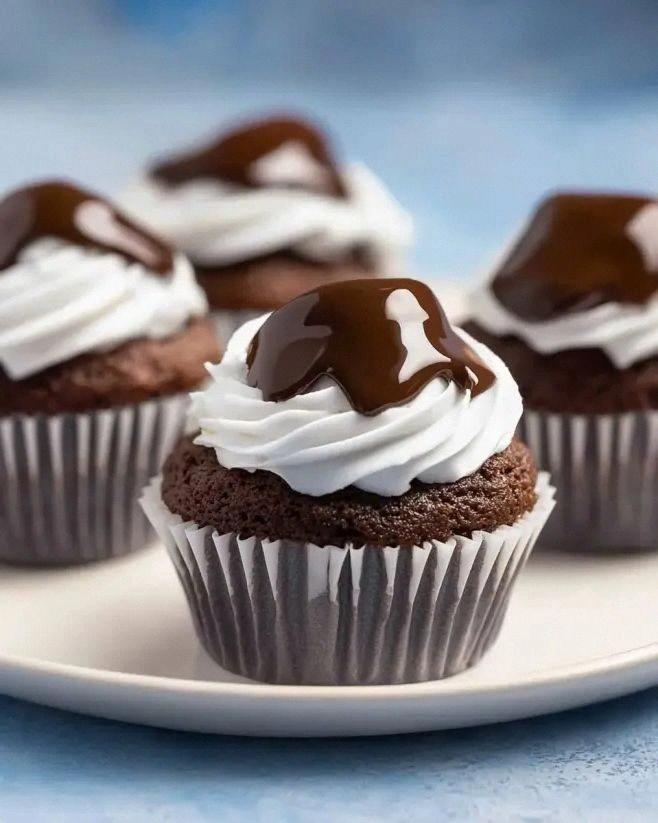
If you want a glossy finish, melt the semi‑sweet chocolate chips with the 2 tablespoons of vegetable oil over a double boiler, stirring until smooth. Drizzle this glossy glaze over each cupcake, letting it set for a minute before adding a generous dollop of the butter‑chocolate frosting on top. The contrast between the shiny glaze and the fluffy frosting is what makes these cupcakes look like they belong on a bakery display.
Let the cupcakes sit for at least 10 minutes before serving so the frosting sets slightly. This waiting period allows the flavors to meld, creating that “once‑in‑a‑lifetime” bite where the crumb, glaze, and frosting all sing together. And now the fun part—taste, share, and watch everyone ask for the recipe.
Insider Tricks for Flawless Results
The Temperature Rule Nobody Follows
Never bake cupcakes straight from the fridge. Let the batter sit at room temperature for 10‑15 minutes before filling the liners. This small pause allows the batter to reach an even temperature, ensuring the cupcakes rise uniformly. I once tried skipping this step, and the result was a flat, dense mess that looked more like a pancake than a cupcake.
Why Your Nose Knows Best
When the cupcakes are in the oven, trust your sense of smell as much as the timer. Around the 20‑minute mark you’ll notice a deep, chocolatey aroma that’s richer than any store‑bought mix. If the scent starts to turn slightly burnt, it’s a sign the tops are ready for the lower temperature phase. This sensory cue is the secret weapon of professional bakers.
The 5‑Minute Rest That Changes Everything
After removing the cupcakes from the oven, let them rest in the pan for exactly five minutes before transferring them to a wire rack. This short rest lets steam escape gently, preventing the bottoms from becoming soggy. Skipping this step can lead to a gummy base that feels like chewing on a wet sponge.
Butter‑Chocolate Fusion
When making the frosting, melt the butter just until it’s liquid, not browned. Adding the hot butter to the powdered sugar creates a glossy texture that’s smoother than a traditional buttercream. A friend tried using melted margarine once—let’s just say the frosting turned grainy and the cupcakes were a disappointment.
Glaze Timing
Apply the chocolate glaze while it’s still warm but not hot; this ensures it spreads thinly and sets with a perfect shine. If the glaze cools too much, it will thicken and create a crust that cracks when you bite. The perfect glaze is like a mirror—reflective, smooth, and just thick enough to add a luxurious layer.
Creative Twists and Variations
This recipe is a playground. Here are some of my favorite ways to switch things up:
Mint‑Chocolate Fusion
Add ½ teaspoon of peppermint extract to the frosting and sprinkle crushed mint chocolate chips on top. The cool mint cuts through the richness, making it perfect for a summer gathering.
Espresso Explosion
Replace 2 tablespoons of the boiling water with a shot of strong espresso and add 1 tablespoon of instant coffee granules to the dry mix. The result is a mocha‑loving cupcake that feels like a coffee shop treat.
Orange Zest Surprise
Stir 1 tablespoon of finely grated orange zest into the batter and swap half of the vanilla extract for orange extract. The citrus brightens the chocolate, giving it a sophisticated edge.
Nutty Crunch
Fold in ½ cup of toasted, chopped hazelnuts into the batter and sprinkle a few on top of the frosting. The nuts add a satisfying crunch that contrasts beautifully with the soft crumb.
White Chocolate Dream
Replace the semi‑sweet chocolate chips in the glaze with white chocolate chips, and add a pinch of sea salt to the frosting. The sweet‑salty combo creates a gourmet feel that’s perfect for special occasions.
Storing and Bringing It Back to Life
Fridge Storage
Place unfrosted cupcakes in an airtight container and store them in the refrigerator for up to 5 days. When you’re ready to serve, frost them and let them sit at room temperature for 30 minutes so the frosting softens.
Freezer Friendly
Freeze the cupcakes without frosting, wrapped individually in plastic wrap, then placed in a zip‑lock bag. They’ll keep for up to 2 months. To revive, thaw overnight in the fridge, then bring to room temperature and frost.
Best Reheating Method
To warm a cupcake without drying it out, place it on a microwave‑safe plate, add a tiny splash of water (about a teaspoon), and microwave on 50% power for 15‑20 seconds. The steam generated brings the crumb back to its original moist glory.