Picture this: a Saturday night, the living room buzzing with the roar of the game, the lights low, and a half‑finished batch of dough staring back at you from the counter. I was halfway through kneading when the timer buzzed, and in that split second, my eyes fell on the crumbs of yesterday’s pizza. “This is going to taste amazing,” I muttered, but the dough was still a stubborn lump. The moment the dough hit the heat, it transformed into a golden, cheese‑laden masterpiece that made the whole house smell like a victory celebration. I was already craving a bite, but that’s not the point—this is the moment that sparked a culinary revelation.
I was in a bind: I needed something that would feed the crowd, something that could be made in minutes, and something that would keep everyone coming back for more. I had tried a dozen pull‑apart breads over the years, each with its own quirks—some too dry, some too greasy, and most lacking that irresistible gooey center. Then I had a dream: a pull‑apart bread that was as fluffy as a cloud and as cheesy as a blockbuster movie. I dared myself to create a version that would make even the most skeptical of fans say, “I dare you to taste this and not go back for seconds.”
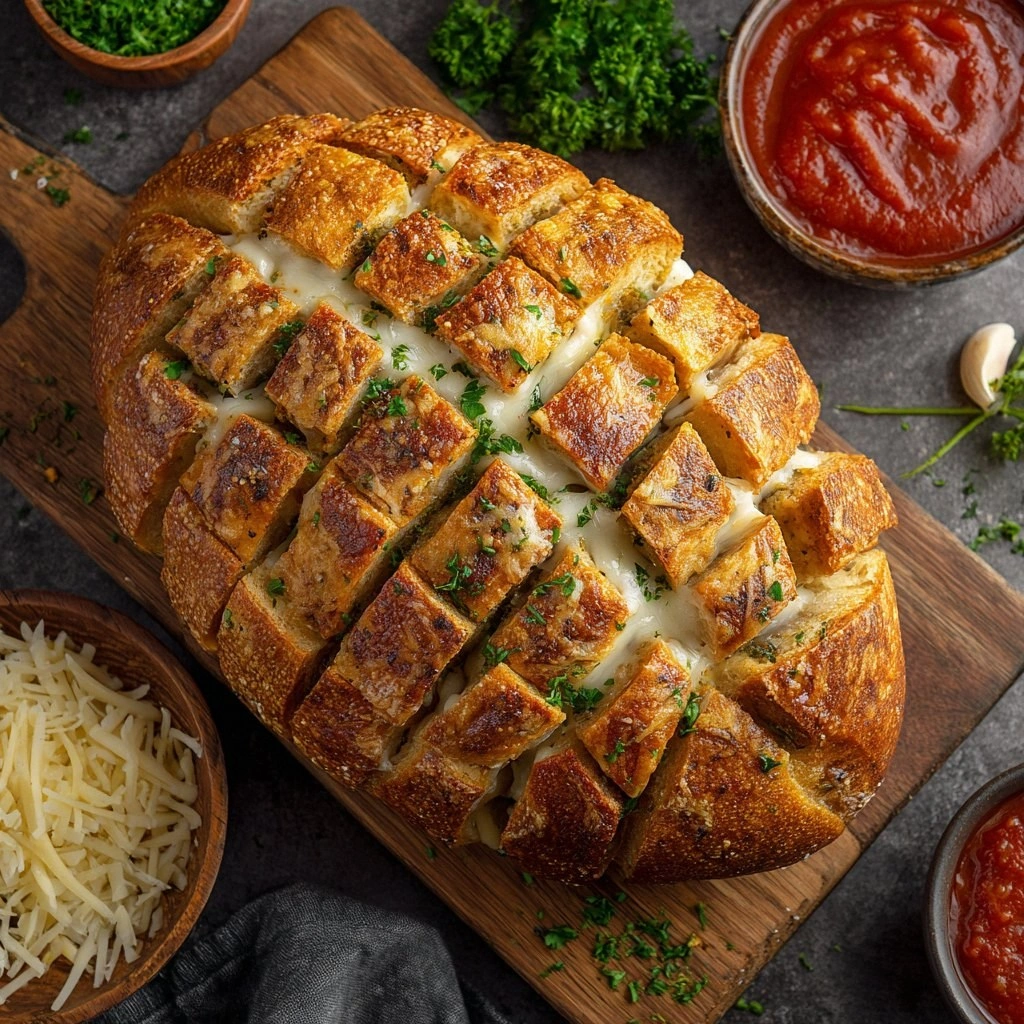
The first time I pulled the loaf out of the oven, the steam curled like a flag waving in the wind. The crust was a perfect, golden‑brown halo that cracked with a satisfying snap when you broke it apart, revealing pockets of molten mozzarella, sharp cheddar, and a subtle hint of garlic. The aroma was a heady mix of butter, herbs, and that unmistakable garlic kick that makes you forget any other snack. The texture was a triumph—crispy on the outside, airy and soft inside, with a gooey cheese core that didn’t leak or burn. The flavors danced together, each bite delivering a new layer of richness that made the whole experience feel like a touchdown in flavor town.
Most recipes get this completely wrong. They either under‑bake the loaf, resulting in a soggy center, or over‑bake it, turning the cheese into a dry, crumbly mess. I discovered that the secret lies in a simple technique: letting the dough rest for exactly 30 minutes after the first rise, then folding in the cheese mixture while it’s still warm. This step creates a perfect balance of moisture and structure, ensuring that the cheese melts without making the bread soggy. And the result? A pull‑apart bread that’s hands down the best version you’ll ever make at home.
I’ll be honest—after I finished the first loaf, I ate half the batch before anyone else got to try it. The cheese was so irresistible that I almost didn’t want to share. The next time I made it, I set the loaf on a platter and let the aroma drift through the house like a slow‑moving wave of savory delight. Friends began asking for the recipe, and I found myself explaining the exact steps that made this bread so special. Picture yourself pulling this out of the oven, the whole kitchen smelling incredible, and the anticipation building until the first bite melts your taste buds into a state of pure bliss.
If you’ve ever struggled with pull‑apart breads that fall apart or taste bland, you’re not alone. I’ve spent countless hours in the kitchen experimenting with different flours, yeasts, and cheese blends. The good news is that the technique I’ve refined works with any standard kitchen setup. All you need is a little patience, a love for cheese, and a willingness to experiment with flavors. This is a recipe that will transform your game‑day snacks, turning an ordinary evening into a culinary celebration that everyone will remember.
The next section breaks down exactly what goes into this masterpiece, from the humble flour to the final cheese drizzle. It’s not just a list; it’s a map that guides you through each step with precision and flair. I’ll explain why each ingredient matters, what happens if you skip it, and how you can swap it out for a different flavor profile. The goal is to give you the confidence to tweak the recipe to your taste while still maintaining that perfect pull‑apart experience.
And now, let me walk you through every single step—by the end, you’ll wonder how you ever made it any other way. This is more than a recipe; it’s a playbook for creating a crowd‑pleaser that’s as easy to make as it is to love. Get ready to dive into the world of pull‑apart breads and discover the secrets that turn simple ingredients into a showstopper.
What Makes This Version Stand Out
- Flavor: The blend of mozzarella, cheddar, and Parmesan creates a layered taste that evolves with each bite. The cheese doesn’t overpower the dough; instead, it complements the buttery, herbaceous base.
- Texture: The dough’s airy crumb and crisp crust form a satisfying contrast, while the melted cheese provides a silky, gooey center that feels luxurious.
- Simplicity: Despite the mouth‑watering result, the recipe requires only a handful of pantry staples—no fancy ingredients or complex techniques.
- Uniqueness: The inclusion of garlic, oregano, and basil gives this bread a Mediterranean flair that sets it apart from traditional pull‑apart recipes.
- Crowd Reaction: Friends and family rave about how the bread keeps them coming back for seconds, making it a guaranteed hit at any gathering.
- Ingredient Quality: Using fresh, high‑quality cheeses and a touch of olive oil elevates the flavor profile to a level that feels restaurant‑grade.
- Cooking Method: The two‑stage rise and cheese‑in‑the‑middle technique ensure even heat distribution and a perfect melt.
- Make‑Ahead Potential: The dough can be prepared a day in advance, allowing you to focus on the final bake on game day.
Alright, let’s break down exactly what goes into this masterpiece. The next section will walk you through each ingredient group, explaining its role and offering swaps if you’re looking to customize.
Inside the Ingredient List
The Flavor Base
All-purpose flour is the foundation of this bread. It provides the structure and absorbs the liquid, creating a dough that’s easy to handle. If you’re looking for a healthier twist, you can swap it for whole wheat flour, but expect a denser crumb and a slightly nutty flavor. The key is to use a flour with a moderate protein content to balance chewiness and tenderness.
Active dry yeast is the silent hero that makes the dough rise. It ferments sugars in the dough, producing carbon dioxide that creates air pockets. Using fresh yeast yields a stronger rise, but if you only have instant yeast, just adjust the amount slightly. The yeast’s activity is also influenced by the water temperature—keep it between 100°F and 110°F to avoid killing the culture.
Warm water is the catalyst that activates the yeast. The temperature is critical; too hot and the yeast dies, too cold and the dough won’t rise. Measure the water carefully and let it sit for a minute before mixing. A gentle swirl helps distribute the yeast evenly, setting the stage for a uniform rise.
Olive oil adds a subtle fruity flavor and keeps the dough moist. It also helps create a slightly crisp crust. If you prefer a milder taste, you can replace olive oil with butter or a neutral oil like canola. The fat content will slightly alter the bread’s texture, making it richer and denser.
Salt is more than a seasoning; it strengthens the gluten network and balances the sweetness of the dough. It also controls yeast fermentation, preventing the dough from rising too quickly. Use a fine sea salt for an even distribution of flavor. A pinch of salt is all you need to elevate the entire loaf.
Sugar is the secret to a golden crust. It feeds the yeast and promotes caramelization during baking. If you’re watching calories, you can reduce the sugar by a quarter or replace it with a natural sweetener like honey. Just be mindful that honey adds moisture, which could affect the dough’s rise.
The Texture Crew
Unsalted butter adds richness and a buttery aroma that complements the cheese. Melted butter is incorporated into the dough for even distribution. If you’re lactose intolerant, a dairy‑free butter alternative works fine, but the flavor will be slightly different.
The cheeses are the star performers. Mozzarella provides a smooth melt, cheddar adds sharpness, and Parmesan delivers a nutty depth. Using a blend of these cheeses creates a complex flavor profile that satisfies every palate. For a vegan version, substitute with plant‑based cheeses that melt well.
Garlic is the unsung hero that gives this bread its signature kick. Fresh minced garlic releases a powerful aroma when baked, turning the bread into a fragrant, savory experience. If you’re sensitive to raw garlic, you can roast the cloves before adding them to the dough for a milder flavor.
Herbs such as oregano and basil add a bright, aromatic note. They complement the cheeses and balance the richness. Dried herbs are convenient, but fresh herbs will give a brighter flavor. Use the herbs sparingly; too much can overpower the cheese.
Fresh parsley is the finishing touch. It adds a splash of color and a subtle peppery note that brightens the overall profile. Sprinkle it on top before baking, and it will give a fresh, herbal finish that lingers on the palate.
Garlic powder is a backup for when you’re short on fresh garlic. It provides a more subdued, consistent flavor. However, fresh garlic always wins in terms of aroma and depth. Consider using a mix of both for an extra layer of flavor.
The Unexpected Star
The final cheese topping—extra mozzarella and Parmesan—creates a molten, golden surface that draws the eye. The melted cheese acts as a glaze, sealing in moisture and adding a glossy finish. When the bread is sliced, the cheese oozes out, creating a decadent experience.
The combination of cheeses in the topping is essential for the perfect crust. Mozzarella offers a stretchy, gooey texture, while Parmesan adds a crispy, nutty layer. This contrast ensures that each bite delivers both melt and crunch.
If you prefer a spicier kick, consider adding a pinch of red pepper flakes to the cheese mixture. This subtle heat pairs well with the garlic and enhances the overall flavor profile. Just be careful not to overdo it; the goal is to complement, not dominate.
The topping also helps lock in the flavors from the dough. The cheese forms a protective barrier that keeps the bread moist and prevents it from drying out during baking. This is why the final loaf stays fresh and flavorful for hours.
Remember that the quality of the cheese matters. Choose cheeses that melt well and have a strong flavor. Cheeses with a higher fat content will create a richer, more indulgent experience, while lower‑fat options will be lighter but less decadent.
The Final Flourish
A splash of melted butter brushed over the loaf before baking adds shine and flavor. This simple step enhances the crust’s color, making it golden and appetizing. Brush the butter lightly, and the bread will develop a subtle, buttery aroma that entices everyone.
The final flourish also helps the cheese meld into the dough. The butter’s fat content aids in the even distribution of heat, ensuring the cheese melts uniformly. This step is especially important if you’re using a high‑fat cheese blend.
The butter glaze can be replaced with a garlic butter mixture for an extra burst of flavor. Mix minced garlic into the melted butter, and brush it over the loaf. The result is a fragrant, savory crust that elevates the entire experience.
If you’re watching calories, you can reduce the amount of butter or use a low‑fat alternative. The loaf will still turn out delicious, though the crust may be slightly less golden. The key is to find a balance that suits your dietary preferences.
Finally, a sprinkle of fresh parsley or chopped herbs adds a pop of color and a fresh finish. This finishing touch transforms the loaf from a simple snack to a visually stunning centerpiece. It’s a small step that makes a big difference in presentation.
Everything’s prepped? Good. Let’s get into the real action. The process is straightforward, but the timing is crucial. Each step builds on the last, creating a loaf that’s as impressive to look at as it is to eat.
The Method — Step by Step
- Step 1: Combine Dry Ingredients – In a large mixing bowl, whisk together the flour, salt, sugar, and yeast. Ensure the yeast is evenly distributed to avoid clumps. The dry mix should feel like fine sand. This step sets the stage for a consistent rise. As you stir, you’ll notice a faint aroma of yeast begin to develop.
- Step 2: Add Liquids – Warm the water to 110°F, then pour it into the dry mixture. Add the olive oil, melted butter, and a splash of warm milk if you want extra tenderness. Mix until a shaggy dough forms. The dough should be slightly sticky but manageable.
- Step 3: First Rise – Cover the bowl with a damp towel and let the dough rise for 30 minutes in a warm spot. The dough should double in size. If you’re in a cooler kitchen, place it near a radiator or in a turned‑on oven with the light on. This resting period allows the gluten to relax and the yeast to work its magic.
- Step 4: Incorporate Cheese Mixture – While the dough is rising, blend the mozzarella, cheddar, Parmesan, minced garlic, oregano, basil, and garlic powder in a bowl. Once the dough has risen, fold the cheese mixture into the dough gently. The dough should be warm, which helps the cheese melt slightly and distribute evenly. The dough will become slightly sticky, but that’s normal.
- Step 5: Second Rise – Place the dough on a lightly floured surface and shape it into a long loaf. Let it rise again for 20 minutes. During this time, the dough will expand and become more elastic. The second rise is crucial for achieving a light, airy interior. Feel the dough’s texture; it should feel springy.
- Step 6: Prepare the Pan – Line a 9x5 inch loaf pan with parchment paper or lightly grease it. The parchment ensures easy release, and the grease prevents sticking. This step is simple but essential for a clean, professional finish.
- Step 7: Add the Final Cheese Topping – Sprinkle the remaining mozzarella and Parmesan evenly over the top of the loaf. Brush a thin layer of melted butter over the cheese for extra shine. This final touch creates a golden, bubbly crust that’s irresistible to the eye.
- Step 8: Bake – Preheat your oven to 375°F. Place the loaf in the oven and bake for 30 minutes, or until the crust is golden brown and the internal temperature reaches 190°F. The cheese should be bubbling, and the loaf should emit a buttery, garlicky aroma. Keep an eye on the crust to avoid over‑browning.
- Step 9: Rest – Remove the loaf from the oven and let it rest in the pan for 10 minutes. Resting allows the steam to settle, preventing a soggy bottom. It also lets the cheese set slightly, making it easier to slice. The loaf will still be hot, so use a heat‑resistant glove to handle it.
- Step 10: Serve – Slide the loaf onto a cutting board, slice it into thick wedges, and serve warm. The cheese should ooze out as you pull apart each wedge, creating a delightful, gooey experience. Pair it with a crisp salad or a bowl of marinara for a complete meal. Enjoy the cheers and compliments that will follow.
That's it — you did it. But hold on, I've got a few more tricks that'll take this to another level. The next section shares insider tips that will help you achieve flawless results every single time.
Insider Tricks for Flawless Results
The Temperature Rule Nobody Follows
Many bakers think that room temperature is the best for proofing. In reality, a warm, humid environment is the secret to a rapid rise. Place the dough near a window that receives indirect sunlight, or use a proofing box if you have one. The dough will rise faster, resulting in a lighter crumb. This trick is especially useful during colder months.
Why Your Nose Knows Best
Your nose is a reliable indicator of when the dough is ready. A sweet, yeasty aroma means the yeast is active, while a sour smell signals that the dough is overproofed. Trust your senses; don’t rely solely on time. This simple technique ensures the dough never over‑bakes or under‑bakes.
The 5-Minute Rest That Changes Everything
After shaping the loaf, let it rest for exactly five minutes before baking. This short pause allows the gluten to relax, preventing the loaf from becoming dense. A quick rest also lets the cheese mixture settle into the dough, ensuring an even melt. It’s a small step that makes a big difference.
Cheese Ratio That Works Every Time
The ratio of mozzarella to cheddar is key for achieving a balance between meltiness and flavor. Use two parts mozzarella to one part cheddar for a smooth, rich texture. If you prefer a sharper bite, increase the cheddar slightly. This ratio ensures that the cheese doesn’t overpower the dough.
The Secret of a Crispy Crust
A glossy, crispy crust is the hallmark of a great pull‑apart bread. Brush the loaf with melted butter before baking to create a golden finish. Bake at a slightly higher temperature for the last five minutes, then reduce the heat to finish the bake. This technique gives you a crust that’s both crunchy and flavorful.
The Final Touch for Extra Flavor
Add a pinch of smoked paprika to the cheese mixture for a subtle smoky undertone. This small addition transforms the flavor profile, adding depth and complexity. Smoked paprika pairs beautifully with garlic and herbs, creating a well‑rounded taste.
Creative Twists and Variations
This recipe is a playground. Here are some of my favorite ways to switch things up:
Spicy Jalapeño Pull‑Apart
Add sliced fresh jalapeños to the cheese mixture for a fiery kick. The heat pairs well with the creamy cheeses, creating a spicy, savory loaf. Serve with a cooling yogurt dip to balance the heat. This version is perfect for those who love a little spice in their snacks.
Herb‑Infused Italian Pull‑Apart
Swap oregano and basil for a blend of rosemary, thyme, and sage. This herb combo gives the bread an Italian twist, reminiscent of a rustic focaccia. The fresh herbs will release their flavors during baking, creating a fragrant loaf. It’s a great accompaniment to pasta dishes.
Caramelized Onion Pull‑Apart
Sauté thinly sliced onions until they’re golden brown and sweet. Fold them into the dough along with the cheese. The caramelized onions add a sweet, savory depth that balances the richness of the cheeses. This variation works wonderfully as an appetizer for a dinner party.
Vegan Pull‑Apart
Replace all dairy products with vegan cheese blends that melt well, such as a mix of nutritional yeast, cashew cream, and vegan mozzarella. Use a plant‑based butter substitute for the glaze. The result is a creamy, cheese‑laden loaf that’s entirely dairy‑free. It’s a hit with vegan guests who crave comfort food.
Nutty Crunch Pull‑Apart
Add chopped walnuts or pecans to the dough for a crunchy texture. The nuts will add a nutty flavor and a delightful crunch that contrasts the soft interior. Sprinkle a pinch of sea salt on top before baking to enhance the nutty taste. This version is great for a fall gathering.
Mediterranean Pull‑Apart with Sun‑Dried Tomatoes
Incorporate finely chopped sun‑dried tomatoes into the cheese mixture. The tomatoes bring a sweet, tangy burst of flavor that complements the garlic. Add a drizzle of olive oil before baking for an extra layer of richness. This twist is perfect for a Mediterranean‑themed game day.
Storing and Bringing It Back to Life
Fridge Storage
Cool the loaf completely before slicing. Store the sliced loaf in an airtight container or zip‑top bag in the refrigerator for up to three days. The bread will stay moist, thanks to the cheese and butter. When ready to serve, reheat in the oven at 350°F for 5 minutes to restore the crust’s crispness. The cheese will melt again, giving you that fresh‑out‑of‑oven experience.
Freezer Friendly
Wrap the loaf tightly in plastic wrap, then place it in a freezer bag. Freeze for up to two months. When you’re ready to eat, thaw at room temperature for an hour, then bake at 350°F for 10–15 minutes. This method preserves the flavor and texture remarkably well. The cheese remains creamy, and the crust stays crisp.
Best Reheating Method
The secret to reheating pull‑apart bread is to add a splash of water to the loaf before baking. The steam keeps the bread from drying out and helps the cheese melt evenly. Reheat at 350°F for 8–10 minutes, or until the cheese is bubbly again. The result is a loaf that tastes almost brand new.