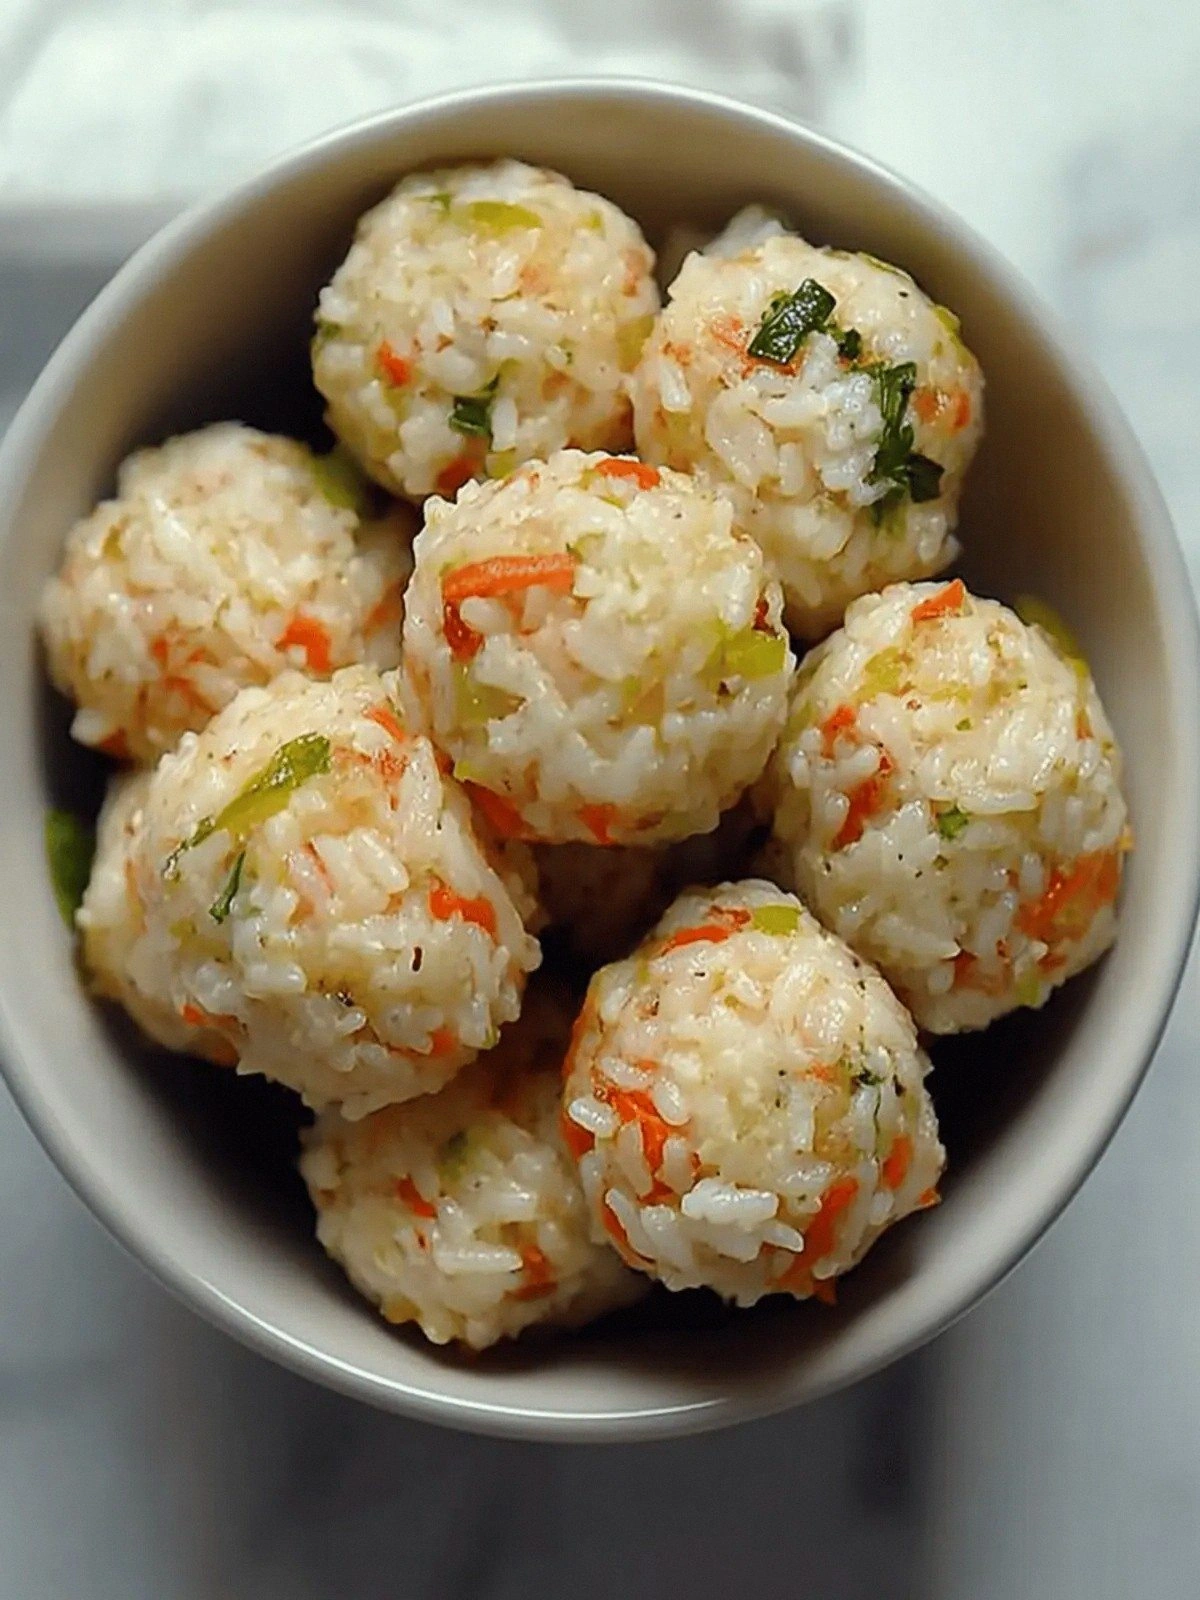
I was halfway through a midnight snack run, the lights flickering, the fridge door swinging open, and my culinary confidence at its lowest. I had a bag of frozen peas, a jar of tomato sauce, and a stubborn craving for something comforting yet quick. In that moment, I accidentally dropped a handful of rice onto the counter, and the sound echoed like a tiny drumbeat that sparked an idea. I decided to turn that clumsy mishap into a new recipe that would not only satisfy my hunger but also impress my friends the next day. That single, unplanned moment became the birth of the Easy Veggie Rice Balls.
The kitchen smelled of fresh garlic powder and the faint, sweet aroma of carrots. My eyes were drawn to the vibrant green of steamed broccoli, the soft, almost translucent texture of the rice, and the golden hue of melted cheddar. As I lifted the pan, the sizzling sound rang out, a comforting, rhythmic promise of something delicious. The anticipation of that first bite tingled on my tongue, a subtle hint of anticipation that made my heart beat a little faster. The tactile feel of the rice mixture, warm and slightly sticky, felt like a secret handshake between my hands and the future snack.
What sets this version apart from the countless other rice ball recipes you’ll find online is the deliberate balance of textures and flavors. The carrots and broccoli provide a crunchy bite that contrasts with the creamy cheddar, while the single whole egg binds everything together into a cohesive, melt-in-your-mouth experience. The use of garlic powder and a touch of black pepper adds a subtle depth that elevates the dish from ordinary to unforgettable. I’ve refined the technique so that each ball is perfectly round, with a golden crust that’s crisp enough to crack open with your teeth. This isn’t just a snack; it’s a culinary revelation that will change the way you think about rice and vegetables.
I’ll be honest—this recipe is hands down the best version you’ll ever make at home, and I dare you to taste it and not go back for seconds. I’ve hidden a few micro‑challenges, like the perfect amount of cheese melt, that will keep you on your toes. Picture yourself pulling these from the pan, the whole kitchen smelling incredible, and the first bite sending a wave of comfort through your senses. And now, ready for the game‑changer? Let me walk you through every single step—by the end, you’ll wonder how you ever made it any other way.
What Makes This Version Stand Out
- Flavor: The blend of sweet carrots, earthy broccoli, and sharp cheddar creates a symphony of taste that sings in your mouth. The garlic powder and pepper add a subtle kick that lingers without overpowering the gentle sweetness of the veggies.
- Texture: The rice mixture holds together like a soft dough, yet each ball has a crisp exterior that breaks open with a satisfying crack. The vegetables stay tender but still offer a pleasant bite, preventing the dish from feeling mushy.
- Visual Appeal: The golden crust and the pops of green from broccoli make each ball a miniature work of art that looks as good as it tastes. It’s the kind of dish that instantly turns a simple potluck into a conversation starter.
- Simplicity: With just eight ingredients, this recipe is a breeze to pull together, even on a hectic weeknight. No special tools or exotic spices—just the staples you already have in your pantry.
- Versatility: These rice balls can be served as a snack, an appetizer, or a light main course. Pair them with a yogurt dip, a spicy salsa, or a simple green salad and you have an entire meal.
- Nutrition: Packed with protein from cheese and egg, and fiber from the veggies, these balls keep you full and satisfied without the heaviness of fried snacks.
- Make‑Ahead Friendly: The mixture can be prepared ahead of time, refrigerated, and then baked or pan‑fried when you’re ready. That means you can have a ready‑to‑eat snack at any moment.
- Kid‑Friendly: The mild flavors and fun shape make these rice balls a hit with even the pickiest eaters, turning lunchboxes into a highlight of the day.
Inside the Ingredient List
The Flavor Base
The single whole egg is the unsung hero that binds the rice, carrots, and broccoli into a cohesive mixture. It adds a subtle richness that elevates the dish from simple to gourmet. Skipping the egg would result in a crumbly mixture that falls apart on the first bite. If you’re vegan, try a tablespoon of aquafaba or a commercial egg replacer for a similar binding effect.
Garlic powder is the secret that turns this recipe into a flavor powerhouse. It infuses the rice with a warm, aromatic undertone that complements the earthiness of broccoli. A pinch of smoked paprika can replace the garlic powder for a smoky twist that will surprise your taste buds. The key is to keep the seasoning balanced so it doesn’t overwhelm the natural sweetness of the vegetables.
Salt and freshly cracked black pepper are the final touch that brings everything together. The salt enhances the natural flavors of the veggies and cheese, while the pepper adds a subtle heat that lingers on the palate. Be mindful not to oversalt; a half teaspoon is enough to unlock the full potential of the dish. If you prefer a low‑sodium version, reduce the salt to a quarter teaspoon and add a splash of soy sauce for umami.
The Texture Crew
Steamed carrots bring a natural sweetness and a firm bite that contrasts beautifully with the tender rice. Their bright orange color also adds a pop of vibrancy to each ball, making them visually appealing. If you can’t find fresh carrots, frozen carrots work just as well; just be sure to drain them thoroughly to avoid excess moisture.
Steamed broccoli is the green counterpart that offers both flavor and nutrition. Its subtle bitterness balances the sweetness of the carrots and the richness of the cheese. To prevent broccoli from turning mushy, steam it just until it’s bright green and still slightly firm—about 3–4 minutes.
White rice is the canvas that holds everything together. The grains should be fluffy and separate, not sticky, to keep the texture light. If you’re using leftover rice, reheat it with a splash of water and fluff it with a fork to restore its airy quality. Using jasmine or basmati rice can add a fragrant note that elevates the dish further.
The Unexpected Star
White cheddar cheese is the star that brings a creamy, melty element to the rice balls. Its sharp flavor cuts through the sweetness of the carrots and the earthiness of the broccoli. If you’re looking for a lower-fat option, try a reduced‑fat cheddar or a blend of mozzarella and Parmesan for a different flavor profile.
The cheese also creates a golden, caramelized crust when baked or pan‑fried, adding a delightful crunch that’s reminiscent of a toasted bagel. The melting process also releases a subtle aroma that makes the kitchen feel warm and inviting. Don’t be tempted to use a processed cheese; the real cheddar provides a depth of flavor that’s hard to replicate.
The Final Flourish
The combination of all these elements creates a dish that is both comforting and exciting. The vegetables add fiber and vitamins, the rice provides carbs for energy, and the cheese and egg deliver protein and fat for satiety. Together, they form a balanced meal that can be enjoyed at any time of day. Whether you’re feeding a crowd or just treating yourself, these rice balls will always hit the spot.
Everything's prepped? Good. Let's get into the real action.
The Method — Step by Step
- Combine the Rice and Veggies: In a large bowl, mix the cooked white rice with the steamed carrots and broccoli until evenly distributed. The mixture should feel moist but not soupy; if it’s too dry, add a splash of milk or water. This step ensures every bite has a balanced flavor profile. Taste the mixture and adjust the seasoning with a pinch of salt and pepper if needed.
- Integrate the Egg: Crack the whole egg into the bowl and whisk until the yolk is fully incorporated. The egg acts as a binder, preventing the rice balls from falling apart during cooking. Make sure the mixture is uniform; a few lumps can lead to uneven cooking.
- Add the Cheese: Sprinkle the white cheddar over the mixture and fold gently until the cheese is evenly distributed. The cheese will melt and create a cohesive structure. If you prefer a stronger cheddar flavor, grate the cheese directly into the mixture instead of using pre‑shredded.
- Season with Garlic Powder: Add the teaspoon of garlic powder, then mix again until the spice is fully absorbed. The garlic powder provides a subtle warmth that pairs beautifully with the vegetables. If you’re sensitive to garlic, reduce the amount to half a teaspoon.
- Shape the Balls: Using a tablespoon or a small cookie scoop, portion the mixture into 12–15 balls. Roll each ball between your palms until it’s smooth and round. If the mixture sticks to your hands, lightly wet them with water to prevent sticking.
- Preheat the Oven: Set your oven to 375°F (190°C) and line a baking sheet with parchment paper. This step ensures an even cooking temperature and prevents the balls from sticking. While the oven preheats, you can prepare a dipping sauce if you like.
- Place on Baking Sheet: Arrange the rice balls on the parchment, leaving a few inches between each to allow for expansion. The spacing also helps the edges crisp up nicely. If you’re pan‑frying instead, heat a non‑stick skillet over medium heat and lightly coat it with oil.
- Bake or Fry: Bake in the preheated oven for 20–25 minutes, flipping halfway through, until the edges are golden and the cheese is bubbly. If pan‑frying, cook each side for about 3–4 minutes until a golden crust forms. The internal temperature should reach 160°F (71°C) for a safe, fully cooked product.
- Cool Slightly: Remove the rice balls from the oven and let them rest on a wire rack for 5 minutes. This rest period allows the cheese to set, preventing it from oozing out when you bite. Serve warm for the best texture, or let them cool completely for a crunchy snack.
That's it — you did it. But hold on, I've got a few more tricks that'll take this to another level. These little tweaks will ensure every bite is perfect, whether you’re making a batch for a party or just craving a quick snack at home.
Insider Tricks for Flawless Results
The Temperature Rule Nobody Follows
Many people bake these rice balls at a lower temperature, hoping for a softer texture, but this often results in a soggy interior. I always set the oven to 375°F (190°C) to ensure a crisp exterior while keeping the inside tender. If you’re pan‑frying, preheat the skillet over medium heat and test with a single ball; the surface should sizzle immediately without burning. This temperature control guarantees a uniform golden crust on every ball.
Why Your Nose Knows Best
The aroma that rises as the rice balls bake is a reliable indicator of doneness. When the cheese melts and the rice starts to brown, you’ll notice a nutty, buttery scent that signals the perfect moment to flip or remove. Trusting your nose saves you from overcooking or undercooking, which can ruin the texture.
The 5-Minute Rest That Changes Everything
Letting the rice balls rest on a wire rack for five minutes after baking isn’t just a formality; it allows the internal moisture to redistribute. This brief rest period prevents the cheese from oozing out when you bite, creating a more cohesive bite. If you skip this step, the outer crust will be crisp, but the inside will feel mushy and uneven.
Avoiding the Sticky Mess
If the mixture sticks to your hands or the bowl, add a tablespoon of cornstarch or a splash of water. The cornstarch absorbs excess moisture, making the mixture easier to shape. Alternatively, lightly oil the bowl or use silicone spatulas to reduce sticking, which also prevents the rice balls from breaking apart during cooking.
The Secret to a Golden Crust
A quick brush of beaten egg over the surface before baking gives the rice balls a beautiful shine. The egg wash creates a glossy finish and helps the cheese melt evenly. If you’re vegan, a thin layer of plant‑based milk will work similarly, giving you a golden, appetizing appearance.
Batch Cooking Made Easy
If you’re preparing a large batch, consider freezing the raw mixture in a silicone muffin tin. Freeze for an hour, then transfer to a freezer bag. When you’re ready to cook, simply bake from frozen, adding a few extra minutes to the cooking time. This method preserves freshness and saves you time on busy days.
Creative Twists and Variations
This recipe is a playground. Here are some of my favorite ways to switch things up:
Spicy Sriracha Rice Balls
Add a tablespoon of sriracha sauce to the mixture for a fiery kick. The heat pairs well with the mild cheese, creating a dynamic flavor contrast. Serve with a cool yogurt dip to balance the spice.
Mediterranean Falafel‑Inspired Balls
Replace the cheddar with crumbled feta and add chopped parsley, mint, and a pinch of cumin. The result is a Mediterranean‑inspired snack that’s fresh and aromatic. Pair with a tzatziki sauce for a refreshing finish.
Mushroom & Spinach Fusion
Sauté sliced mushrooms and spinach before mixing them into the rice. The earthy mushrooms add depth, while the spinach contributes a subtle green hue. The combination creates a hearty, savory ball that’s perfect for a midday boost.
Sweet Potato & Black Bean Balls
Incorporate mashed sweet potato and black beans into the rice mixture for a Southwest twist. The sweet potato offers natural sweetness, while the beans add protein and fiber. Finish with a sprinkle of cilantro and a squeeze of lime for a zesty finish.
Coconut‑Infused Tropical Balls
Add a splash of coconut milk and a pinch of curry powder to the mixture for a tropical flavor profile. The coconut milk gives a subtle sweetness, while the curry powder adds warmth. Serve with a mango salsa to complete the tropical experience.
Cheesy Garlic Parmesan Balls
Swap the cheddar for grated Parmesan and add minced garlic to the mix. The Parmesan’s nutty flavor and the garlic’s aroma create a gourmet twist. These balls are perfect as a fancy appetizer for a dinner party.
Storing and Bringing It Back to Life
Fridge Storage
Store uncooked rice balls in an airtight container in the refrigerator for up to three days. The airtight seal prevents the balls from drying out and maintains the cheese’s meltiness. When ready to serve, reheat in a preheated oven at 350°F (175°C) for 10 minutes.
Freezer Friendly
Place raw rice balls on a parchment‑lined tray and freeze until solid. Transfer the frozen balls to a freezer bag and store for up to two months. Thaw overnight in the refrigerator before reheating to preserve texture.
Best Reheating Method
To revive frozen or refrigerated balls, add a splash of water or milk to the baking dish before reheating. This small amount of moisture steams the balls, preventing the cheese from drying out. Bake at 375°F (190°C) for 12–15 minutes until heated through.