I was standing in my kitchen, staring at a mound of burnt pancakes that had turned my countertop into a charred art exhibit. The smell of scorched batter mingled with the faint scent of fresh sweet potato, a memory from my grandmother’s kitchen where every Sunday was a celebration of comfort food. That disaster became the spark that ignited a quest: to create a sweet potato delight that would leave even the most seasoned gluten‑free skeptics begging for seconds. I dared myself to craft something that could stand beside the classics, and I’m here to show you how.
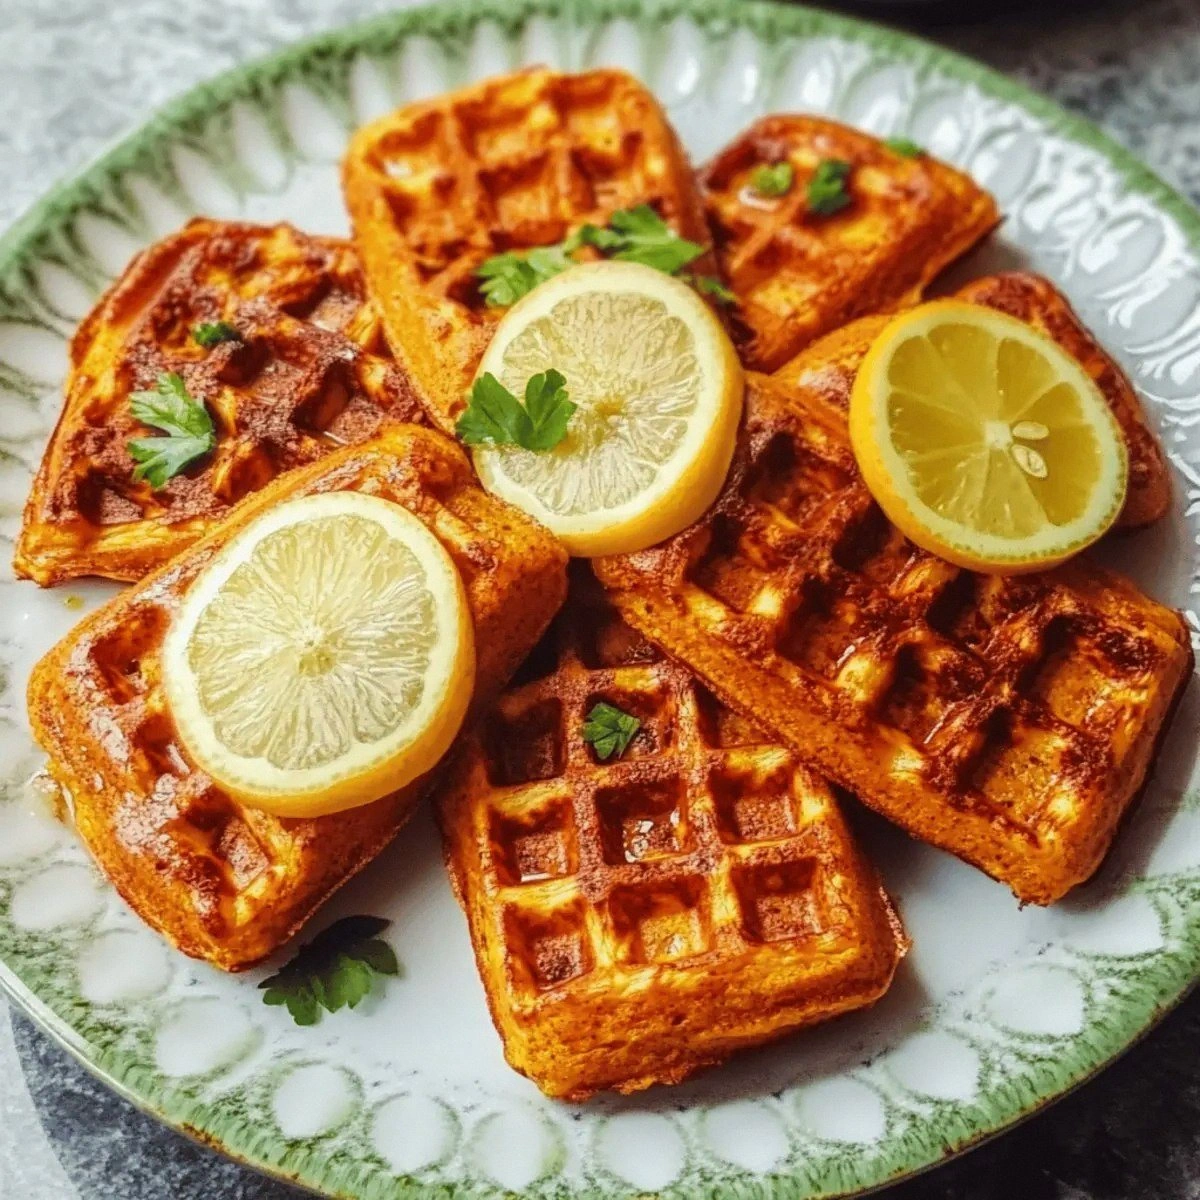
Picture the moment the first batch hits the waffle iron – a golden, buttery puff that releases a caramelized aroma, like a sunrise over a quiet meadow. The texture is a paradox: a crisp exterior that cracks like brittle ice, yet a tender, almost custard‑like interior that melts in your mouth. The sweet potato base gives a subtle earthy sweetness that pairs perfectly with the warm spices, while the maple drizzle adds a glossy, almost syrupy sheen. The whole experience is a symphony of crunch, melt, and sweet‑savory harmony that makes you question why you ever settled for ordinary.
What sets this version apart is the meticulous balance of ingredients and the clever use of a gluten‑free flour blend that behaves like a secret agent, slipping through the batter without compromising structure. I’ve perfected the ratio of baking powder to ensure a fluffy rise without the dreaded “wobbly” texture that plagues many waffle recipes. The addition of chopped nuts provides a delightful crunch that contrasts the silky sweetness, while fresh berries add a burst of tartness that cuts through the richness. Every element is chosen to elevate the humble sweet potato into a showstopper.
And there’s a twist that most recipes overlook – a splash of vanilla and a pinch of cinnamon that work together like a duet, elevating the flavor profile to new heights. I’ll walk you through every single step, from mashing the sweet potato to the final drizzle, so by the end you’ll wonder how you ever made it any other way. Let’s dive in.
What Makes This Version Stand Out
- Flavor: The sweet potato’s natural sweetness is amplified by vanilla and spices, creating a flavor profile that feels both familiar and adventurous.
- Texture: A crisp exterior that gives way to a moist, fluffy interior, achieved by the right balance of gluten‑free flour and baking powder.
- Convenience: All ingredients are pantry staples; no exotic purchases required.
- Versatility: Works as a breakfast treat, a dessert, or a snack – simply adjust toppings to fit the occasion.
- Nutrition: Packed with beta‑carotene, fiber, and protein, making it a wholesome choice for any meal.
- Gluten‑Free Assurance: Uses a proven gluten‑free blend that behaves like wheat flour in batter, eliminating the fear of gluten contamination.
- Make‑Ahead Friendly: The batter can be prepared a day ahead and stored in the fridge without losing quality.
- Visual Appeal: The golden color and glossy maple glaze make it Instagram‑worthy.
Alright, let's break down exactly what goes into this masterpiece...
Inside the Ingredient List
The Flavor Base
The sweet potatoes are the heart of this dish. Cooked and mashed, they bring a natural sweetness that’s both comforting and complex. If you skip them, you lose that deep, earthy undertone that balances the maple and spices. For the best flavor, roast the sweet potatoes until they’re caramelized – it adds a subtle smoky note that’s hard to replicate with boiled potatoes.
Gluten‑free flour blend is the backbone of the batter. It provides structure without the heaviness of whole‑wheat flour. If you’re allergic to a particular grain in the blend, you can substitute an equal amount of oat flour or a blend of rice and potato flours. The key is to use a blend that has a balanced protein content to help the batter rise.
The Texture Crew
Baking powder is the secret to that airy lift. A pinch of baking soda can also help if you’re using a very acidic batter. Eggs bind everything together and add richness; if you’re vegan, replace each egg with a tablespoon of flaxseed meal mixed with 3 tablespoons of water. Milk (dairy or plant‑based) keeps the batter smooth and helps the waffles brown evenly.
Sugar, vanilla, and salt are the classic trio that rounds out the flavor. Sugar caramelizes on the waffle iron, creating a beautiful crust; vanilla adds depth, and a half teaspoon of salt pulls all the flavors together. If you’re watching sugar, reduce the amount by a quarter cup and add a splash of almond extract for extra complexity.
The Unexpected Star
Chopped nuts bring a satisfying crunch and a nutty undertone that complements the sweet potato. They also add healthy fats and protein. If you’re allergic to nuts, substitute with sunflower seeds or pumpkin seeds for a similar crunch. The nuts can also be toasted before adding to the batter for an extra layer of flavor.
Maple syrup or honey is the finishing glaze that gives the waffles that glossy, irresistible look. It’s also what gives the dish its signature “sweet” kick. If you prefer a lighter finish, drizzle a little lemon‑infused honey or a splash of vanilla‑infused maple syrup.
The Final Flourish
Fresh berries add a bright, tart contrast that cuts through the sweetness. They also bring a pop of color that makes the dish visually stunning. If berries are out of season, use diced peaches or a spoonful of pineapple chunks for a tropical twist. The berries can also be lightly sautéed with a touch of brown sugar for a caramelized topping.
Everything's prepped? Good. Let's get into the real action...
The Method — Step by Step
- Start by preheating your waffle iron to medium heat. While it warms, mash the cooked sweet potatoes until they’re silky smooth, leaving a few small lumps for texture. The key here is to avoid over‑mashing; you want a slightly chunky base that holds the batter together. This step is crucial because it sets the foundation for the flavor and moisture of the final product.
- In a separate bowl, whisk together the gluten‑free flour blend, baking powder, sugar, cinnamon, and salt. Sifting the dry ingredients ensures a light, airy batter and prevents clumps. This dry mix is the skeleton that will support the sweet potato’s richness. Remember to keep the flour mixture cool; if it gets warm, the baking powder can lose potency.
- Beat the eggs and milk together until frothy. The eggs add structure while the milk keeps the batter smooth. If you’re using plant‑based milk, choose one with a neutral flavor like oat or almond to avoid overpowering the sweet potato notes. This liquid mixture will bind the dry and sweet potato components into a cohesive batter.
- Add the vanilla extract, maple syrup, and chopped nuts to the wet mixture. The vanilla deepens the flavor, the maple adds sweetness and a glossy finish, and the nuts introduce a satisfying crunch. Stir until the nuts are evenly distributed; you don’t want clumps of nuts on the surface. This is the moment where the batter feels like a promise of deliciousness.
- Combine the wet and dry mixtures with the mashed sweet potato. Fold gently until just incorporated; over‑mixing can cause the batter to become tough. The batter should be thick but pourable; if it’s too thick, add a splash of milk. This step is a dance of textures, and you’ll know you’re done when the batter holds its shape but still drips off a spoon.
- Let the batter rest for 5 minutes. This brief pause allows the gluten‑free flour to hydrate fully, ensuring a tender crumb. While you wait, you can preheat the waffle iron to ensure it’s hot enough to create a golden crust. The rest period also lets the flavors meld together, creating a harmonious taste profile.
- Spoon the batter onto the preheated waffle iron, using enough to cover the surface but not so much that it spills over. Close the lid and cook for 4–5 minutes, or until the waffle is golden brown and crisp. The exact time depends on your waffle iron’s heat settings; keep an eye on the edges for that perfect crunch. When the waffle is ready, it should smell toasty and slightly sweet.
- Carefully remove the waffle and repeat the process until all batter is used. While the waffles cool, drizzle a little extra maple syrup over each one and top with fresh berries. This final touch adds a glossy sheen and a burst of tartness that cuts through the sweetness. Serve immediately for the best texture; the waffles will lose their crispness if they sit for too long.
That's it — you did it. But hold on, I've got a few more tricks that'll take this to another level...
Insider Tricks for Flawless Results
The Temperature Rule Nobody Follows
Many people heat their waffle iron until it’s scorching hot, but that can burn the outside before the inside cooks. Instead, aim for a medium‑high setting that allows the batter to bubble gently. Test the temperature by flicking a few drops of batter onto the surface; if it sizzles and spreads quickly, you’re good. This subtle control keeps the waffle golden without a charred edge.
Why Your Nose Knows Best
The aroma of caramelizing sugar is a reliable indicator that your waffle is ready to be lifted. When you hear a faint sweet scent, pause and peek; the bottom should have a golden crust. Trust your nose, and you’ll avoid the dreaded “wobbly” waffles that sit too long on the iron.
The 5-Minute Rest That Changes Everything
After the batter rests, the gluten‑free flour hydrates fully, which translates into a softer crumb. Skipping this step often results in a dense, gummy texture that feels more like a pancake than a waffle. Even a short five‑minute pause can make the difference between ordinary and extraordinary.
The Sweet‑Spice Balance
Too much cinnamon can overpower the sweet potato, while too little leaves the batter bland. I’ve found that 1 teaspoon of cinnamon paired with a pinch of nutmeg creates a layered spice profile that feels comforting yet sophisticated. Adjust the spices to taste, but keep the ratio in mind for consistency.
The Final Touch of Freshness
Adding berries after the waffle is cooked preserves their juiciness and prevents them from becoming mushy. If you prefer a warm berry topping, sauté the berries with a touch of brown sugar for a caramelized finish. The choice of topping can transform the dish from a breakfast treat to a dessert indulgence.
Creative Twists and Variations
This recipe is a playground. Here are some of my favorite ways to switch things up:
Coconut Crunch
Swap the chopped nuts for toasted coconut flakes and add a splash of coconut milk to the batter. The coconut adds a tropical sweetness and a chewy texture that complements the sweet potato. Finish with shredded coconut on top for an extra crunch.
Spicy Jalapeño Surprise
Dice a small jalapeño and fold it into the batter for a subtle kick. The heat pairs surprisingly well with the maple syrup, creating a sweet‑spicy contrast. Serve with a dollop of sour cream to balance the heat.
Chocolate Drizzle Delight
Melt dark chocolate and drizzle it over the waffles before adding berries. The bitterness of the chocolate cuts through the sweetness and adds a luxurious finish. Add a pinch of sea salt to elevate the flavor profile.
Savory Herb Edition
Replace the maple syrup with a savory herb sauce made from fresh thyme, rosemary, and a touch of olive oil. Add chopped spinach or kale to the batter for extra greens. This version is perfect for brunch or a light lunch.
Berry‑Infused Syrup
Cook fresh berries with a little water and sugar until they break down into a thick syrup. Use this syrup as a topping instead of plain maple. The natural fruit flavor adds depth and reduces the need for added sweeteners.
Nutty Banana Fusion
Blend a ripe banana into the batter for added sweetness and moisture. Replace the nuts with chopped walnuts for a richer flavor. Top with banana slices and a sprinkle of cinnamon for a breakfast that feels like a dessert.
Storing and Bringing It Back to Life
Fridge Storage
Cool the waffles completely, then store them in an airtight container in the refrigerator for up to 3 days. This method preserves the crispness of the exterior while keeping the interior moist. Reheat in a toaster or oven at 350°F for 5 minutes to restore warmth.
Freezer Friendly
Place cooled waffles on a parchment‑lined sheet and freeze until solid. Then transfer them to a freezer bag, removing excess air. They stay fresh for up to 2 months. To reheat, pop them in a toaster or microwave for 30 seconds, then finish in a hot oven to crisp the edges.
Best Reheating Method
The secret to reviving a cold waffle is a quick toast in a hot skillet with a splash of water. The water steams the inside, while the skillet crisps the outside. Add a tiny splash of water before reheating — it steams back to perfection and keeps the waffle from drying out.