Love this? Pin it for later! 📌
When the first snowflakes begin to dance past my kitchen window, I reach for my largest soup pot and a bag of creamy white beans. There's something almost magical about transforming humble pantry staples into a velvety, soul-warming soup that can be stashed in the freezer for those nights when you need comfort but lack energy. This Cozy Freezer Prep Creamy White Bean Soup has become my winter insurance policy against take-out temptation and cold-weather blues.
I developed this recipe during a particularly brutal February when my twins were newborns and my husband was traveling for work. Between round-the-clock feedings and bone-deep exhaustion, I needed meals that felt like a warm hug but required zero effort beyond reheating. After testing countless versions, this creamy white bean soup emerged as the clear winner. The secret lies in the dual cooking method: we simmer dried beans until they're buttery-soft, then blend a portion to create that luxurious, cream-like texture without any actual cream. The result is a protein-packed, fiber-rich soup that tastes indulgent but nourishes from the inside out.
What makes this recipe truly special is its freezer-friendly nature. The soup's velvety texture actually improves after freezing, as the flavors meld and deepen. I now make a triple batch every December, portioning it into quart-sized freezer bags that lie flat like edible gold bars. Whether you're feeding a crowd, meal-prepping for busy weeks, or simply want to gift future-you a night off from cooking, this soup delivers pure winter comfort in every spoonful.
Why This Recipe Works
- Freezer-Friendly Texture: The blended white beans create a naturally creamy base that thaws beautifully without separating or becoming grainy
- Economical Luxury: Dried beans cost pennies per serving but deliver restaurant-quality richness when properly prepared
- Hands-Off Cooking: Most of the cooking time is unattended simmering, perfect for weekend meal prep
- Customizable Comfort: The mild base welcomes endless variations from smoky bacon to bright herbs
- Nutrition Powerhouse: Each serving delivers 15+ grams of plant-based protein and 12 grams of fiber
- Allergy-Friendly: Naturally gluten-free, dairy-free, and vegan without compromising on taste
Ingredients You'll Need
The beauty of this soup lies in its simplicity. Each ingredient plays a crucial role in building layers of flavor that belie the short grocery list. I've tested this recipe with both premium and budget ingredients, and while quality matters, you can still achieve exceptional results with supermarket staples.
Great Northern or Navy Beans (1 pound) - These small white beans are my top choice for their quick cooking time and creamy texture. Great Northern beans hold their shape better if you prefer some whole beans in your soup, while navy beans break down more easily for an ultra-smooth texture. Avoid cannellini beans here; their tougher skin never quite achieves the velvety consistency we're after. If you're short on time, you can substitute 3 (15-ounce) cans of white beans, but the flavor won't be quite as rich.
Extra-Virgin Olive Oil (3 tablespoons) - Don't be tempted to skimp here. A generous glug of good olive oil at the beginning creates the flavor base that carries through the entire soup. I keep a jug of decent everyday olive oil for cooking and save my finest bottle for drizzling at the end.
Yellow Onion (1 large) - The foundation of nearly every great soup. Look for firm, heavy onions with no soft spots. If your onion starts sprouting green shoots, remove them before dicing as they can add bitterness.
Celery (3 stalks) - Often overlooked, celery provides essential aromatic backbone. Choose hearts with fresh, crisp stalks and save the leaves for garnish - they're packed with flavor and look beautiful floating on top.
Carrots (2 medium) - Beyond adding subtle sweetness, carrots contribute to the gorgeous golden color. I prefer organic carrots for their more intense flavor, but conventional work perfectly well.
Garlic (6 cloves) - Yes, six! The long simmering mellows garlic's bite, leaving behind rich umami depth. Fresh garlic is non-negotiable here; the pre-minced jarred variety tastes flat and can add unpleasant acidity.
Vegetable Broth (6 cups) - The quality of your broth directly impacts the final soup. If you have time, homemade is unbeatable. Otherwise, I recommend low-sodium store-bought broth so you can control the salt level. Avoid bouillon cubes; they often contain MSG and artificial flavors that muddle the clean bean taste.
Fresh Thyme (2 teaspoons) - Woody herbs like thyme release their oils slowly during long cooking, infusing the soup with earthy complexity. Strip the leaves from the stems by running your fingers backward along the sprig. Dried thyme works in a pinch, but use only 1 teaspoon as it's more potent.
Bay Leaves (2) - These aromatic leaves add subtle depth that you can't quite identify but would miss if omitted. Always remove bay leaves before blending - their sharp edges can damage blender blades and they're unpleasant to bite into.
Smoked Paprika (1 teaspoon) - My secret weapon for adding smoky depth without actual smoke. Hungarian sweet paprika provides beautiful color but lacks the complexity of smoked Spanish paprika. Regular paprika will work, but the soup will taste flatter.
How to Make Cozy Freezer Prep Creamy White Bean Soup for Winter Warmth
Soak Your Beans Overnight
The night before you plan to cook, sort through your dried beans, removing any stones or shriveled beans. Place them in a large bowl and cover with cold water by at least 2 inches. Add 1 tablespoon of salt - this seasons the beans from the inside out and helps them cook more evenly. Let soak at room temperature for 12-24 hours. If your kitchen is particularly warm, you can refrigerate them. Properly soaked beans will nearly double in size and cook much faster than unsoaked beans.
Drain and Rinse the Beans
Drain your soaked beans in a colander and rinse under cold running water until the water runs clear. This removes the starchy soaking liquid that can cause digestive discomfort. Take a moment to appreciate how plump and hydrated your beans have become - this visual transformation always makes me feel like a kitchen magician.
Build Your Aromatic Base
Heat 3 tablespoons olive oil in your largest heavy-bottomed pot or Dutch oven over medium heat until shimmering. Add diced onion, celery, and carrots with 1 teaspoon salt. Cook, stirring occasionally, until vegetables are softened and onions are translucent but not browned, about 8-10 minutes. The goal here is to coax out sweetness without adding color. If vegetables start browning, reduce heat slightly. Add garlic and cook for 1 minute more, until fragrant but not colored.
Add Spices and Herbs
Stir in smoked paprika, thyme leaves, and bay leaves. Cook for 30 seconds, stirring constantly, until spices are fragrant and coating the vegetables. This brief toasting awakens the essential oils in your spices, deepening their flavor. Your kitchen should smell incredible at this point - like a cozy cabin in the woods.
Add Beans and Broth
Add drained beans and vegetable broth. The liquid should cover beans by about 1 inch; add water if needed. Bring to a boil over high heat, then reduce to a gentle simmer. Skim off any foam that rises to the top - these are impurities that can cloud your broth and add off-flavors. Reduce heat to maintain the gentlest possible simmer, cover partially, and cook until beans are very tender, about 1 to 1.5 hours depending on your beans' age.
Check for Doneness
Taste several beans from different parts of the pot - they should be completely tender with no chalky center. If beans are still firm, continue cooking, checking every 15 minutes. Older beans can take significantly longer to cook, so patience is key here. The soup is ready when you can easily mash a bean against the roof of your mouth with your tongue.
Remove Bay Leaves and Blend
Fish out bay leaves and discard. For a chunky soup, blend only 2 cups of soup until smooth and return to pot. For a creamier consistency, blend half the soup. I use an immersion blender directly in the pot, but you can carefully transfer to a regular blender. If using a regular blender, work in batches and remove the center cap from the lid to let steam escape - otherwise, you'll have a soup explosion on your hands.
Season and Serve
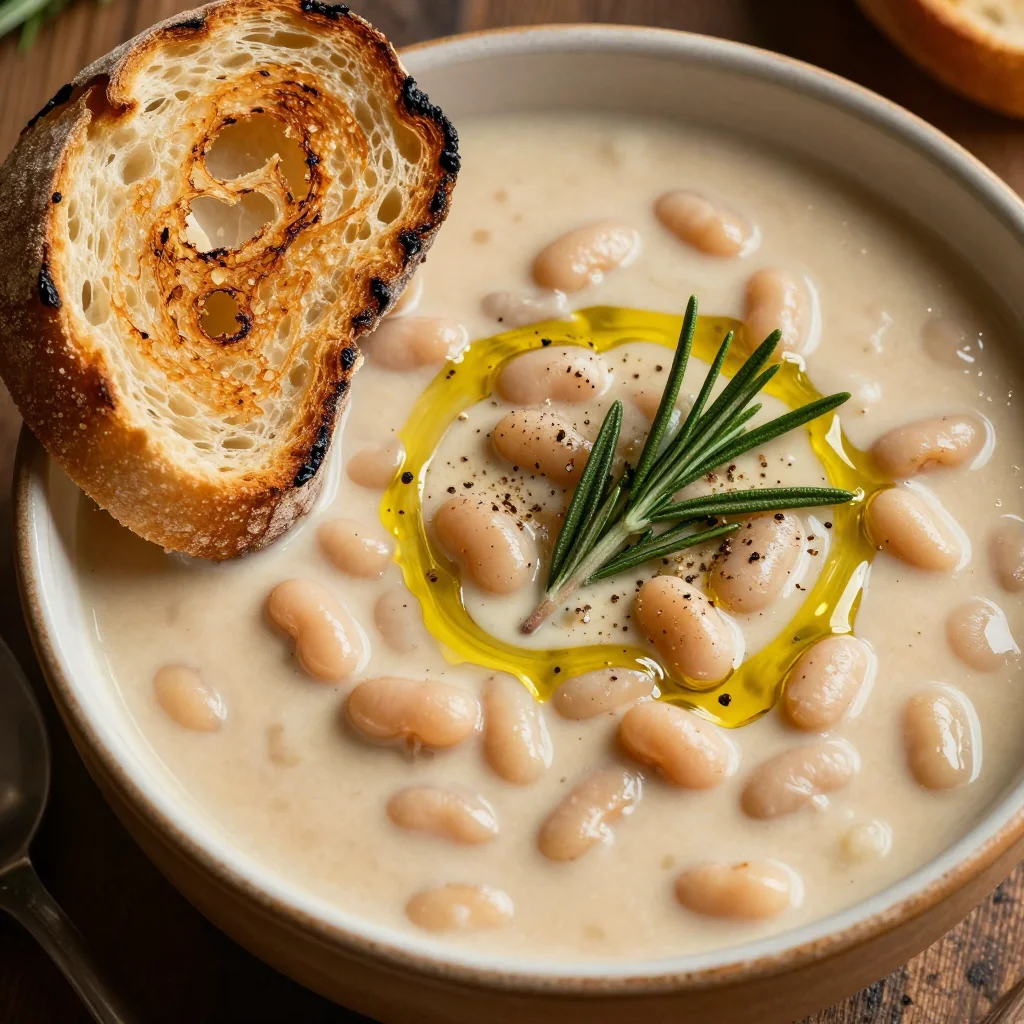
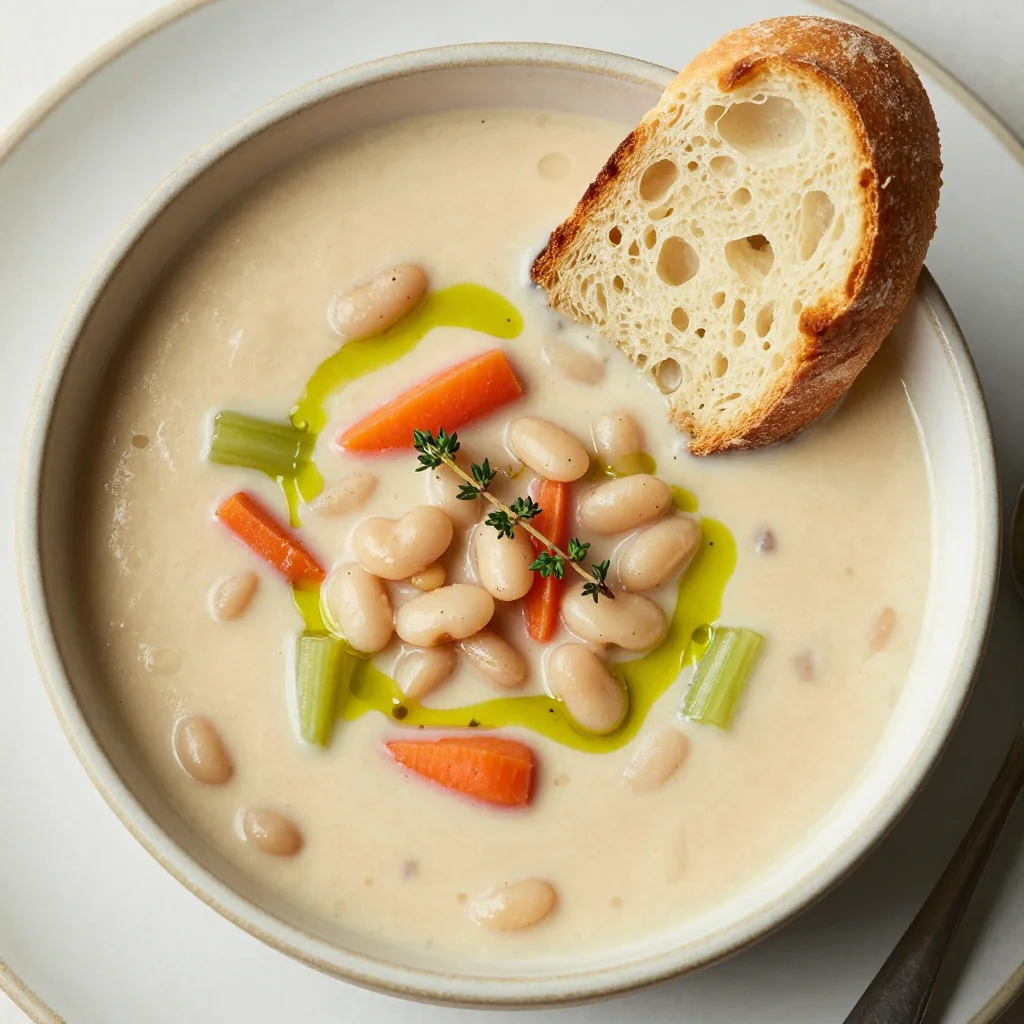
Taste and adjust seasoning with salt and freshly ground black pepper. The soup should taste slightly over-seasoned - flavors mellow as it cools. For extra richness, swirl in a tablespoon of olive oil. Serve hot with crusty bread, or let cool completely for freezing. If serving immediately, I love adding a squeeze of lemon and some fresh parsley for brightness.
Expert Tips
Bean Water Magic
Save the starchy bean cooking liquid - it's liquid gold for thickening other soups and stews. Freeze in ice cube trays for easy portioning.
Temperature Control
Keep your simmer gentle - vigorous boiling will break beans apart, resulting in mushy texture and cloudy broth.
Age Matters
Older beans take longer to cook. If your beans have been in the pantry for over a year, add 30 minutes to your cooking time.
Overnight Shortcut
Forgot to soak? Use the quick-soak method: cover beans with boiling water, let stand 1 hour, then proceed with recipe.
Freezer Success
Cool soup completely before freezing. Portion into flat freezer bags for space-efficient storage that thaws quickly.
Texture Control
For restaurant-quality presentation, reserve some whole beans before blending. Stir them back in for visual appeal.
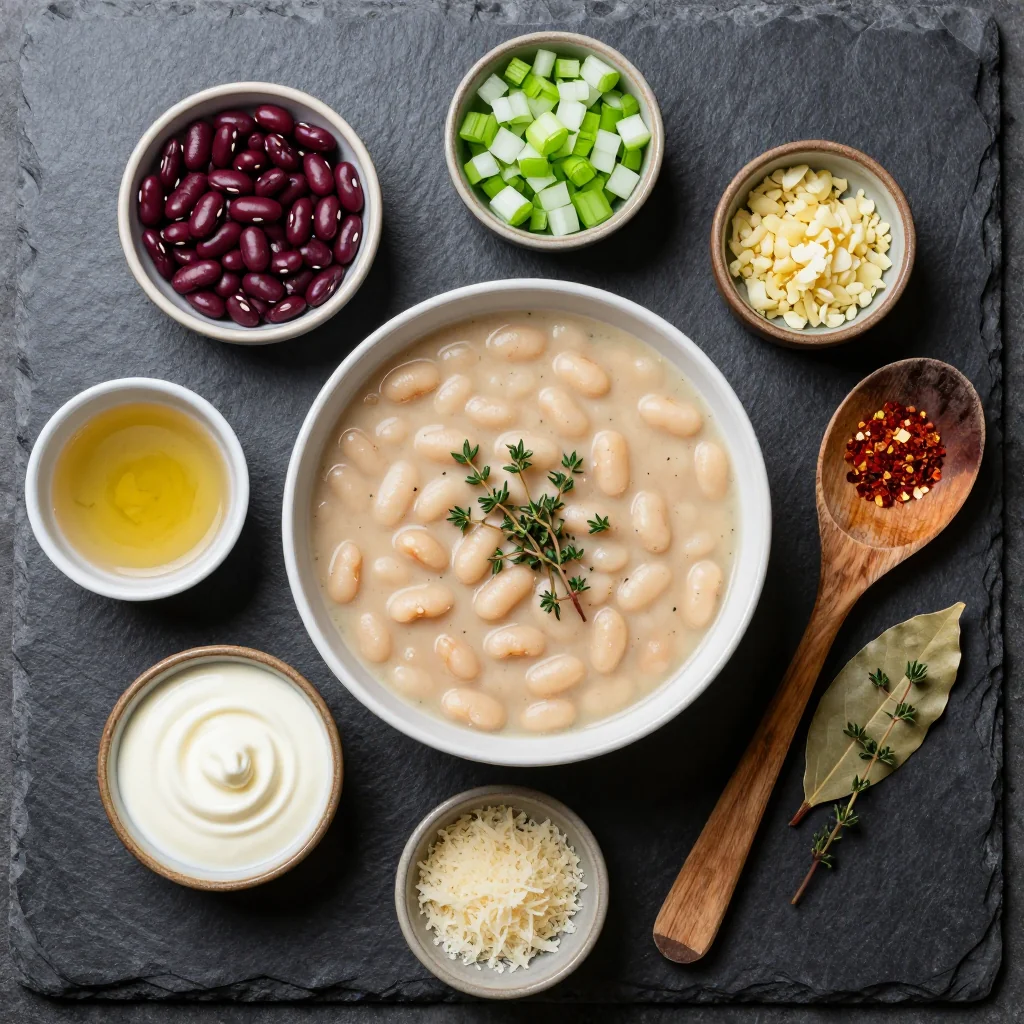
Variations to Try
Smoky Bacon Version
Replace olive oil with rendered bacon fat and add crispy bacon bits as garnish for smoky depth.
Rosemary Parmesan
Swap thyme for fresh rosemary and stir in grated Parmesan after blending for Italian flair.
Spicy Southwest
Add cumin, oregano, and chipotle powder. Top with avocado and cilantro for Mexican-inspired warmth.
Creamy Tuscan
Stir in baby spinach and sun-dried tomatoes. Finish with a splash of cream for extra richness.
Storage Tips
Freezer Instructions
This soup freezes beautifully for up to 3 months. Cool completely before transferring to freezer-safe containers. I prefer quart-sized freezer bags laid flat - they thaw quickly and save space. Remove as much air as possible to prevent freezer burn. Label with the date and contents. To thaw, transfer to refrigerator overnight or submerge sealed bag in cold water for faster thawing. Reheat gently over medium heat, adding broth if needed to thin.
Pro tip: Freeze in individual portions for grab-and-go lunches. The soup's texture actually improves after freezing as flavors meld!
Refrigerator Storage
Store cooled soup in airtight containers in the refrigerator for up to 4 days. The soup will thicken considerably when cold - this is normal! Simply thin with water or broth when reheating. For best quality, reheat only the amount you plan to serve rather than reheating the entire batch multiple times.
Frequently Asked Questions
Yes, but with modifications. Substitute 3 (15-ounce) cans of white beans, drained and rinsed. Reduce cooking time to 20 minutes since canned beans are already cooked. The flavor won't be quite as rich, but you'll still have a delicious soup. Consider adding a parmesan rind during simmering for extra depth.
Old beans, hard water, or acidic ingredients can dramatically increase cooking time. Ensure your beans are fresh (within 1 year), soak them properly, and avoid adding salt until beans are tender. If you live in an area with hard water, consider using filtered water for cooking.
Absolutely! Sauté vegetables on the stovetop first, then transfer to slow cooker with soaked beans and broth. Cook on LOW for 6-8 hours or HIGH for 4-5 hours until beans are tender. Blend as directed. The slow cooker method is perfect for busy weekdays.
Extremely! Each serving provides 15+ grams of plant-based protein, 12 grams of fiber, and is naturally low in fat. White beans are rich in folate, iron, and potassium. The soup is naturally gluten-free, dairy-free, and can be made vegan. It's filling without being heavy, making it perfect for healthy eating goals.
Simply thin with water, vegetable broth, or even milk for extra richness. Add liquid gradually, stirring and checking consistency. The soup will thicken considerably when cold, so it's better to err on the side of thinner consistency when freezing.
Crusty sourdough bread is classic, but this soup also pairs beautifully with grilled cheese, garlic knots, or a simple green salad. For a heartier meal, add cooked sausage or top with crispy bacon. A drizzle of good olive oil and some fresh herbs elevate it for company.
Cozy Freezer Prep Creamy White Bean Soup for Winter Warmth
Ingredients
Instructions
- Soak beans overnight: Sort and rinse beans, then cover with cold water by 2 inches. Add 1 tablespoon salt and soak 12-24 hours.
- Prepare vegetables: Heat olive oil in large pot over medium heat. Add onion, celery, and carrots with 1 teaspoon salt. Cook until softened, 8-10 minutes.
- Add aromatics: Stir in garlic, thyme, and smoked paprika. Cook 1 minute until fragrant.
- Add beans and broth: Drain and rinse soaked beans. Add to pot with vegetable broth and bay leaves. Bring to boil.
- Simmer until tender: Reduce heat and simmer 1-1.5 hours until beans are very tender.
- Blend and season: Remove bay leaves. Blend 2 cups soup until smooth and return to pot. Season with salt and pepper.
- Serve or freeze: Serve hot with crusty bread, or cool completely and freeze in portions.
Recipe Notes
For canned beans: Substitute 3 (15-ounce) cans, reduce cooking time to 20 minutes. Soup thickens considerably when cold - thin with water or broth when reheating. Freezes beautifully for up to 3 months.