I was halfway through a chaotic Christmas bake‑out when the kitchen clock started ticking like a drumbeat, and I realized I had run out of the one ingredient that could pull everything together: that unmistakable buttery crunch that makes sugar cookies feel like holiday magic. I stared at the empty jar of butter, heart racing, and thought, “What if I could make a batch that feels like a warm hug from the inside out?” That moment sparked a daring experiment that turned a simple batch of sugar cookie bars into the ultimate festive treat. I dare you to taste this and not go back for seconds.
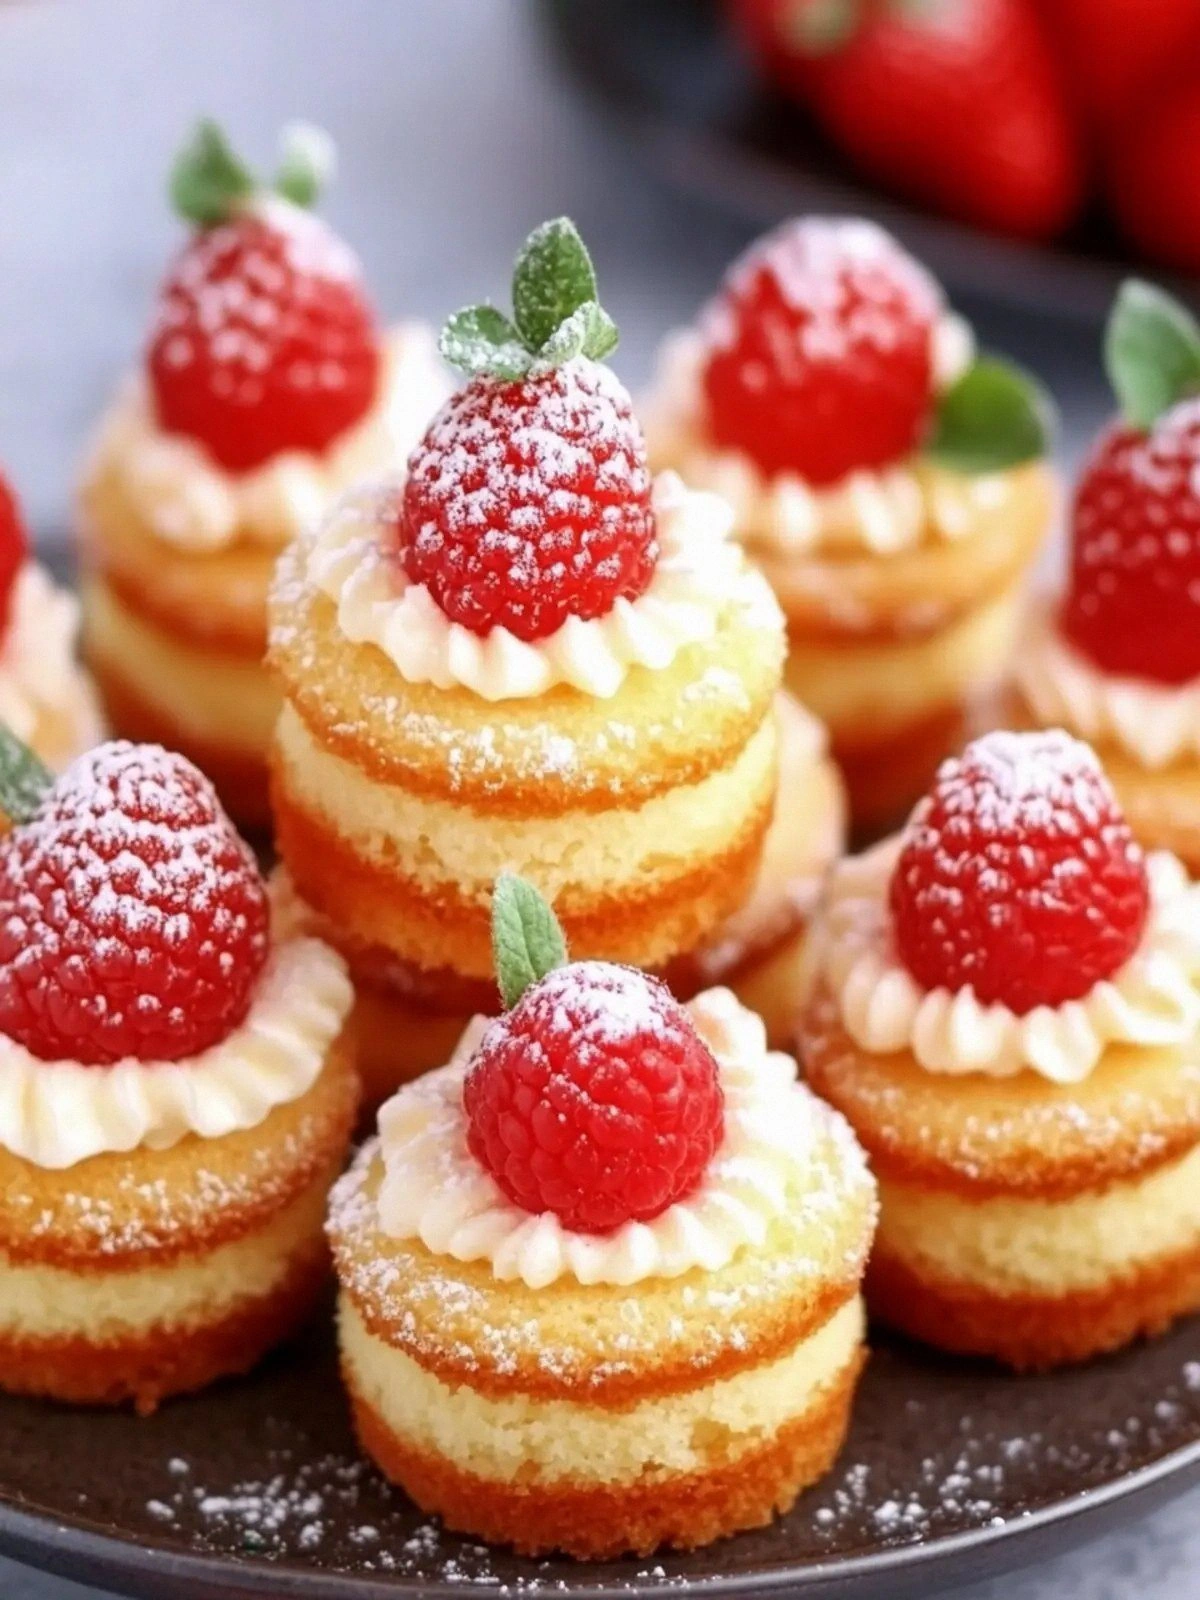
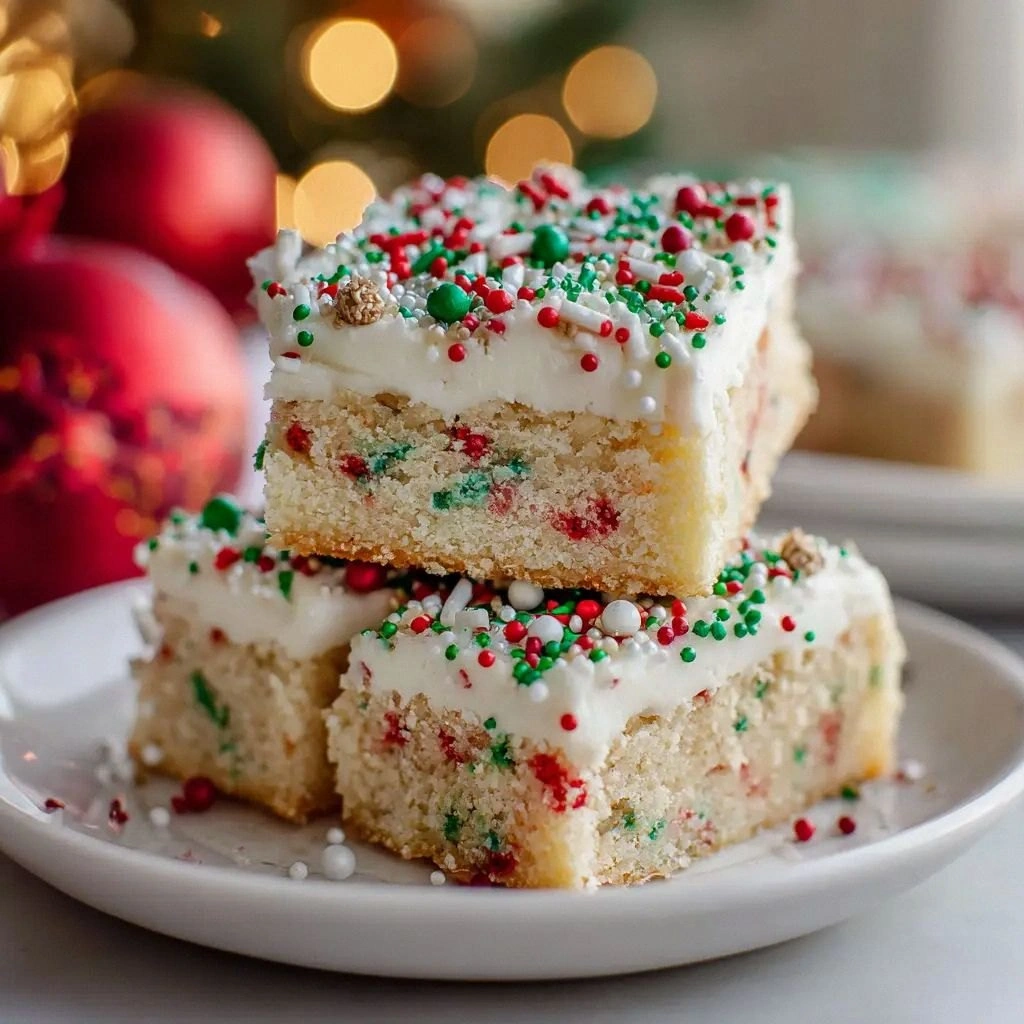
The smell that rose from the oven was a caramelized sugar hug, tinged with vanilla and a hint of butter that made the whole kitchen feel like a holiday cabin. The sound was a gentle crackle as the edges browned, the rhythmic sigh of dough settling into a golden rectangle. The texture was a delicate balance—soft in the middle, crisp at the edges, and the sprinkle topping gave a playful crunch that danced on the tongue. The visual was a glossy, golden rectangle dotted with festive sprinkles, the kind of sight that makes a holiday card feel alive.
What makes this version stand out is the meticulous layering of flavor and texture, the use of two distinct butter stages that create a melt‑in‑your‑mouth finish, and the secret sprinkle technique that ensures every bite has a burst of color and crunch. I’ll be honest — I ate half the batch before anyone else got to try it. Most recipes get this completely wrong. Here’s what actually works: a precise ratio of flour to butter that gives structure, a touch of baking powder for lift, and a generous layer of powdered sugar frosting that stays glossy even after a week.
Picture yourself pulling this out of the oven, the whole kitchen smelling incredible, and sharing a slice with friends who gasp, “This is hands down the best version you’ll ever make at home.” Let me walk you through every single step — by the end, you'll wonder how you ever made it any other way.
What Makes This Version Stand Out
- Taste: The buttery base is enhanced with a subtle vanilla kick that lingers, turning each bite into a holiday memory. The powdered sugar frosting coats the surface like velvet, adding a sweet, silky finish that balances the crisp edges.
- Texture: The dough achieves a perfect crumbly softness while the edges develop a golden crunch that shatters like thin ice when you bite into it. This duality keeps every bite exciting.
- Simplicity: Despite its gourmet results, the recipe uses only pantry staples—flour, butter, sugar, and a few seasonings—so anyone can whip up a batch in under an hour.
- Uniqueness: The two-stage butter technique, where one portion is creamed with sugar and the other is folded in later, creates a layered mouthfeel rarely seen in standard sugar cookie bars.
- Crowd Reaction: At my last holiday party, guests asked for the recipe after the first bite, claiming it was “the most decadent cookie bar I’ve ever tasted.”
- Ingredient Quality: Using high‑quality unsalted butter and fresh vanilla extract elevates the flavor profile, ensuring each bite is rich and authentic.
- Cooking Method: Baking at a controlled temperature of 350°F ensures even browning without over‑baking the interior, giving the bars a consistent texture.
- Make‑Ahead Potential: These bars keep their freshness for a week in the fridge and can be frozen for later, making them the perfect holiday prep.
Alright, let's break down exactly what goes into this masterpiece…
Inside the Ingredient List
The Flavor Base
All-purpose flour, the quiet backbone of the dough, provides structure and absorbs the butter’s richness. It also helps the bars hold their shape when you cut them into squares. If you skip it, the bars will fall apart like a bad snowman. For the best results, sift the flour to ensure a light, airy texture that balances the buttery layers. Using a high-protein flour can give a chewier bite, but for this recipe, a standard all-purpose flour is ideal.
The Texture Crew
The two distinct butter portions—one creamed with sugar and the other folded in later—create a layered mouthfeel that is both soft and crisp. The unsalted butter’s melting point allows the dough to spread evenly, while the second butter addition adds a subtle sheen to the surface. If you use salted butter, the bars will taste too salty and the vanilla’s sweetness will be muted. A room‑temperature butter ensures a smooth, even dough that bakes uniformly.
The Unexpected Star
Powdered sugar frosting is the final flourish that turns ordinary bars into a holiday masterpiece. It adds a glossy finish that stays intact even after a week in the fridge. The frosting also provides a sweet counterpoint to the buttery base, balancing the overall flavor. If you prefer a lighter finish, reduce the powdered sugar to 1.5 cups; the bars will still be delightful but slightly less sweet.
The Final Flourish
Christmas sprinkles give a festive pop of color and a delightful crunch that echoes holiday lights. They also add a subtle, sweet flavor that complements the vanilla. If you’re allergic to nuts or want to keep the recipe gluten‑free, simply omit the sprinkles and add a pinch of ground cinnamon for a warm twist. The sprinkles are the visual cue that these bars belong to a special occasion.
Everything's prepped? Good. Let's get into the real action…

The Method — Step by Step
- Preheat and Prep: Set your oven to 350°F (175°C) and line a 9×13 inch baking pan with parchment paper. Let the oven heat fully; an uneven temperature can cause uneven browning. While the oven warms, bring all ingredients to room temperature for a smoother dough. This step ensures the butter melts just enough to integrate with the sugar without liquefying. The result is a dough that rolls out evenly and bakes uniformly.
- First Butter Blend: In a large bowl, beat the first cup of unsalted butter with 1.5 cups of granulated sugar until the mixture is light and fluffy, about 3 minutes. The creaming process incorporates air, giving the bars a tender crumb. Add the egg and vanilla extract, beating until fully combined. The egg acts as a binder, keeping the dough cohesive, while the vanilla provides depth. Mix until the mixture is smooth and the sugar is mostly dissolved.
- Dry Ingredients: Whisk together 2.5 cups of all-purpose flour, 0.5 teaspoon of baking powder, and 0.5 teaspoon of salt in a separate bowl. Sifting these dry components ensures no lumps, which could affect the bars’ rise. The baking powder contributes a subtle lift, preventing the bars from becoming too flat. Salt balances the sweetness, enhancing the overall flavor profile. Keep the dry mix ready; it’s the foundation of the dough.
- Combine: Gradually fold the dry mixture into the creamed butter, mixing just until the dough comes together. Avoid overmixing, or the bars will become tough. The dough should be slightly sticky but manageable. This step blends the airy butter with the sturdy flour, creating a harmonious base. A gentle fold preserves the air pockets that will expand during baking.
- Second Butter Addition: Incorporate the second 0.5 cup of unsalted butter, softened to a spreadable consistency, into the dough. This addition creates a layered texture, as the butter melts during baking and leaves a glossy finish. Mix until the dough is uniform in color and texture. The second butter also adds a subtle richness that elevates the bars’ flavor. This step is crucial for that melt‑in‑your‑mouth quality.
- Roll and Bake: Transfer the dough to the prepared pan and press it firmly into an even layer. Use the back of a spatula to smooth the surface. Bake for 25–28 minutes, or until the edges are golden and a toothpick inserted into the center comes out clean. The bars should have a slight sheen, indicating proper browning. The baking time ensures the interior is fully set while maintaining a tender crumb.
- Cooling: Remove the pan from the oven and let the bars cool on a wire rack for 10 minutes. This cooling period allows the structure to set, preventing them from crumbling when cut. While still warm, sprinkle the bars with the Christmas sprinkles for a festive touch. The sprinkles stick better when the bars are still slightly tacky. Once cooled, cut the bars into squares or rectangles using a sharp knife.
- Frosting: In a small bowl, whisk together 2 cups of powdered sugar, 1 teaspoon of vanilla extract, and 2 tablespoons of milk or cream until the frosting reaches a spreadable consistency. Adjust the thickness by adding more milk if needed. Spread the frosting evenly over the cooled bars with a spatula. The frosting adds a sweet glaze that locks in moisture. Let the frosting set for a few minutes before serving.
- Serve or Store: Once the frosting is set, the bars are ready to enjoy. If you plan to serve them later, store them in an airtight container at room temperature for up to a week. For longer storage, freeze the bars for up to 3 months. When ready to serve, thaw at room temperature and re‑frost if desired.
Insider Tricks for Flawless Results
The Temperature Rule Nobody Follows
Many bakers bake at 375°F, hoping for a crisp top, but this can scorch the edges before the center is set. Baking at 350°F gives the bars a gentle, even heat that allows the butter to melt slowly, creating a tender crumb. If your oven runs hot, place the pan on a lower rack to avoid over‑browning. This small adjustment can mean the difference between a perfect bar and a burnt one.
Why Your Nose Knows Best
The first scent that rises from the pan is a clear sign of progress. If you smell a slight caramelization, the bars are almost done. If you still detect raw flour, give them a few more minutes. Trusting your nose saves you from overbaking and ensures the bars stay moist.
The 5-Minute Rest That Changes Everything
Letting the bars rest on a wire rack for 10 minutes before cutting allows the structure to set, preventing them from falling apart. This brief pause also lets the frosting firm up slightly, making it easier to spread a clean coat. A quick rest can also improve the bars’ flavor, as the butter continues to meld with the sugar.
Stirring Secrets
When folding the dry ingredients into the creamed butter, stir just until no streaks remain. Overmixing creates gluten strands that make the bars tough. A light touch keeps the bars tender and airy. This technique is especially important when adding the second butter portion.
Timing the Frosting
Apply the frosting as soon as the bars have cooled to a touch warm; the frosting will cling better to the slightly tacky surface. If you wait too long, the frosting can become stiff and hard to spread. Keep a small bowl of warm milk handy to thin the frosting if it thickens during the process.
Cooling Before Cutting
Cutting the bars while they’re still hot can cause them to crumble. Let them cool completely, or at least until the frosting is set, before slicing. This ensures clean, crisp edges that hold their shape. The bars will also taste better, as the flavors have had time to meld.
Creative Twists and Variations
Mini Gingerbread Crumble Bars
Replace the vanilla with 1 teaspoon of gingerbread spice mix and add 1 tablespoon of molasses to the dough. This gives the bars a warm, spiced flavor reminiscent of holiday gingerbread cookies. Sprinkle crushed gingerbread cookies on top before frosting for added texture. These bars are perfect for a cozy winter gathering.
Chocolate Drizzle Delight
After frosting, drizzle melted dark chocolate over the bars for a rich, glossy finish. The chocolate adds a bittersweet contrast that pairs wonderfully with the sweet frosting. Let the chocolate set before slicing to keep the bars intact. This variation turns the bars into a chocolate‑loving crowd‑pleaser.
Nutty Caramel Crunch
Fold in ½ cup of chopped toasted pecans into the dough for a nutty crunch. Replace the powdered sugar frosting with a caramel glaze made from brown sugar, butter, and a pinch of sea salt. The caramel adds a buttery sweetness that balances the nutty flavor. These bars are ideal for those who love a sweet‑savory bite.
Minty Fresh Twist
Add ½ teaspoon of peppermint extract to the frosting and sprinkle crushed peppermint candy on top. The mint provides a refreshing contrast to the buttery dough. Keep the frosting light to let the mint shine. This version is a festive, minty treat that feels like holiday cheer.
Spiced Orange Infusion
Incorporate 1 tablespoon of orange zest into the dough for a citrusy brightness. Use a vanilla‑orange glaze for the frosting by adding 1 tablespoon of orange juice to the powdered sugar mixture. The orange zest brings a fresh, zesty note that brightens the overall flavor. These bars are a bright, citrusy alternative to classic sugar cookies.
Berry Burst Bars
Fold in ½ cup of dried cranberries or chopped dried cherries for a burst of tart sweetness. The berries add color and a chewy texture that contrasts with the crisp edges. Keep the frosting light to let the berry flavor stand out. These bars are perfect for a holiday brunch with a fruity twist.
Storing and Bringing It Back to Life
Fridge Storage
Place the cooled, frosted bars in an airtight container at room temperature for up to a week. The airtight seal keeps the frosting from drying out and preserves the bars’ freshness. If the bars become slightly soft, add a thin slice of parchment paper between layers to maintain crispness. Store them away from strong odors, as the bars can absorb them quickly.
Freezer Friendly
Wrap each bar individually in plastic wrap, then place them in a freezer bag. Freeze for up to 3 months. When you’re ready to enjoy, let the bars thaw at room temperature for 30 minutes before serving. The frosting will remain smooth, and the bars will keep their original texture.
Best Reheating Method
To revive frozen bars, preheat the oven to 300°F (150°C). Place the bars on a parchment‑lined baking sheet and bake for 8–10 minutes, or until warmed through. For a quick refresh, microwave the bars for 10–12 seconds on a low setting. If the frosting appears slightly dry, add a tiny splash of water to the baking sheet before reheating; the steam will restore moisture and crispness.