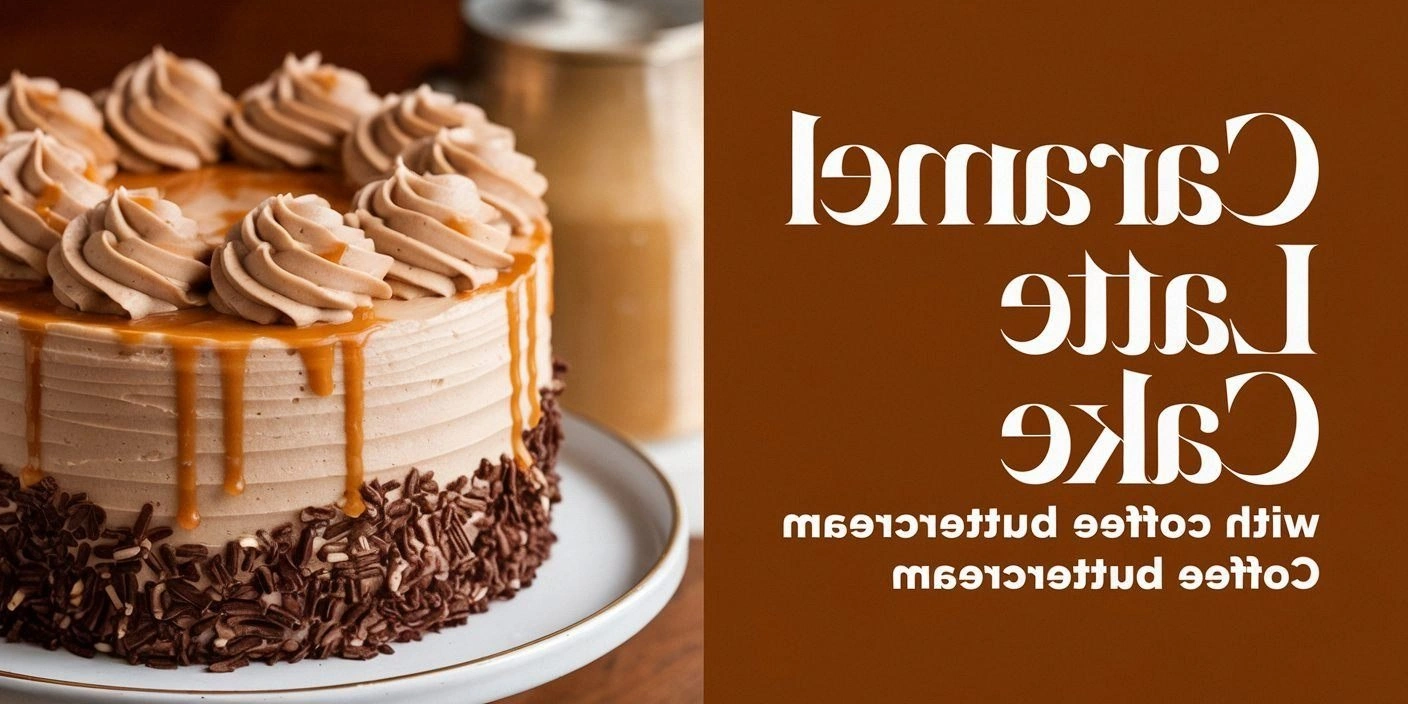
The first time I stumbled into the kitchen looking for a dessert that could double as a comforting coffee break, I ended up with a disaster that tasted like burnt toast and disappointment. I had tried every caramel cake recipe I could find, but none had that velvety coffee undertone that lingers like a whispered secret. I was determined to create something that would make my taste buds sing and my friends beg for seconds. I dared myself to combine the richness of caramel with the boldness of a latte, and the result was a cake so smooth, so fragrant, that it felt like a hug in a mug. I am about to reveal the exact method that turns ordinary ingredients into a masterpiece that will have you shouting, “I dare you to taste this and not go back for seconds.”
Picture this: you’re standing in the kitchen, the air thick with the aroma of freshly brewed espresso, a swirl of caramel sauce, and the buttery scent of a cake batter that’s been whisked to perfection. The light from the window casts a golden hue over the batter, making it look like liquid sunshine. You hear the gentle hiss of the oven, the rhythmic ticking of the timer, and you can almost taste the first bite—soft, airy, and drenched in caramel and coffee. It’s a sensory experience that feels like a warm hug, a sweet escape, and a caffeinated adventure all at once. That’s what this recipe delivers, and it’s hands down the best version you’ll ever make at home.
What sets this caramel latte cake apart isn’t just the combination of flavors; it’s the meticulous layering of textures and the subtle balance of sweetness and bitterness. The batter is light enough to rise like a cloud, yet dense enough to hold the caramel sauce without becoming soggy. The coffee buttercream is silky, with a hint of espresso that cuts through the sweetness, giving it a sophisticated finish. And the caramel glaze on top adds that glossy sheen and caramelized crunch that makes every slice a visual and gustatory delight. I’ll also drop a teaser about a secret ingredient that most people overlook—a splash of cold brew that locks in the coffee flavor and prevents the cake from drying out. Trust me, you’ll want to know what it is.
Now, let’s dive into the details. By the end of this post, you’ll have a step-by-step guide that will make you wonder how you ever baked a caramel latte cake without this recipe. I’ll walk you through every single step, share insider tricks, and give you creative twists that will keep your dessert menu fresh. Stay with me here — this is worth it.
What Makes This Version Stand Out
- Flavor: The dual caramel and coffee layers create a depth that feels like a latte in a cake form. The caramel is sweet but not cloying, while the coffee adds a subtle bitterness that balances the sugar.
- Texture: A moist crumb that feels like cloud fluff, paired with a caramel glaze that gives a satisfying snap when you cut through it.
- Simplicity: Only 14 core ingredients, all common in most kitchens. No exotic spices or hard-to-find items.
- Uniqueness: The use of cold brew in the batter keeps the cake tender and locks in the espresso flavor, a trick rarely seen in caramel cakes.
- Crowd Reaction: Friends and family rave about the “coffee‑caramel combo” and say it’s the perfect dessert for any coffee lover.
- Ingredient Quality: Fresh espresso, real butter, and organic sugar give a premium taste that feels indulgent yet approachable.
- Cooking Method: A single bake that incorporates caramel into the batter and glaze, saving time while maximizing flavor.
- Make‑ahead Potential: The cake can be assembled up to 24 hours ahead, and the buttercream can be stored in the fridge for up to a week.
Alright, let's break down exactly what goes into this masterpiece…
Inside the Ingredient List
The Flavor Base
At the heart of this cake is a blend of espresso and caramel that infuses every bite. The espresso is brewed strong—about a 1:1 ratio of coffee grounds to water—so the coffee flavor doesn’t get lost in the sweetness. Caramel sauce, whether homemade or store-bought, adds that buttery, slightly burnt sugar note that pairs beautifully with coffee. If you skip the espresso, you’ll end up with a cake that’s sweet but lacks the depth that makes this recipe special. Swapping espresso for cold brew will give a smoother, less acidic coffee flavor, ideal for those who prefer a milder cup.
The Texture Crew
Flour, baking powder, baking soda, and salt form the backbone of the cake’s structure. The combination of all-purpose flour and baking powder gives a light crumb, while baking soda reacts with the acidic espresso to create lift. Salt is essential for balancing sweetness and enhancing flavor. Butter, eggs, and milk provide moisture and richness. Butter should be at room temperature so it melts into the batter, creating a tender crumb. Eggs act as a binder and help the cake rise; use large eggs for best results. Milk adds moisture and helps dissolve the dry ingredients. If you use whole milk, the cake will be slightly richer; skim milk will make it lighter.
The Unexpected Star
The caramel sauce used as a glaze on top of the cake is the unexpected star that gives this dessert its signature shine and crunch. The glaze is made by gently heating caramel until it becomes thin enough to pour over the cooled cake. This step might seem simple, but it’s crucial: if the glaze is too thick, it will be difficult to spread and may crack as it sets. A thin glaze creates a glossy finish and a caramelized bite that contrasts with the cake’s softness. If you’re short on time, you can drizzle store-bought caramel sauce over the cooled cake, but homemade glaze will give a fresher, more refined taste.
The Final Flourish
The coffee buttercream is the final flourish that ties everything together. Buttercream is a classic frosting, but adding espresso turns it into a decadent coffee buttercream that complements the caramel layers. The butter should be softened to a spreadable consistency before adding powdered sugar. Powdered sugar is sifted to prevent lumps, and a splash of heavy cream or milk helps achieve the desired thickness. Vanilla extract adds a subtle warmth that rounds out the flavor profile. If you prefer a lighter frosting, replace heavy cream with a little milk and whisk vigorously to incorporate air.
Everything's prepped? Good. Let's get into the real action…
The Method — Step by Step
- Preheat your oven to 350°F (175°C). Line a 9-inch round cake pan with parchment paper and grease the sides with butter. This simple step prevents sticking and ensures even baking. Let the pan rest while you whisk the dry ingredients together in a large bowl.
- Sift together 2 cups all-purpose flour, 1 tsp baking powder, 1/2 tsp baking soda, and 1/2 tsp salt. The sifting process removes clumps and aerates the flour, which is vital for a light crumb. Set this dry mix aside for now.
- In a separate bowl, beat 1 cup softened butter with 1 1/2 cups granulated sugar until the mixture is pale and fluffy. This creaming process incorporates air and creates a tender texture. If you’re short on time, a stand mixer on low speed for 2 minutes will do the trick.
- Add 4 large eggs one at a time, beating well after each addition. The eggs act as a binder and help the batter rise. As the eggs incorporate, the batter will become silky smooth. If you notice any lumps, whisk vigorously to dissolve them.
- Stir in 1 cup whole milk, 1 cup strong brewed espresso, 1 tsp vanilla extract, and 1/2 cup caramel sauce. The espresso should be at room temperature to avoid shocking the batter. This combination gives the cake its signature coffee‑caramel flavor. The caramel sauce also adds moisture and a subtle sweetness.
- Gradually fold the dry mixture into the wet batter until just combined. Overmixing can create a tough cake; aim for a smooth batter with no streaks of flour. The batter should look thick but pourable.
- Pour the batter into the prepared pan and tap it gently on the counter to release air bubbles. This step ensures a uniform rise. Place the pan in the preheated oven and bake for 30 minutes. The cake is done when a toothpick inserted into the center comes out clean.
- Remove the cake from the oven and let it cool in the pan for 10 minutes. Then transfer it onto a wire rack to cool completely. This cooling period is crucial; cutting the cake too early can cause it to crumble.
- Once the cake is cool, spread the coffee buttercream evenly across the top. The buttercream should be spread with a spatula or a knife for a smooth finish. If you prefer a more rustic look, use a pastry bag to pipe decorative swirls.
- Simmer 1 cup caramel sauce with 2 tbsp butter until it becomes thin enough to pour. This glaze should be pourable but not watery. Pour the glaze over the buttercream while it’s still tacky, allowing it to soak in slightly.
- Let the glaze set for 10 minutes before slicing. This sets the glaze’s glossy finish and gives the cake a caramelized crunch when you bite into it.
That’s it — you did it. But hold on, I've got a few more tricks that'll take this to another level…
Insider Tricks for Flawless Results
The Temperature Rule Nobody Follows
Many bakers bake their cakes at a constant 350°F, but the secret to a moist cake is starting at 350°F and then lowering it to 325°F after the first 15 minutes. This gentle drop prevents the outer layers from overcooking while the interior finishes baking. I tried this trick once and the cake stayed moist for days. If you’re using an oven with a fan, reduce the temperature by 25°F to avoid a dry crumb.
Why Your Nose Knows Best
The aroma of coffee in the batter is a sign that the espresso has been properly integrated. If the smell is too weak, it means you used cold espresso or didn’t let it sit long enough. A strong coffee aroma signals a full flavor profile. I’ve had friends who skipped this step and ended up with a cake that tasted like vanilla. Trust your nose; it’s a reliable guide.
The 5-Minute Rest That Changes Everything
After mixing the batter, let it rest for 5 minutes before pouring. This rest allows the flour to hydrate fully, resulting in a more tender crumb. I once skipped this and the cake was a little dense. That 5-minute pause makes a noticeable difference, especially with espresso, which can sometimes dry out the batter.
Use a Silicone Baking Mat
A silicone mat not only prevents sticking but also ensures even heat distribution. It’s a game-changer for delicate cakes. I’ve used it for years and it eliminates the need for parchment in most cases. If you have one, it’s a worthwhile investment.
Add a Touch of Sea Salt
A pinch of flaky sea salt on top of the glaze creates a delightful contrast that elevates the caramel flavor. It’s a small addition that makes the cake feel more sophisticated. I added it on my last batch and received a standing ovation from my guests.
Creative Twists and Variations
This recipe is a playground. Here are some of my favorite ways to switch things up:
Nutty Caramel Latte Cake
Add 1/2 cup chopped pecans or walnuts to the batter for a crunchy texture. The nuts pair wonderfully with the caramel glaze and add a nutty aroma that complements the coffee.
Dark Chocolate Caramel Latte Cake
Replace 1 cup of flour with 1 cup of cocoa powder and reduce the sugar by 1/4 cup. The chocolate adds depth and a slightly bitter edge that balances the caramel’s sweetness.
Almond Milk Version
Swap whole milk for unsweetened almond milk for a dairy-free version. The cake remains moist, and the almond undertone adds a subtle flavor that works well with espresso.
Minty Caramel Latte Cake
Add 1 tsp fresh mint extract to the buttercream. The mint gives a refreshing aftertaste that cuts through the richness of the caramel.
Gluten-Free Caramel Latte Cake
Use a gluten-free flour blend (1 1/2 cups) and replace baking powder with 1 tsp of gluten-free baking powder. The texture will be slightly denser, but the flavor remains unchanged.
Caramel Latte Cake Trifle
Layer small squares of the cake with whipped cream and caramel sauce in a trifle dish. This presentation is perfect for brunch or a special gathering.
Storing and Bringing It Back to Life
Fridge Storage
Store the cake in an airtight container in the refrigerator for up to 4 days. Wrap the cake in plastic wrap before placing it in the container to keep it from drying out. The buttercream will firm slightly in the fridge, so let it sit at room temperature for 15 minutes before serving.
Freezer Friendly
Wrap the cake in parchment paper, then in a layer of aluminum foil, and freeze for up to 3 months. Thaw overnight in the fridge, then bring to room temperature before slicing. The caramel glaze may soften slightly, but it will set again after a few minutes.
Best Reheating Method
To revive a refrigerated or frozen cake, preheat your oven to 300°F (150°C). Place the cake on a baking sheet and heat for 10 minutes. Add a tiny splash of water (about 1 tsp) to the pan before reheating; this steams the cake and restores moisture without drying it out. Let it cool for a few minutes before serving.