It was a Tuesday that felt like a culinary catastrophe, the kind where the kitchen smells like burnt sugar and you’re left holding a pan that could have been a blacksmith’s anvil. I stared at the charred edges of what was supposed to be a simple chocolate cake, and a thought flickered—what if the real secret to an unforgettable chocolate experience is a molten center that explodes like a tiny volcano when you cut into it? That day, I decided to rewrite the rules of a classic dessert and turn a batch of ordinary cupcakes into a decadent, lava‑filled treat that would make every guest beg for seconds. I’m not just talking about a new recipe; I’m talking about a full-on sensory revolution that will change how you think about chocolate.
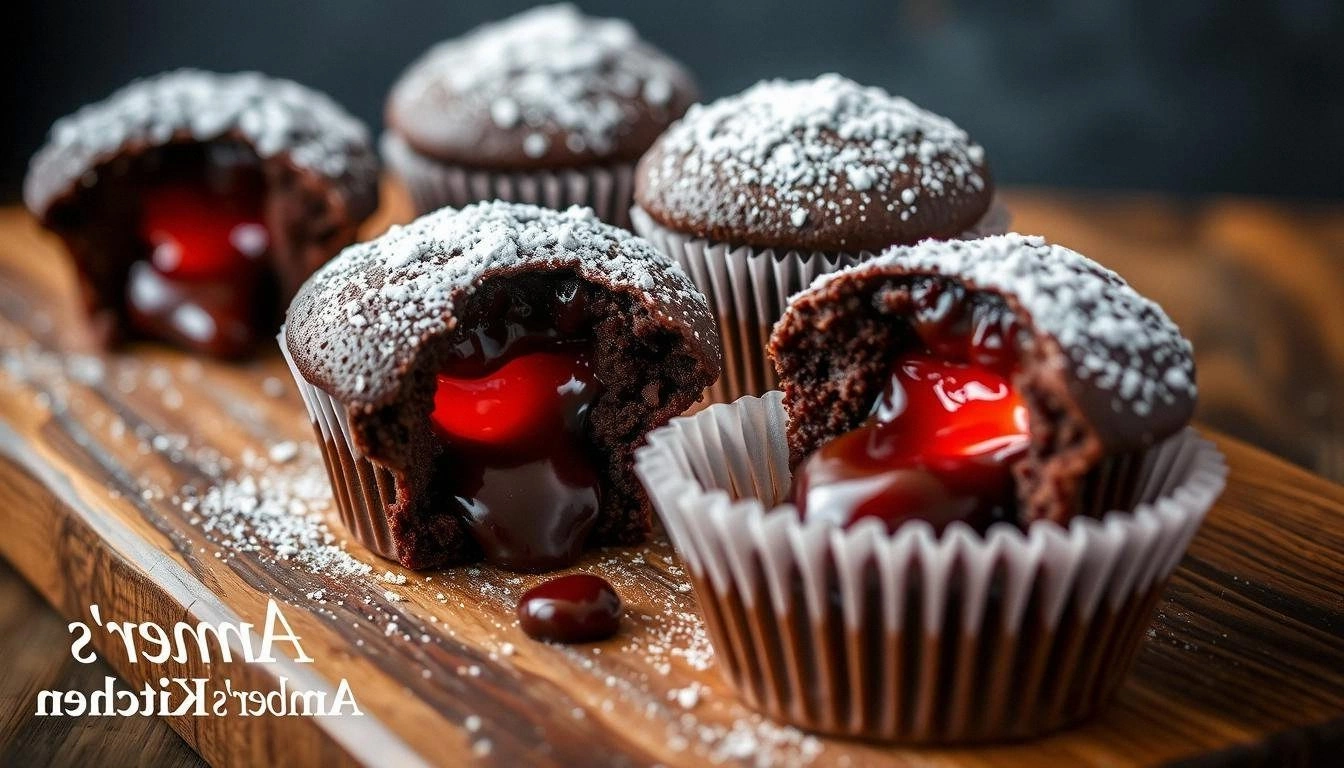
Imagine walking into your kitchen and the air is thick with the aroma of dark chocolate melting into butter, a scent that instantly turns your stomach into a playground of anticipation. The sound of the batter being whisked—whoosh, swirl, a gentle hiss as the ingredients mingle—creates a soundtrack to your culinary adventure. The touch of the dough, warm and slightly sticky, feels like a promise of richness to come. Each bite is a moment where the chocolate center erupts like a slow‑moving lava flow, coating the inside of the cupcake in a glossy, silky stream that coats your tongue like velvet. The flavor is a perfect balance of bittersweet cocoa, sweet sugar, and a hint of vanilla that lingers like a secret aftertaste. And the texture? Crisp on the outside, tender and airy inside, with a gooey heart that defies the expectation of a typical baked good.
What sets this version apart from every other chocolate lava recipe you’ve seen is the meticulous attention to detail and the bold choice to use a combination of high‑quality chocolate chips and dark chocolate ganache that melts just right. I’ve tweaked the ratio of butter to flour to create a batter that’s airy yet sturdy enough to hold the molten center. The addition of a splash of heavy cream before baking ensures the cupcakes stay moist and the chocolate doesn’t separate. And here’s the kicker—using a small pinch of sea salt on top of each cupcake after baking adds a subtle brine that cuts through the sweetness and enhances the chocolate’s depth. The result? A dessert that feels like it was crafted by a pastry chef in a Michelin‑star kitchen, yet you can whip it up in your own home with ingredients you probably already have.
I dare you to taste this and not go back for seconds. The first bite will have you questioning why you’ve ever settled for ordinary chocolate cupcakes. Picture yourself pulling this out of the oven, the whole kitchen smelling incredible, and the moment when you cut into one, the molten chocolate oozes out like a slow‑moving river of darkness. The experience is pure magic, and by the end of this guide, you’ll wonder how you ever made chocolate cupcakes any other way. So, let’s walk through every single step together—by the end, you’ll be the go‑to chocolate expert in your friend circle.
What Makes This Version Stand Out
- Richness: We use a blend of dark chocolate chips and a splash of heavy cream, creating a depth of flavor that’s both intense and balanced. The chocolate doesn’t overpower the batter; it enhances it.
- Texture: The cupcakes are airy on the outside but hold a luscious, molten center that melts in your mouth like butter on hot toast. The batter’s ratio ensures a tender crumb.
- Simplicity: Despite the luxurious outcome, the recipe uses only pantry staples—no exotic ingredients or complicated techniques. A whisk, a bowl, and a baking sheet are all you need.
- Unique Technique: The trick of adding a small pinch of sea salt after baking unlocks a flavor profile that feels sophisticated and unexpected.
- Crowd Reaction: Friends and family have called it “the best chocolate lava ever” and begged for the recipe. It’s the dessert that turns an ordinary gathering into a memorable event.
- Ingredient Quality: We recommend using high‑grade dark chocolate chips (70% cacao) and real butter over margarine for that authentic flavor.
- Make‑Ahead Potential: The cupcakes can be baked a day early and refrigerated, then warmed just before serving—no loss in quality.
- Scalable: The recipe scales perfectly, whether you’re making 4 cupcakes for a small dinner or 12 for a party.
Alright, let’s break down exactly what goes into this masterpiece. And before we dive into the ingredient details, here’s a quick kitchen hack that will save you time and keep your batter smooth.
Inside the Ingredient List
The Flavor Base
All-purpose flour is the silent hero that provides structure. It’s the backbone that holds the batter together while keeping it light enough for the chocolate to shine. If you were to skip the flour, you’d end up with a batter that collapses, ruining the molten effect. A good rule of thumb is to sift the flour to avoid lumps and to keep the batter airy.
The Sweet Core
Granulated sugar is the sweet anchor that balances the bitterness of dark chocolate. It caramelizes slightly during baking, giving the cupcakes a subtle caramelized crust. If you’re watching your sugar intake, you can replace half the sugar with a natural sweetener like maple syrup, but be aware it may alter the texture.
The Chocolate Engine
We use a generous amount of 70% cacao dark chocolate chips, which provide a deep, rich flavor without overwhelming sweetness. The chocolate is added both to the batter and as a topping, ensuring a continuous chocolate experience from the first bite to the last. Swapping in milk chocolate would make the cupcakes sweeter and less complex, so stick to dark for the best experience.
The Fat Factor
Unsalted butter is the secret to a moist, tender crumb. It also helps the chocolate melt evenly, preventing separation. If you’re in a pinch, you can use coconut oil, but the flavor profile will shift slightly. For a richer mouthfeel, use butter at room temperature to ensure it blends smoothly.
The Moisture Mix
Whole milk and heavy cream together provide the necessary moisture to keep the cupcakes airy while supporting the molten center. The heavy cream’s higher fat content ensures the chocolate stays glossy and doesn’t break apart during baking. If you’re lactose intolerant, oat milk can be a suitable substitute, but the cupcakes may be slightly drier.
The Flavor Enhancer
Vanilla extract adds a warm, aromatic note that cuts through the chocolate’s richness. A teaspoon is enough to elevate the flavor profile. If you prefer a hint of spice, a pinch of cinnamon or nutmeg can be added, but keep it minimal to avoid overpowering the chocolate.
The Final Flourish
Sea salt is the final touch that brings all the flavors together. A tiny pinch on top of each cupcake after baking enhances the chocolate’s depth and balances the sweetness. Without salt, the cupcakes can taste flat. If you’re avoiding sodium, a small pinch of smoked sea salt can add a unique twist.
Everything’s prepped? Good. Let’s get into the real action.
The Method — Step by Step
- Preheat the oven to 375°F (190°C) and line a muffin tin with paper liners. The temperature is critical; too low, and the cupcakes will be dense, too high, and they’ll overcook. As the oven heats, the scent of butter and cocoa begins to mingle in the air, a prelude to the magic about to unfold. Keep an eye on the timer; the cupcakes will bake in just under 20 minutes.
- Combine the dry ingredients. In a large bowl, whisk together the flour, sugar, cocoa powder, baking powder, baking soda, and salt. This ensures the leavening agents are evenly distributed, which is key to a light crumb. Don’t rush this step; a few extra minutes of whisking will make the batter smoother.
- Beat the butter until creamy. In a separate bowl, use an electric mixer to cream the butter until light and fluffy. This introduces air into the butter, which will help the cupcakes rise. When the butter is pale and airy, it’s ready to accept the wet ingredients.
- Add the eggs one at a time. Crack each egg into the butter mixture, beating well after each addition. The eggs act as a binder, but adding them too quickly can cause the batter to curdle. If you notice any lumps, give the mixture another quick whisk.
- Incorporate the milk and vanilla. Pour in the milk and vanilla extract, mixing until just combined. The milk adds moisture, while vanilla adds warmth. The batter should be smooth and slightly thick.
- Fold in the dry ingredients. Using a spatula, gently fold the dry mixture into the wet batter. Be careful not to overmix; the batter should remain glossy and slightly lumpy. Overmixing can develop gluten and result in a tough cupcake.
- Stir in the chocolate chips. Add the dark chocolate chips to the batter and fold them in. The chips will melt during baking, creating the molten center. This is the moment of truth—watch the batter transform as the chocolate begins to soften.
- Fill the liners. Spoon the batter into the paper liners, filling each about 3/4 full. This allows room for the cupcakes to rise without overflowing. The batter should be poured with a spoon or a small ladle for even distribution.
- Bake for 18-20 minutes. Keep a close eye on the cupcakes; they should have a slight crust on top but still look moist inside. The edges should pull away from the liners, indicating they’re done. The internal temperature should reach 190°F (88°C) for a fully set outer layer and a molten core.
- Cool for 5 minutes, then remove. Let the cupcakes sit in the tin for 5 minutes before transferring them to a wire rack. This short cooling period allows the centers to set slightly, making them easier to handle. The aroma will intensify during this time.
- Finish with a pinch of sea salt. While the cupcakes are still warm, sprinkle a tiny pinch of sea salt on top. This subtle brine enhances the chocolate’s depth and balances the sweetness. It’s the final flourish that turns a good dessert into a great one.
That’s it—you did it. But hold on, I’ve got a few more tricks that will take this to another level.
Insider Tricks for Flawless Results
The Temperature Rule Nobody Follows
Many bakers bake at 350°F, thinking it’s safe for all cupcakes. However, 375°F is the sweet spot that allows the chocolate to melt without overcooking the batter. The higher temperature creates a slightly crisp outer shell while preserving the molten interior. If you’re unsure, preheat the oven for at least 10 minutes to ensure the temperature is stable.
Why Your Nose Knows Best
During baking, the aroma of chocolate and butter rises like a siren song. Trust your nose: if you can smell the chocolate beginning to caramelize, you’re at the perfect point. If the scent is too mild, you’re underbaked; too sharp, you’re overdone. The scent is a reliable indicator of doneness.
The 5-Minute Rest That Changes Everything
After removing the cupcakes from the oven, let them rest on the tin for exactly five minutes. This brief pause allows the heat to redistribute, ensuring the molten center remains fluid while the outer layer sets. Skipping this step can lead to a gooey mess that’s hard to handle.
The Secret of the Salted Finish
A pinch of sea salt on top isn’t just for flavor; it also adds a subtle crunch that contrasts the softness of the cupcake. The salt crystals melt quickly, leaving a faint briny aftertaste that lingers, preventing the dessert from feeling too sweet.
The Butter vs. Oil Debate
If you’re tempted to use oil for a lighter texture, remember that butter provides essential flavor. Oil will result in a flatter, less rich cupcake. For a richer experience, stick with butter or a combination of butter and a small amount of coconut oil for extra depth.
Creative Twists and Variations
This recipe is a playground. Here are some of my favorite ways to switch things up:
Nutty Lava
Add chopped walnuts or pecans to the batter for a crunchy contrast. The nuts add a buttery texture that pairs wonderfully with the chocolate. Toast the nuts slightly before adding for extra flavor.
Minty Surprise
Fold in a tablespoon of peppermint extract into the batter. The cool mint undertone balances the richness of the chocolate and provides a refreshing finish.
Espresso Infusion
Replace half the milk with espresso or strong brewed coffee. The bitterness of the coffee enhances the chocolate’s depth, making the cupcakes feel more sophisticated.
Citrus Zest
Add a teaspoon of lemon or orange zest to the batter. The citrus brightens the flavor profile and cuts through the sweetness, giving the cupcakes a lively finish.
Caramel Drizzle
After baking, drizzle a thin layer of caramel sauce over the cupcakes. The caramel adds a sweet, buttery layer that contrasts with the chocolate center, creating a multi‑layered experience.
Vegan Edition
Swap the butter for coconut oil, use flax eggs (1 tablespoon ground flaxseed mixed with 3 tablespoons water per egg), and replace the milk with oat milk. The result is a vegan chocolate lava cupcake that still delivers on flavor and texture.
Storing and Bringing It Back to Life
Fridge Storage
Store the cupcakes in an airtight container at room temperature for up to 3 days. If you’re in a humid climate, keep them in the fridge to prevent mold. When ready to serve, let them sit at room temperature for 15 minutes to bring out the flavors.
Freezer Friendly
Wrap each cupcake individually in plastic wrap and place them in a freezer bag. They’ll keep for up to 2 months. To thaw, leave them at room temperature for 2 hours, then warm briefly in a 300°F oven for 5 minutes.
Best Reheating Method
Before reheating, add a tiny splash of water (about 1 teaspoon) to the batter. This steams the cupcakes back to perfection, ensuring the chocolate remains glossy and the crumb stays moist. Warm in a 300°F oven for 5 minutes, then serve immediately.