Easy Homemade Gluten Free Bread That Actually Tastes Good
Living with gluten intolerance can be tough. Finding a gluten-free bread that tastes good and feels right is a big challenge. It’s like searching for a needle in a haystack. But, I’m here to share a recipe that will make you rethink gluten-free baking.
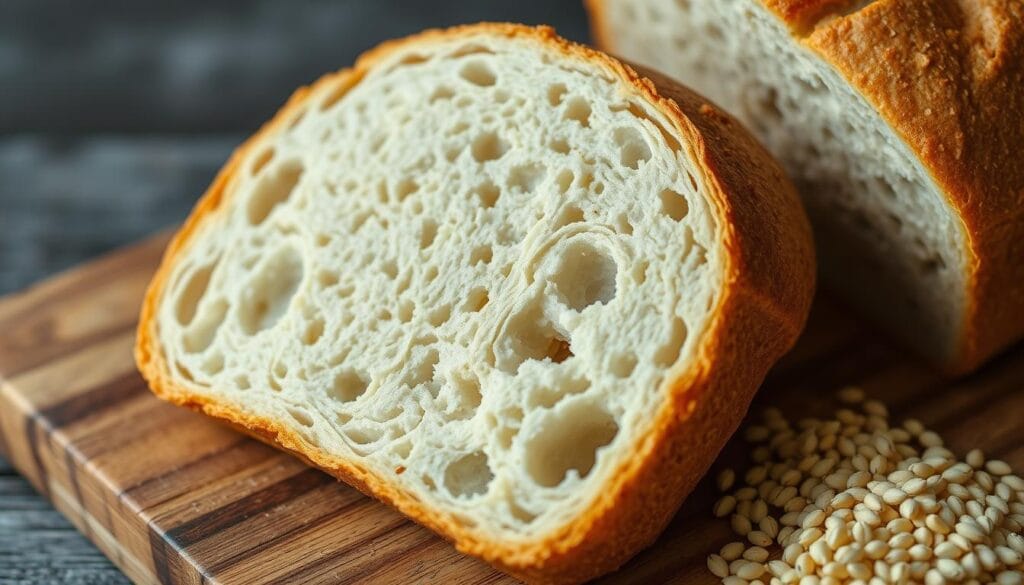
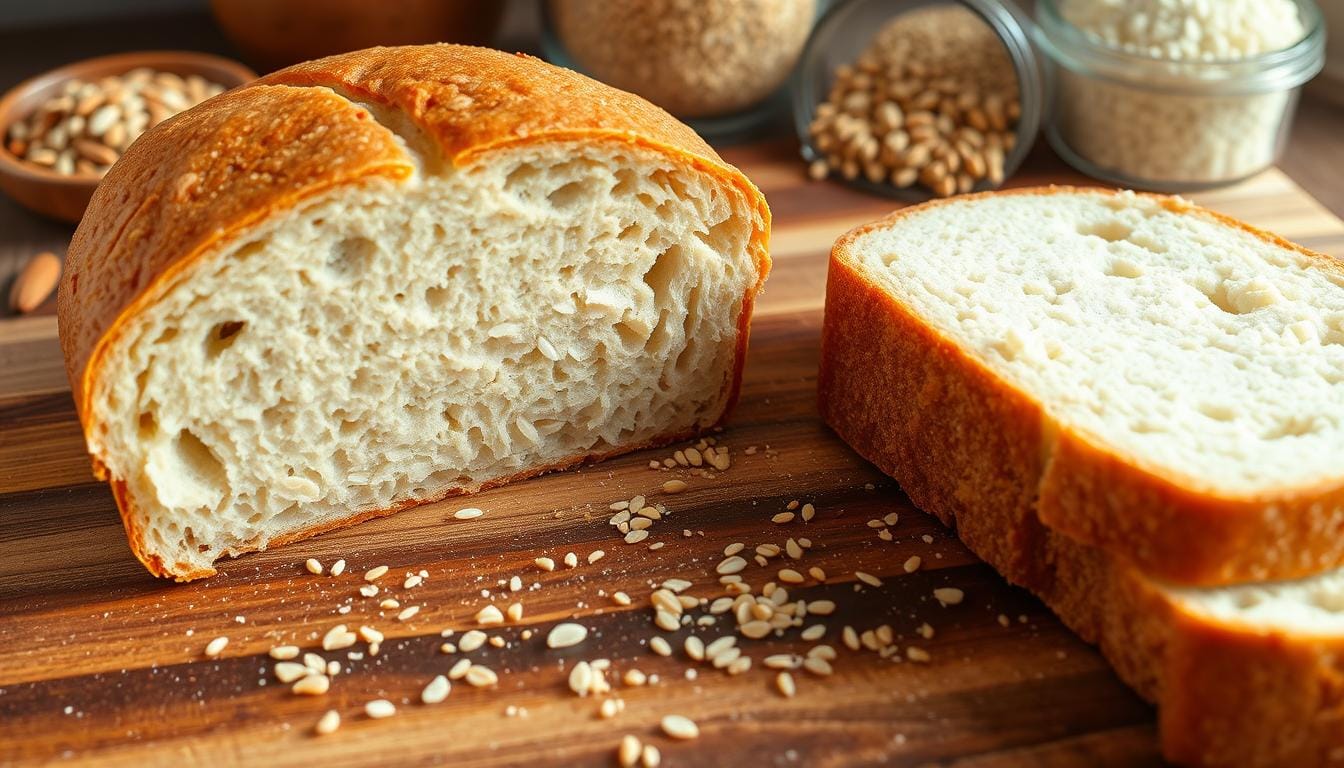
This homemade gluten-free bread is a game-changer. It’s soft, fluffy inside and has a crust that looks like it came from a bakery. Unlike the dry, tasteless loaves out there, this one is a winner. It’s made with quality ingredients and simple techniques, so you can enjoy it without giving up on taste or texture.
Table of Contents
Understanding Gluten Free Bread Basics
Many people struggle to find gluten-free bread that tastes good. Traditional bread recipes often don’t work for those on a grain-free diet. But, with the right ingredients and baking science, you can make tasty, homemade grain-free loaves.
Why Traditional Bread Recipes Don’t Work
Traditional bread recipes fail for gluten-free bakers because they lack gluten. Gluten is the protein that gives bread its structure and rise. Without it, the dough is dense and gummy.
Essential Ingredients for Success
- A well-balanced gluten-free flour blend, often featuring a mix of alternative flours like rice, tapioca, or almond flour
- Xanthan gum, which acts as a gluten substitute to improve texture and keep baked goods fresher longer
- Proper yeast for leavening and rise
- Adequate moisture content to support yeast activity and achieve the desired bread texture
The Science Behind Gluten Free Baking
Gluten-free baking faces a big challenge: creating a structure that can trap air bubbles and rise. Xanthan gum is key, helping to mimic gluten’s function. Paying attention to ingredient ratios and techniques like kneading and proofing is crucial for the right texture.
| Brand | Price per Loaf | Slice Size |
|---|---|---|
| Canyon Bakehouse | $7.29 | Standard |
| Schar | $5.69 | Standard |
| Rudi’s | $5.69 | Standard |
| Three Bakers | $7.99 | Standard |
| Aldi’s Live GFree | $6.49 | Large |
| Simple Truth (Kroger) | $5.99 | Large |
| Sam’s Choice (Walmart) | $6.74 | Standard |
Store-bought grain-free loaves can be expensive. Making your own is a cost-effective option. With the right approach, you can create delicious, grain-free loaves using alternative flours that are just as good as store-bought ones.
Essential Equipment and Tools for Perfect Results
Baking the perfect gluten-free bread at home needs the right baking tools and kitchen equipment. A reliable stand mixer and a precise digital scale are key. Each tool plays a big role in getting great results. Let’s look at the must-have tools for gluten-free bakers.
A stand mixer with a paddle attachment is very helpful. It mixes and kneads ingredients well, making a uniform dough. A digital kitchen scale is also essential. It helps measure flour, water, and other ingredients accurately, which is important for gluten-free baking.
An oven thermometer is crucial too. It helps keep the oven at the right temperature. This is key for a perfect crust and crumb. A 9x5x3 inches loaf pan is ideal for shaping your gluten-free bread. You can also use a pizza peel or an overturned baking sheet to safely put the dough in the oven.
For the best crust, use a baking steel or stone with a shallow pan for steam. This setup mimics professional oven conditions. It gives you a crisp outside and a soft inside.
| Tool | Purpose |
|---|---|
| Stand Mixer with Paddle Attachment | Effortlessly combines and kneads ingredients for a uniform dough |
| Digital Kitchen Scale | Ensures accurate measurements of flour, water, and other components |
| Oven Thermometer | Helps monitor and maintain precise oven temperature for optimal results |
| Loaf Pan (9x5x3 inches) | Provides the ideal shape and size for homemade gluten-free bread |
| Pizza Peel or Overturned Baking Sheet | Allows for safe transfer of dough into the oven |
| Baking Steel or Stone | Creates professional-grade conditions for a crisp crust and soft interior |
| Shallow Pan for Steam | Helps develop the perfect crust by creating steam in the oven |
With these baking tools and kitchen equipment, you’re ready to make amazing gluten-free bread. It’s sure to impress everyone.
Best Flour Blends for Gluten Free Bread
Baking gluten-free bread requires the right flour blend. Store-bought mixes might not give you the texture and taste you want. For better results, try a homemade gluten-free flour blend or a specialty blend made for gluten-free baking.
Store-Bought vs. Homemade Flour Mixes
Flour mixes from King Arthur or Bob’s Red Mill might not be the best for gluten-free bread. They’re made for general baking and lack the right mix of starches, proteins, and xanthan gum for yeast bread.
Understanding Flour Ratios
A good gluten-free flour blend has the right mix of flours and starches. For example, a mix could be:
- 285 grams of potato starch
- 250 grams of superfine white rice flour
- 75 grams of tapioca starch
- 75 grams of whey protein isolate
- 15 grams of xanthan gum
This mix has the perfect balance of starches, proteins, and xanthan gum. It helps with air bubbles and keeps the bread’s shape.
The Role of Xanthan Gum
Xanthan gum is key in gluten-free baking. It acts like gluten, binding and stabilizing the dough. It traps air, prevents crumbling, and makes the bread soft and pliable.
“Developing the perfect gluten-free flour blend is an art form. It’s all about finding the right balance of ingredients to achieve the desired texture and flavor in your baked goods.”
Mastering the Perfect Gluten Free Bread Texture
Getting the right bread texture is key when baking gluten-free loaves. To achieve a soft, pillowy crumb, focus on mixing and rising techniques. Mix the dough until it’s light and airy, almost like a thick batter. Avoid over-kneading to prevent a dense, gummy texture.
The secret to a tender crumb is in the rising and baking. Let the dough rise for the right amount of time. This allows it to develop structure and volume. When baking, make sure the inside cooks through without drying out the outside. The result should be a loaf with a soft, bending crumb that squishes gently like regular wheat bread.
| Ingredient | Quantity |
|---|---|
| Brown Rice Flour | 1 cup |
| Corn Starch | 1/2 cup |
| Tapioca Flour | 1/2 cup |
| Dry Milk Powder | 2 tablespoons |
| Xanthan Gum | 1 teaspoon |
| Egg Replacer | 2 tablespoons |
| Yeast | 1 packet (2 1/4 teaspoons) |
| Water | 1 cup |
| Eggs | 2 |
| Honey | 2 tablespoons |
| Butter, melted | 2 tablespoons |
| Apple Cider Vinegar | 1 tablespoon |
To bake the perfect gluten-free bread, start by warming all ingredients to room temperature. This helps them mix better. The dough should be light and airy, unlike traditional doughs. Proper rising and baking are key to getting a soft crumb and bread texture.
“The secret to a perfect gluten-free loaf is in the mixing and rising. Gentle handling is key to maintaining that soft, pillowy texture.”

By following these tips, you can master baking gluten-free bread. You’ll get a soft, tender crumb that’s just as good as traditional wheat bread.
The Secret to a Crusty Exterior and Soft Interior
Getting a crusty outside and a soft inside is every baker’s dream, especially for crusty bread or artisan bread. The trick is in two main steps: steam baking and controlling the oven’s temperature.
Steam Baking Technique
Steam baking is essential for a crispy crust. Just put a pan of hot water on the oven’s bottom rack. The steam helps the dough rise and then sets the crust, making it light and airy.
For the best results, use a baking steel or stone. These surfaces spread heat evenly, ensuring your bread is perfectly baked.
Temperature Control Tips
Controlling the oven’s temperature is vital for crusty bread or artisan bread. Use an oven thermometer to check the temperature. This ensures your bread is baked just right, avoiding under-baking or over-browning.
Try different temperatures and baking times to find what works best for your recipe and oven. A high initial temperature followed by a lower one often yields the perfect crust and soft inside.
“The secret to a great loaf of bread is all in the technique. Mastering steam baking and temperature control is the key to unlocking the perfect texture every time.”
Proofing and Rising Techniques
Getting the perfect gluten-free bread starts with proofing and rising. Let your dough rise in a warm, draft-free spot until it doubles in size. This usually takes 1-2 hours. It’s key for the bread’s structure and texture.
After it reaches the right size, chill it for at least 6 hours, or up to 10 days. This longer time in the fridge makes the bread’s flavor better through yeast fermentation. The longer it stays, the more complex the taste gets.
On baking day, shape the dough gently and let it rise again. It should puff up but not double in size. Be careful not to overproof, as it can make the loaf fall. The best proofing time depends on temperature and your recipe’s ingredients.
“Proper bread proofing is essential for achieving the perfect gluten-free loaf. Take the time to master this crucial step, and you’ll be rewarded with an exceptional homemade bread.”

Remember, patience and detail are key in gluten-free bread baking. By following these steps, you’ll make delicious, bakery-quality bread at home.
Troubleshooting Common Baking Issues
Baking gluten-free bread can be rewarding but comes with challenges. You might face dense or gummy textures and collapsed loaves. But, with the right techniques, you can solve these problems and get great results at home.
Dealing with Dense or Gummy Bread
Dense or gummy bread often comes from undermixing or the wrong flour blend. To fix it, mix well and adjust your flour mix. Also, bake until it hits 195°F to avoid a gummy crumb.
Fixing Collapsed Loaves
Collapsed loaves are common in gluten-free baking. They usually happen from overproofing or opening the oven too soon. To avoid this, let it rise just below the pan’s top and don’t peek too early. Proper temperature and gentle handling are crucial.
Remember, solving bread troubleshooting and baking problems is part of mastering gluten-free baking. With practice and these tips, you’ll soon make beautiful, fluffy loaves.
Storage and Freezing Methods
Keeping your homemade gluten-free bread fresh is key. Store it in a plastic bag or airtight container at room temperature. It stays fresh for up to 5 days. For longer storage, slice and freeze the bread.
To freeze a whole loaf, wrap it in plastic wrap, then foil or freezer paper. Put it in a freezer bag. Frozen bread lasts up to 3 months. Thaw it in the fridge overnight before serving.
Freeze sliced bread in individual portions. Wrap each slice in plastic wrap or wax paper. Store them in an airtight container or freezer bag. This keeps the slices from sticking together and preserves their texture and freshness.
Don’t refrigerate gluten-free bread. The moisture can cause mold. Store it at room temperature in a cool, dry place. Keep it away from direct sunlight to prevent staleness.
| Bread Type | Room Temperature | Refrigeration | Freezing |
|---|---|---|---|
| Gluten-Free Bread | Up to 5 days | Not recommended | Up to 3 months |
| Gluten-Free English Muffins | Up to 10 days | Not recommended | Up to 7 months |
| Gluten-Free Bagels | Up to 14 days | Not recommended | Up to 7 months |
By using these storage and freezing tips, your gluten-free bread stays fresh and tasty. Proper storage also boosts the bread’s resistant starch content. This starch is good for your health.
Conclusion
Congratulations on mastering gluten-free baking! You can now make homemade gluten-free bread that’s just as good as store-bought. This recipe gives you a crusty outside and a soft inside. It’s great for sandwiches, toast, and even French toast.
The secret to great gluten-free bread is knowing how gluten-free flours work. Use the right tools and learn how to proof and bake. Try different flour mixes and add-ins to make your own special bread. Soon, you’ll be making gluten-free bread that’s as good as any bakery’s.
If you can’t eat gluten or just like the taste of gluten-free bread, this recipe is for you. It’s a must-have in your kitchen. Enjoy making your own gluten-free bread that’s healthy and delicious. Happy baking!
FAQ
What makes this gluten-free bread recipe different?
Why don’t traditional bread recipes work for gluten-free baking?
What essential equipment is needed for this gluten-free bread recipe?
What kind of flour blend works best for this recipe?
How do I achieve the perfect gluten-free bread texture?
What’s the secret to a crusty exterior and soft interior?
How do I properly proof and rise the gluten-free dough?
What causes common baking issues with gluten-free bread?
How should I store and freeze the baked gluten-free bread?
Source Links
- Easy Gluten Free Bread Recipe – https://glutenfreeonashoestring.com/gluten-free-bread-recipe/
- Easy Gluten-Free Bread Recipe (for an Oven or Bread Machine) – https://www.glutenfreepalate.com/gluten-free-bread-recipe/
- The Ultimate Guide to Gluten Free Bread – https://theglutenfreegathering.com/2024/06/20/the-ultimate-guide-to-gluten-free-bread/
- Gluten Free Bread 101 – Gluten Free Cooking School – http://www.glutenfreecookingschool.com/gluten-free-bread-class-1/
- My Highly Curated Baking Tools | The Perfect Loaf – https://www.theperfectloaf.com/my-baking-tools/
- The Ultimate Gluten-Free Sourdough Tool Guide – https://creativeinmykitchen.com/gluten-free-sourdough-tools/
- 8 Tools to Level Up Your Bread Baking Game – https://www.nytimes.com/wirecutter/reviews/tools-for-making-bread/
- Kim’s Gluten Free Bread Flour Blend – https://www.letthemeatgfcake.com/kims-gluten-free-bread-flour-blend/
- I Tried the Top Gluten-Free Flour Blends. Only One Was Worth It – https://www.bonappetit.com/story/gluten-free-flour-for-baking?srsltid=AfmBOorDMTtfriOiGulEq6_OcacOuMWzcAXd8lJrpgomdi1l9V8LQWId
- The Best Gluten-Free Bread Recipe – It’s Delicious & Fluffy! – https://www.onegoodthingbyjillee.com/best-gluten-free-bread-recipe-ever/
- Unlocking the Secret to Perfect Gluten Free Bread: Baking Tips for Glu – https://livepacha.com/blogs/news/unlocking-the-secret-to-perfect-gluten-free-bread-baking-tips-for-gluten-free-bread?srsltid=AfmBOor0DSzF6iXY4WDCQsJk-U2MKaLUlcXIl4eU9aDUTWH9W0Y3aqmb
- Gluten Free Artisan Bread – https://www.letthemeatgfcake.com/gluten-free-artisan-bread/
- Secrets to a Softer Crust – Bread by the Hour – https://breadbythehour.com/secrets-to-a-softer-crust/
- Easy, Homemade Gluten-Free Italian Bread – https://www.mamagourmand.com/gluten-free-italian-bread/
- 18 Tips for Gluten Free Bread Baking – gfJules – https://gfjules.com/tips-for-baking-better-gluten-free-bread/
- The Ultimate Guide to Proofing Bread Dough | The Perfect Loaf – https://www.theperfectloaf.com/guides/proofing-bread-dough/
- Things bakers know: Proof your bread dough in this unexpected spot – https://www.kingarthurbaking.com/blog/2024/01/04/things-bakers-know-proof-your-bread-dough-in-this-unexpected-spot
- Gluten Free Baking Troubleshooting – GF baking expert gfJules – https://gfjules.com/gluten-free-baking-troubleshooting/
- Troubleshooting Gluten-Free Crusty Bread – – https://handandheartglutenfree.com/troubleshooting-gluten-free-crusty-bread/
- How To Store Gluten Free Bread – https://www.fearlessdining.com/how-to-store-gluten-free-bread/
- How to Store Gluten-Free Bread: Your Guide to Keeping It Fresh (and Tasty!) – https://queenstreetbakery.com/blogs/blog/how-to-store-gluten-free-bread-your-guide-to-keeping-it-fresh-and-tasty
- Experiences with Gluten-Free Bread: A Qualitative Study Amongst People with Coeliac Disease Participating in a Randomised Controlled Trial – https://pmc.ncbi.nlm.nih.gov/articles/PMC10706794/
- 6 Top Health Benefits of Choosing Gluten Free Bread – https://sprinngfoods.com/health-benefits-of-choosing-gluten-free-bread/
- Exploring the Rise of Gluten-Free Desserts – https://www.uren.com/news/exploring-the-rise-of-gluten-free-desserts/

